Customers
This section will list your customers. Which can be used in sale documents throughout the system.
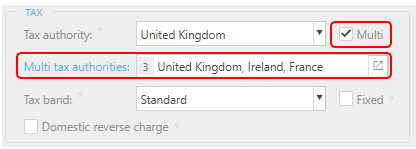
Customer details and functionality can be setup in this feature. For instance, customers can have different Payment methods and Tax authorities.
The screenshot below shows a sample grid of customers, which includes some key information.

- Code: Customers code.
- Description: This will be used to identify the customer.
- Company: The customers company name.
- Customer information: Postcode, email, phones, website.
Tip
To modify the columns displayed, select
 on the top right of the page, then tick/untick the information you want to hide or display.
How to view Customers
Viewing a Customer
Select Sales / Customers from the Main section of the pulse menu -

Note
This is an example screen shot of the pulse menu.
Position of the menu items within pulse will vary according to available options and dependant on personal screen resolution.
or from the Main Menu select Sales then Customers -

or enter Customers in the Quick Launch Side Menu.

This will then show the Customers that you are able to see on system where normal customisation of Sets can be used.

Note
If Enforce data access control is set on the Contact group, you will need the correct Data Access Control access on the Legal entity to see the correct records.
An extra Set showing here is With debt - this will list all Customers with outstanding debt.

Note
If the Debt is based on differing currencies, then these will show on separate lines for the same Customer .

You can use the search bar to find a customer.

Tip
To modify the columns displayed, select  on the top right of the page, then tick/untick the information you want to hide or display.
How to create Customers
Create a new Customer
Select Customers from one of the options as shown above in View Customers.
Press New.

If System generate contact account code is ticked in the General section of Environment defaults, then the Doc# field will be 'greyed out' and the system will generate an account code. Otherwise, an account code can be entered manually.

Fill in the Account name to identify the contact account.

Tick the boxes to assign the customer roles.
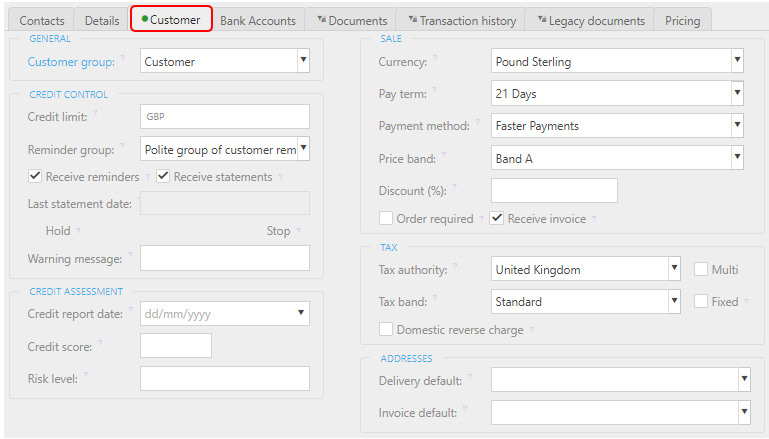
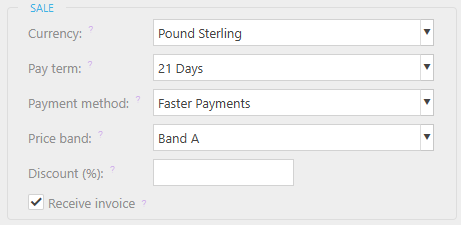
Under the customer tab select a Customer group. This will auto fill defaults such as the Currency used by the customer.
Fill in the other fields as required. For more information see The tabs explained in the Edit Customers section below.
Press Create.
How to edit Customers
Edit/setup Customer details/functionality
When you double click on a customer, you will be presented with the full customer record. By clicking Edit in the top left of the page, you can amend the details and customer functions.
Note
Whilst this document is in the Edit mode other users viewing the same document will be notified that it is being edited.

When you are happy with the changes made, press Save.

Along the bottom are the customers tabs, each tab will present the customers details and functionality.
Depending on the type of accounts selected and the User roles, will depend on the Tabs that will be displayed.
Tabs explained:
- Contacts
- Details
- Customer
- Bank Accounts
- Pricing
- Payment Service Mandates
- Documents
- Transaction history
- Legacy documents
- Log
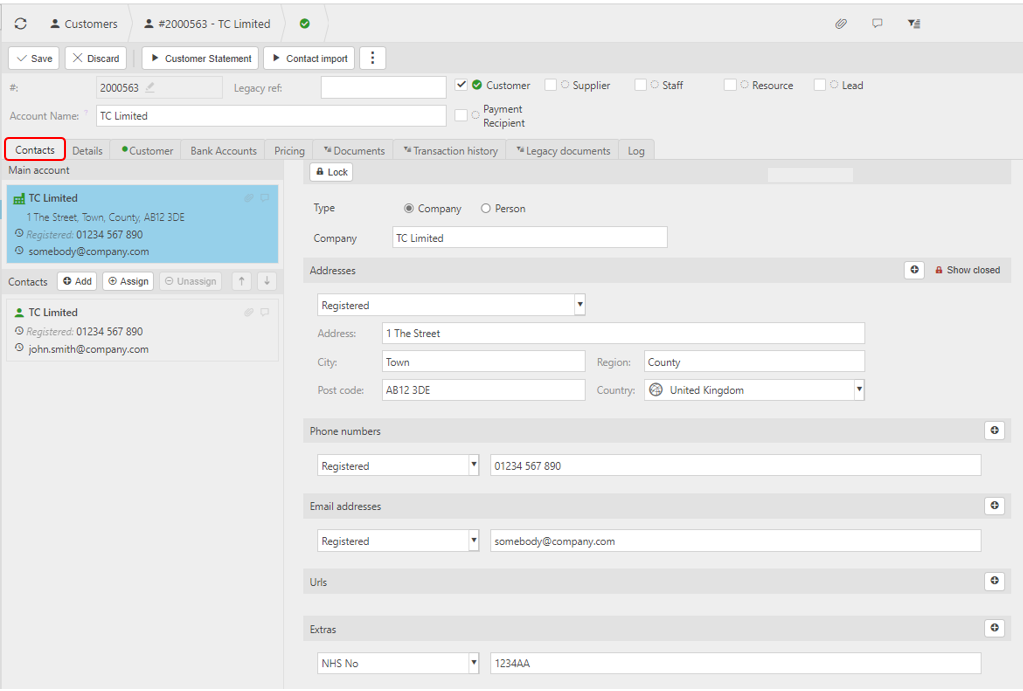
This section will present the Contacts that you have listed for the customer. Press Edit then Add to list more contacts under the customer.
You can also Assign a contact to be the main account if there is more than one contact.
How to merge Customers
Merging customers
Merging Customers will transfer data from one Customer to another Customer and then lock the original customer. Situations where this can be used is where a duplicate customer has been created by mistake. So, instead of re-entering everything again, they can just merge from the old customer to the new one.
Select Customers from one of the options as shown above in View Customers.
Identify the 'From' Customer that is to be merged and the 'To' Customer that it will merge into.
e.g.

Select and open the 'From' Customer that is to be merged.

On the
 icon, select the Merge customer option.
A message will show a warning that the merge process is permanent.

If payments have been made via this Customer, then Bank accounts should be included in the merge. If this is the case, the following message will show.

Note
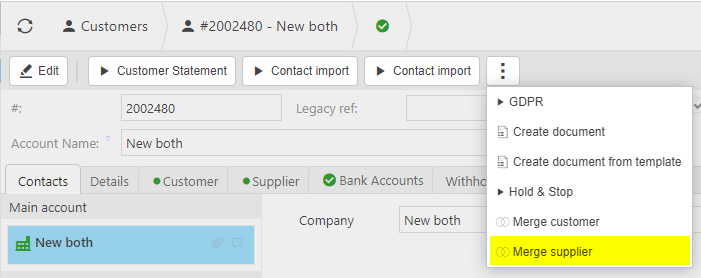
If the Customer is also linked to a Supplier ...

... then the
 icon will also have the Merge supplier option.
Note
This Merge supplier option will not be available for Suppliers that are Interco, a Legal entity, a parent or have a parent contact account.
Enter the 'To' Customer to merge to.
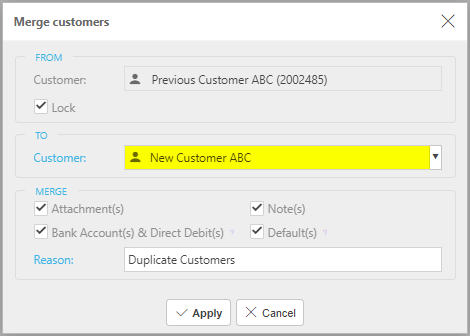
- Lock: This option will be ticked as default so that the 'From' Customer will be locked and not available for use in the future. If, for some reason, this Customer will still be required, then untick this option.
Merge options:
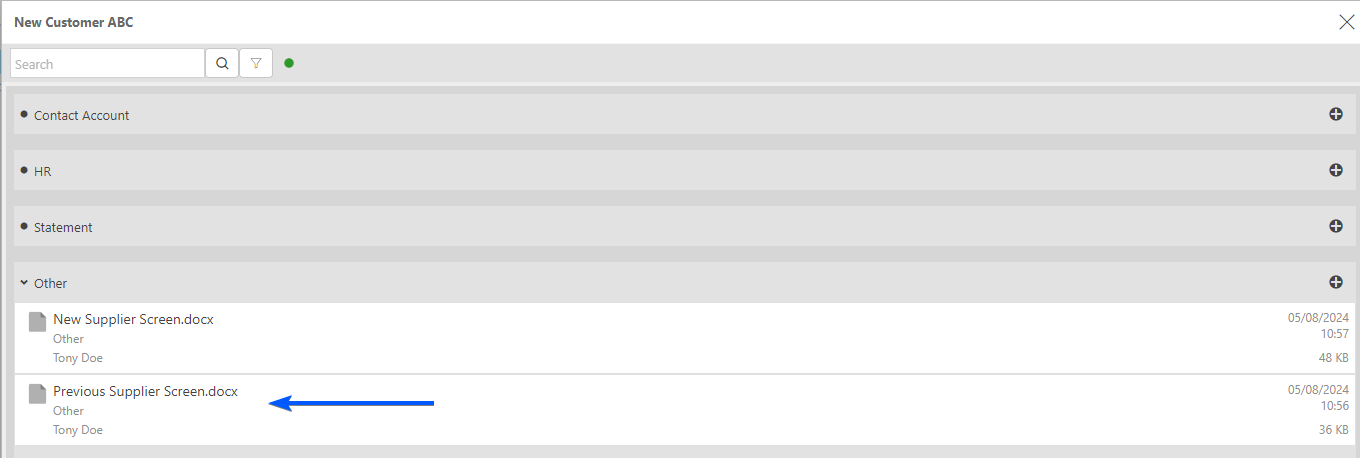
Attachments: Tick to copy any Attachments from the 'From' customer to the 'To' customer.
'To' customer will show all Attachments once merged.
Warning
Deleting an Attachment from the 'To' customer that has been merged from the 'From' customer, will also delete the Attachment from the 'From' customer.
Bank Account(s) & Direct Debit(s): This option will be ticked (or should be) when payments have been made to any of the bank account(s) on the 'From' customer.
The 'To' customer will show all Bank accounts once merged.

Note(s): Tick to copy Notes from the 'From' customer to the 'To' customer.
'To' customer will show all Notes once merged.
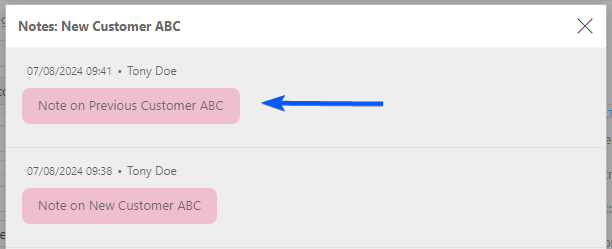
Warning
Deleting a Note from the 'To' customer that has been merged from the 'From' customer, will also delete the Note from the 'From' customer.
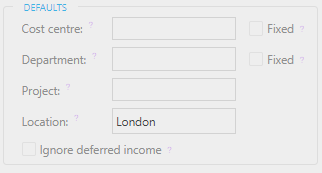
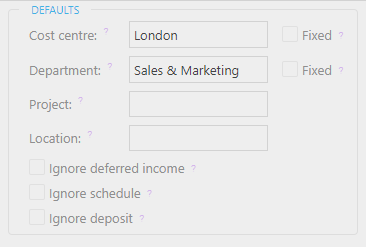
Defaults: Tick to copy default values from the 'From' customer, if they exist, to blank default options in the 'To' customer. If any default options are populated in the 'To' customer, these will not be overwritten.
e.g. Default values in the 'To' customer -
Default values in the 'From' customer -
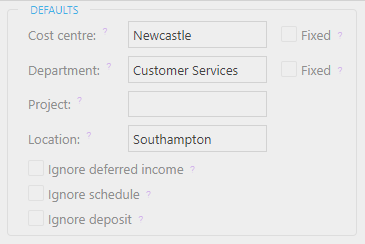
So, Cost Centre and Department will not be overwritten as they exist in the 'To' customer defaults, but as Location is blank in the 'To' customer, then it will be populated from the value that exists in the 'From' customer.
Reason: Enter a reason why the Customers are being merged.
Note
If none of these options are ticked, it will still do the merge but only merge the appropriate documents, such as Purchase invoices and GL records to realign them to the 'To' customer.
Select Apply to complete merge.
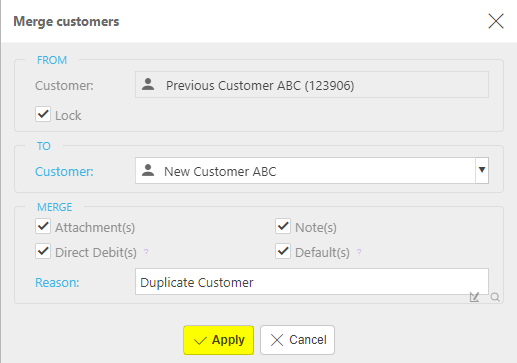
Once the 'From' customer has been merged and the Lock option was ticked, then the Merge customer will no longer show on the  option.

Also, any documents that were linked to the 'From' customer will now be linked to the 'To' customer.
How to Import Customer details
Importing Customer details
Select Customers from one of the options as shown above in View Customers.
Select Customer Import from the
 button.
Enter options for Import.
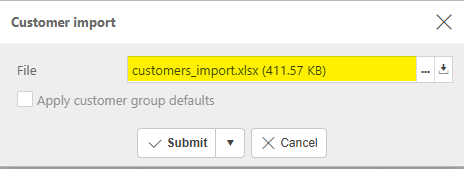
- File: The source file created and saved previously.
- Apply customer group defaults: Tick to apply defaults.
Tip
To create an Import file with the correct formatting, Export a file first and save to your external source. Then use this file to add updated Customer details.
Select Submit.
Warning
iplicit allows a maximum of 5,000 rows in a single Import.
If your Import is too large, an error message will tell you that the Import cannot be processed and will advise you to create smaller Import files.
If the latter is not possible, please contact Customer support.
How to Export Customer details
Exporting Customer details
Select Customers from one of the options as shown above in View Customers.
Select Customer Export from the
 button.
Enter options for Export.
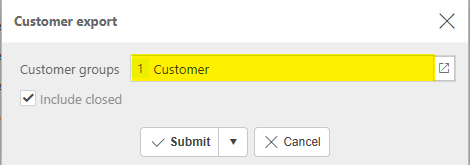
- Customer groups: Enter Customer groups to export from the dropdown list.
- Include closed: Tick to include closed bank accounts.
Select Submit.
The Export file is created as an Excel spreadsheet.
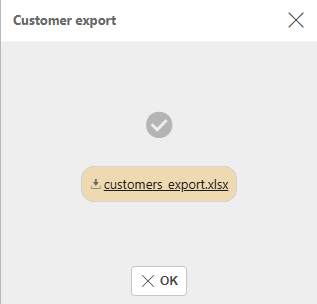
This file can now be opened in Excel to show the selected Customers' data.
Note
Many fields are exported including -
- URL
- Phone numbers
- Email addresses
- Address
- City
- Region
- Postcode
- Country code
- Description
- Default delivery address type
- Default invoice address type
How to Import Bank details
Importing Bank details
Select Customers from one of the options as shown above in View Customers.
Select Contact Bank Import from the
 button.
Enter options for Import.
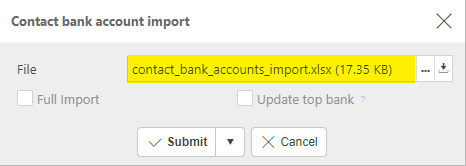
- File: The source file created and saved previously.
- Update top bank: If a bank already exists for the contact account and you've input new details, ticking this box will update the top bank account's details.
Tip
To create an Import file with the correct formatting, Export a file first and save to your external source. Then use this file to add updated bank details.
Select Submit.
Warning
iplicit allows a maximum of 5,000 rows in a single Import.
If your Import is too large, an error message will tell you that the Import cannot be processed and will advise you to create smaller Import files.
If the latter is not possible, please contact Customer support.
How to Export Bank details
Exporting Bank details
Select Customers from one of the options as shown above in View Customers.
Select Contact Bank Export from the
 button.
Enter options for Export.
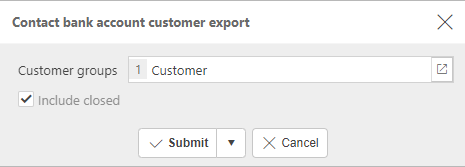
- Customer groups: Enter Customer groups to export from the dropdown list.
- Include closed: Tick to include closed bank accounts.
Select Submit.
The Export file is created as an Excel spreadsheet.

This file can now be opened in Excel to show the selected Bank details data.
How to produce a Customer statement
Produce a Customer statement
In this section you can produce, preview and send customer statements. To do so, fill in the selection criteria based on your needs then press Submit.

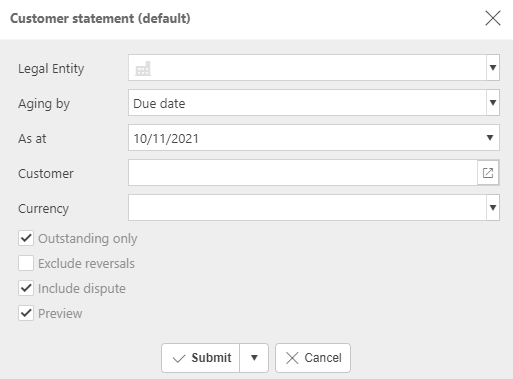
Selection criteria explained:
- Legal entity: If there is more than one legal entity, this will allow you to select an individual entity for the customer statement.
- Aging by: This is the date that the debt is aging from on the statement.
- As at: This is the date that you would like the statement to be created for.
- Customer: The customer that the statement is for.
- Currency: The statement currency.
- Outstanding only: Tick this box if you would only like the outstanding debt to be shown on the statement.
- Excludes reversals: If reversals have been made, you may want these excluded from the customer statement. If this is the case, tick this box.
- Include dispute: Tick if you want to include disputed sales invoices in aged debt statement.
- Preview: Tick this box to allow a preview of the statement.
Updated June 2025


