Contact accounts
Contact accounts are set up for Customers, Suppliers, Staff, Resources, Lead or Payment Recipient to hold information which will be used throughout iplicit applications.
How to view Contact Accounts
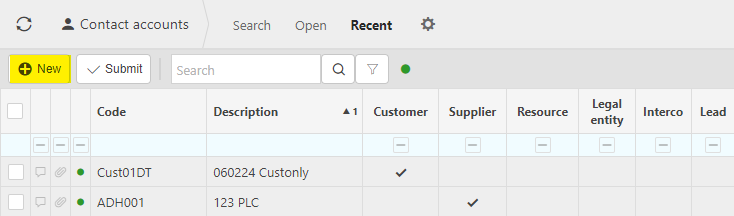
Viewing Contact accounts
Select Contact / Contact accounts from the Settings section of the pulse menu -

Note
This is an example screen shot of the pulse menu.
Position of the menu items within pulse will vary according to available options and dependant on personal screen resolution.
or enter Contact accounts in the Quick Launch Side Menu.

This will then show the Contact accounts on the system where normal customisation of Sets can be used.

Tip
To modify the columns displayed, select  on the top right of the page, then tick/untick the information you want to hide or display.
How to create Contact Accounts
Create a Contact account
Select Contact accounts from one of the options as shown above in Viewing Contact accounts.
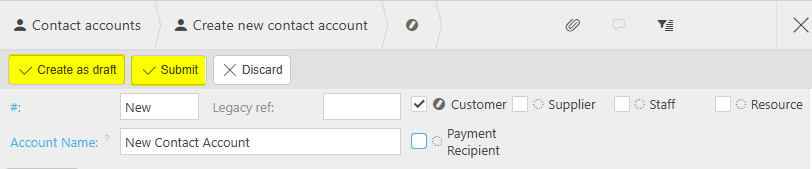
Select New.
Enter a Code and Account name.

Tick the checkboxes as appropriate for Customers, Suppliers, Staff, Resources, Lead or Payment Recipient.

Once one of these options is selected, the options to Create as draft and Submit will show.
Depending on the tick box you have selected the parameters will be different. The following will explain each tab -
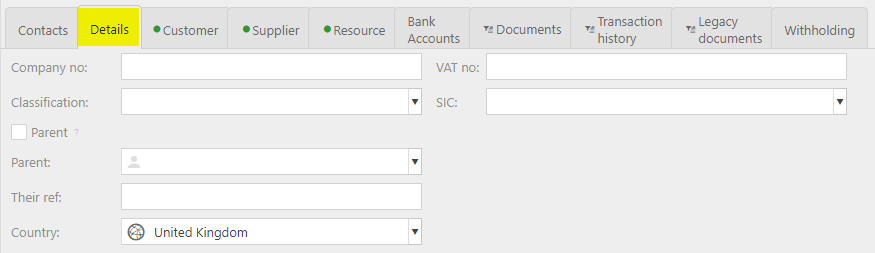
Tabs explained
- Contacts
- Details
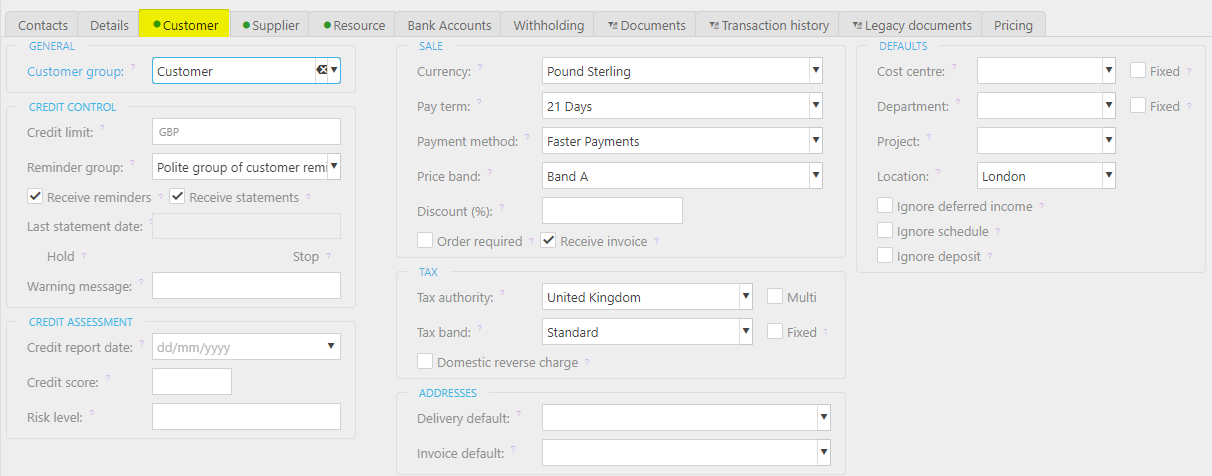
- Customer
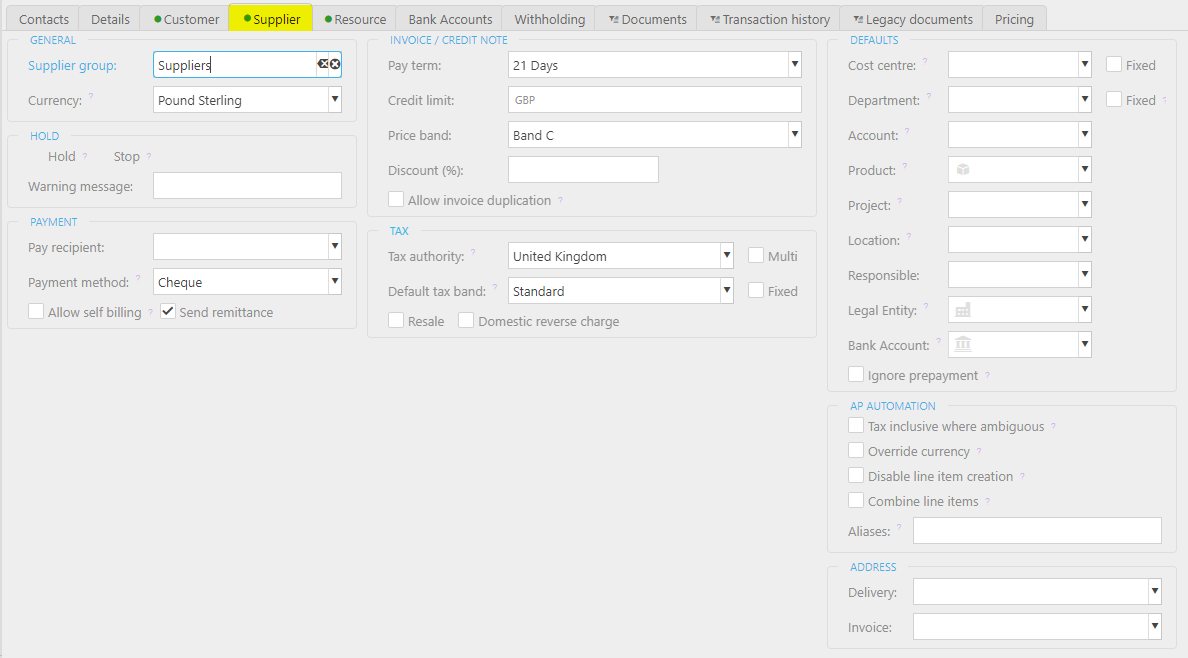
- Supplier
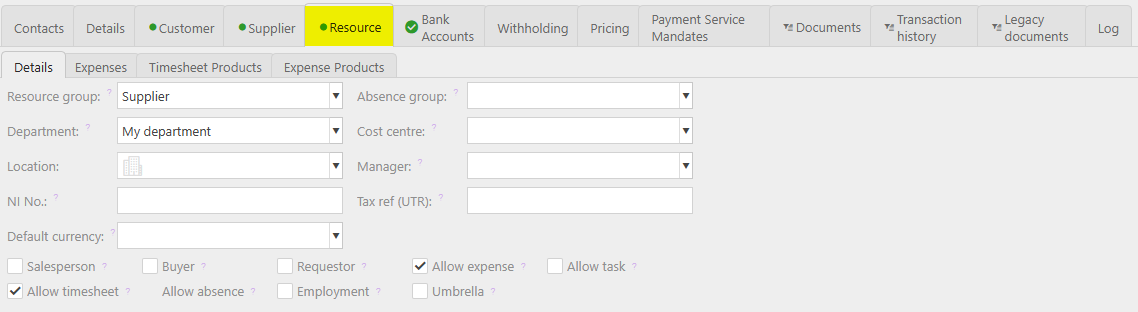
- Resource
- Bank Accounts
- Pricing
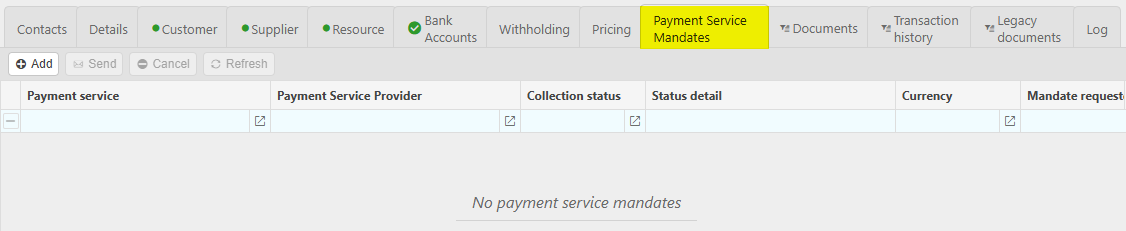
- Payment Service Mandates
- Documents
- Transaction history
- Legacy documents
- Log
Add - enter new Contact information - further details can be found on Contacts User Guide.
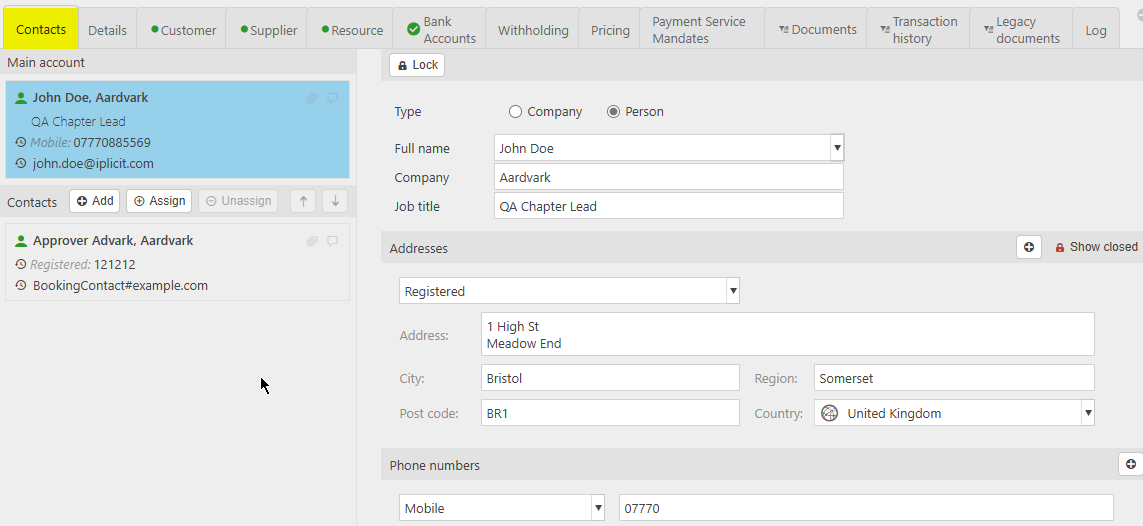
Assign - enter a Contact that has previously been created.

Addresses
Enter the type of address from the options found in Address Types - you can have many addresses but only one address per address type.
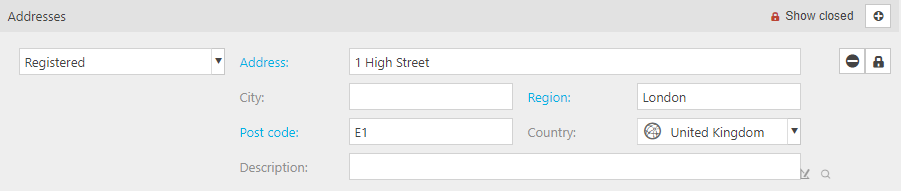
Then add the address details - road, town, county, postcode etc.
Additional Addresses can be added using the
 icon ...
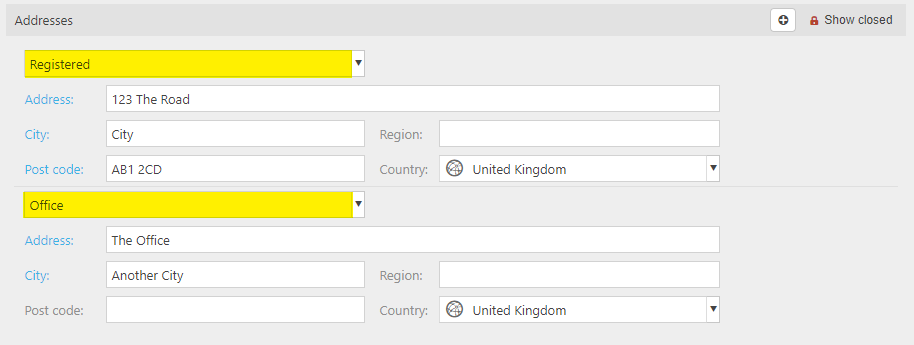
Warning
If you try and add another address of the same type, you will get the
 icon warning that this isn't possible.
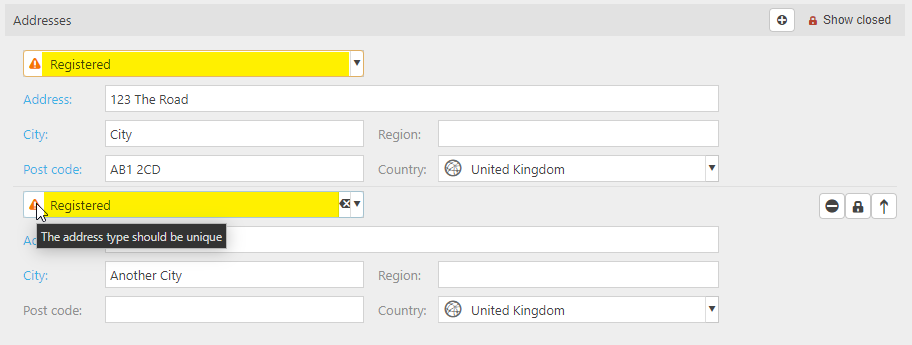
And you will be prevented from Saving the changes.
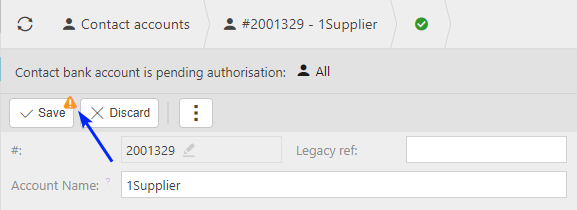


Select Submit to create the contact account in a Submitted state so that -
- It will be authorisation if a workflow exists and will show the
 submitted symbol. While it is in the authorisation workflow it will show the
  pending authorisation symbol.
 - It can have documents added against it.
- A User can Lock the contact account.
- A User can Delete the contact account, but only if there are no documents against it.
or
Select Create as draft to create the contact account in a Draft state so that -
- It will not be authorisation if a workflow exists and will show the
 draft symbol.
 - It can not have documents added against it.
- A User can Lock the contact account.
- A User can Delete the contact account.
- A user will be capable of selecting the Submit option.
- It will be authorisation if a workflow exists and will show the
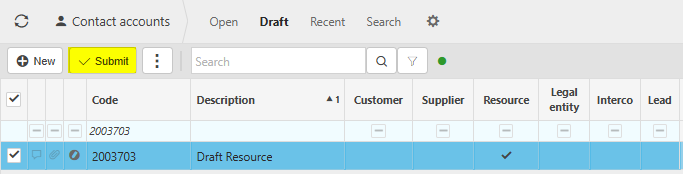
How to submit a draft Contact Account directly for finder menu
Submit draft Contact Accounts
This allows Users to Submit draft Contact Account records directly from the finder view list instead of having to open each record individually to submit it.
The feature supports selecting multiple draft Contact Accounts.
Select Contact Accounts from one of the options as shown above in Viewing Contact Account.
Select the draft Contact Account to Submit directly.

Select Submit on the Action Bar.
How to Import details
Importing details
Select Contact accounts from one of the options as shown above in Viewing Contact accounts.
Select Resource Import, Customer Import, Supplier Import or Contact Bank Import from the
 button.
Enter options for Import e.g. for bank Imports.
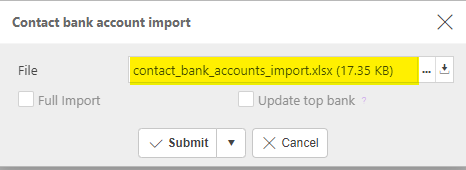
- File: The source file created and saved previously.
- Update top bank: If a bank already exists for the contact account and you've input new details, ticking this box will update the top bank account's details.
Tip
To create an Import file with the correct formatting, Export a file first and save to your external source. Then use this file to add updated bank details.
Note
Updating a Customer, Supplier or Resource from a group with enforce Data access control (DAC) true, to a group with enforce DAC false, the appropriate Customer Supplier or Resource should become available to all Users.
Select Submit
How to Export details
Exporting details
Select Contact accounts from one of the options as shown above in Viewing Contact accounts.
Select Resource Import, Customer Import or Contact Bank Import from the
button.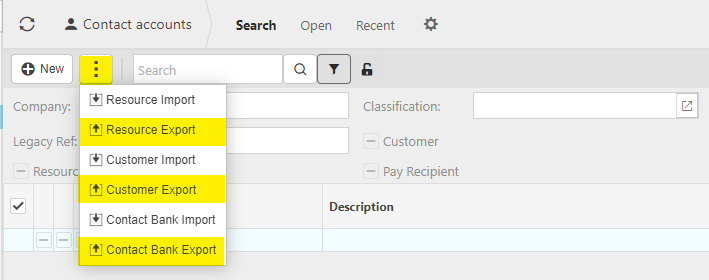
Enter options for Export.
Selecting Contact Bank Export shows ...

- Bank account type: Enter Customer groups to export from the dropdown list.
- Resource groups: Include only Resources under this group. Leave blank to include all Resource groups.
- Customer groups: Include only Customers under this group. Leave blank to include all Customer groups.
- Supplier groups: Include only Suppliers under this group. Leave blank to include all Supplier groups.
- Include closed: Tick to include closed bank accounts.
... other Export options will only be for the relevant Resource, Customer or Supplier.
Select Submit.
The Export file is created as an Excel spreadsheet.
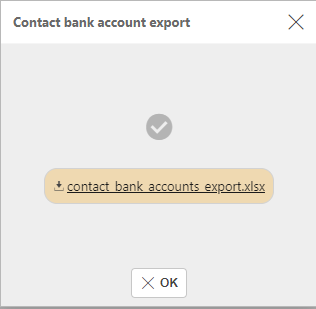
This file can now be opened.
Updated June 2026