Data Access Control
Data access control (DAC) is available to restrict access to e.g. Legal Entities for selected Users.
Note
When in force, these restrictions apply to the access of documents (e.g. Purchase Invoice) as well as any reporting & enquiries.
A User may be in multiple DAC Groups and when this is the case, will inherit the aggregate access.
How to view Data Access Control
Viewing Data Access Control
Select User Access / Data access control from the Settings section of the pulse menu -

Note
This is an example screen shot of the pulse menu.
Position of the menu items within pulse will vary according to available options and dependant on personal screen resolution.
or enter Data access control or DAC in the Quick Launch Side Menu.

This will then show the Data access controls on the system where normal customisation of Sets can be used. There are also columns showing those DACs that are linked to a CDAC and those that are Enabled or not.
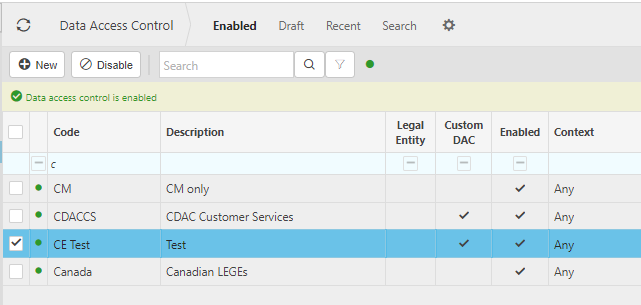
Tip
To modify the columns displayed, select  on the top right of the page, then tick/untick the information you want to hide or display.
How to create 'ALL' Data Access Control
Creating ALL Data Access Control
Recommendation is that when creating DAC there should always be a role that has got all the available Legal entities. Similarly, there should be a role that has all the CDACs, so that at least one person always has everything.
Select Data Access Control from one of the options as shown above in Viewing a Data Access Control.
Create an All DAC Group. Press New.
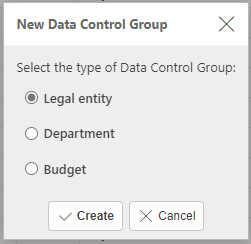
Select either Legal Entity or the Custom Attribute set up for Custom Data Access Control, then select Create.
Enter Code and Description.

Tip
Create an ALL DAC group for Super Users so that at least one User has access to all Legal Entities.
Press Select and choose all Legal Entities to this DAC Group - tick selection box at top of Available column and move all to Selected column, or just select the
 move all button.
Tip
Include Locked Legal Entities if you still wish to run enquiries and reports against them.
Tip
Legal Entities can also be added to DACs directly from the Legal Entity.
Add Super users to All DAC Group
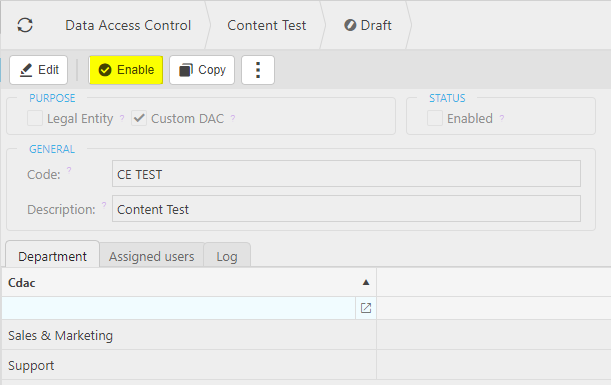
Press Enable to make the DAC group active.
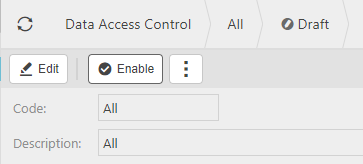
Tip
Once a single DAC Group is made active then DAC is activated for all users. To ensure you don't restrict user access before you have finished setting up DAC Groups, you may want to create your DAC Groups in DRAFT and defer enabling them until this is complete.

How to create 'Other' Data Access Control
Creating other Data Access Control
- Select Data Access Control from one of the options as shown above in Viewing a Data Access Control.
Note
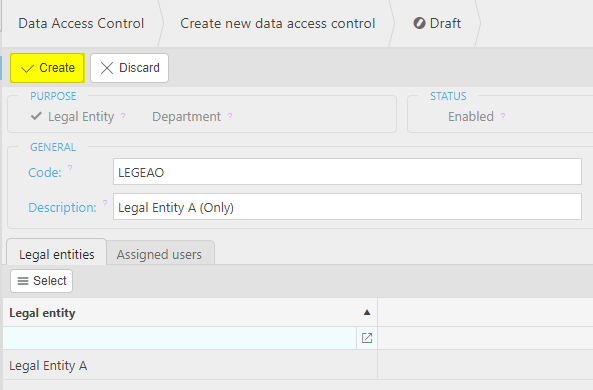
In the example below, an additional DAC Group has been created for Legal Entity A with a restricted selection of Users.
Press New.
Select Legal Entity, then select Create.

Enter Code and Description for the new DAC Group.
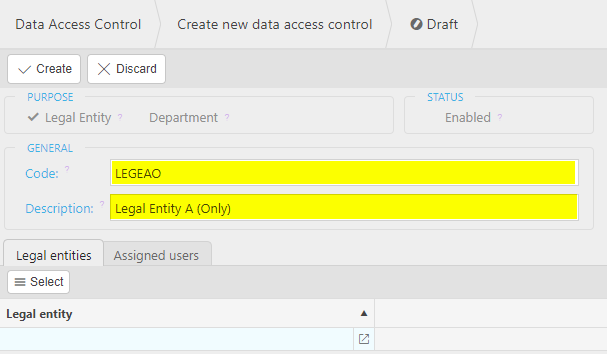
Add Legal Entity(s) and press Apply

Assign User(s) - go to Assigned User tab and press Select.
Select User(s) and move to right-hand column (Selected), then press Apply.

Press Create and Enable the DAC Group
To make the DAC active, select Enable button.
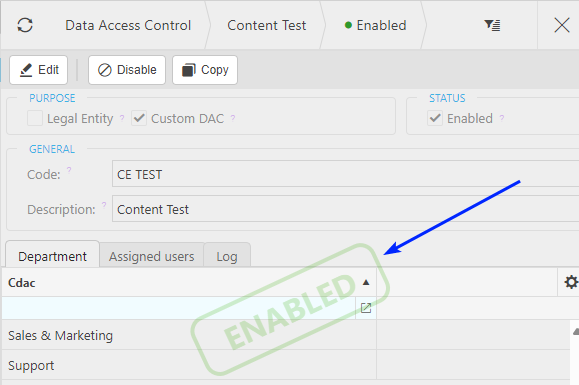
The DAC will then be stamped with a green Enabled mark.
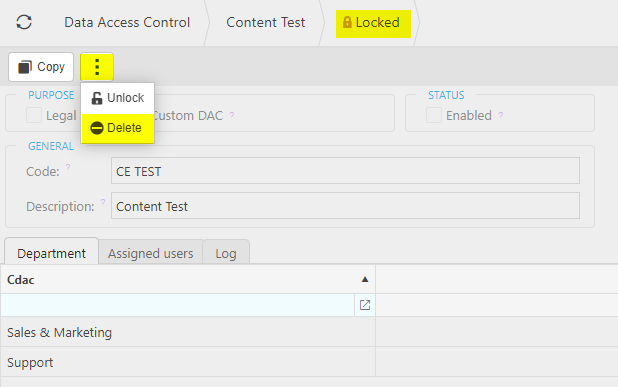
To remove the DAC Group
Select Lock from the
 button, then select Delete.
Updated December 2024