Manual Journals
Manual Journals are used for a multitude of reasons including year-end, tax only corrections, etc.
- Accruals are created using either an accrual automation or directly from the accrual's finder.
- The Year-end process is typically run from the financial year rather than manually created as a manual journal.
Examples of Manual Journals include:
- Simple manual journal.
- Multico journal.
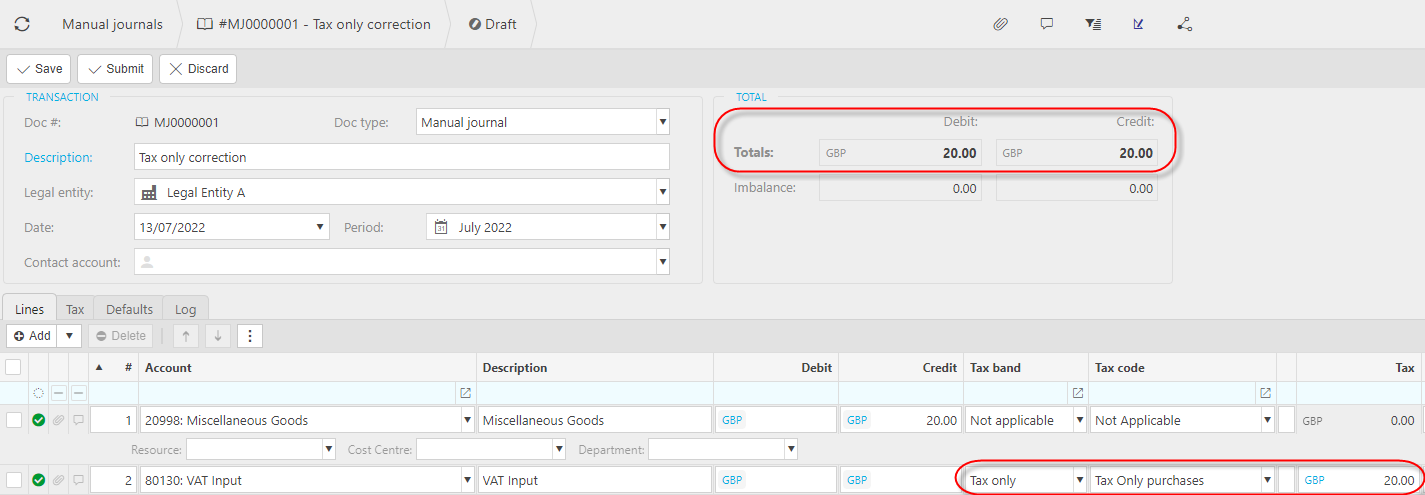
- Tax only correction.
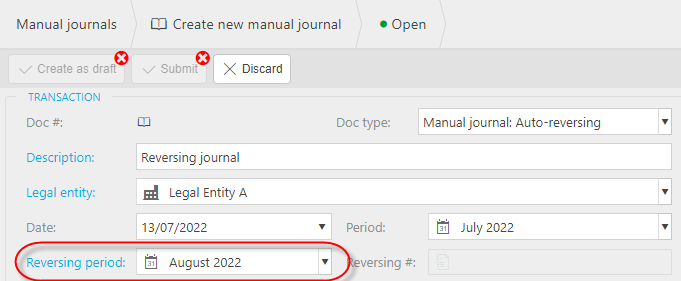
- Auto reversing journal.
Once you have created a manual journal, the following list are common actions you may wish to perform:
- Copy a manual journal.
- Create a template manual journal.
- Abandon a manual journal.
- Reverse a manual journal.
- Period correction.
- Unpost.
How to view Manual Journals
Viewing Manual Journals
Select GL / Manual journals from the Main section of the pulse menu -

Note
This is an example screen shot of the pulse menu.
Position of the menu items within pulse will vary according to available options and dependant on personal screen resolution.
or from the Main Menu select GL then Manual journals -

or enter Manual journals in the Quick Launch Side Menu.

This will then show the Manual journals on the system where normal customisation of Sets can be used. Also, depending on User roles, the My/All option will be showing.
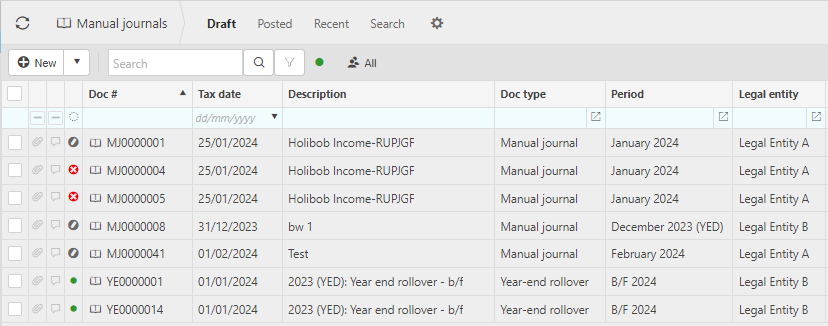
Doc #: This is the unique document number.
Tax Date:
Description: This is used to identify the journal entry.
Doc Type: The Document type.
Period: This is the Financial period that the journal entry will be logged in.
Legal entity: The Legal entity associated with the manual journal.
Tip
To modify the columns displayed, select
 on the top right of the page, then tick/untick the information you want to hide or display.
How to create Manual Journals
Create a Manual journal
Select Manual journals from one of the options as shown above in Viewing Manual journals.
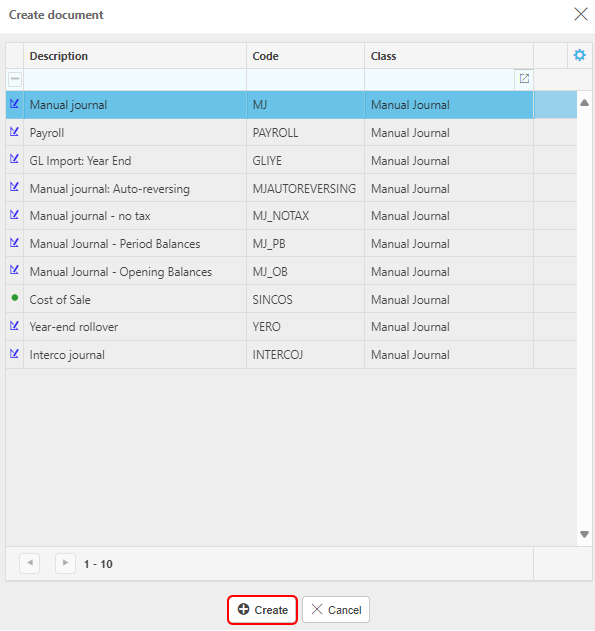
From the drop-down menu, select either New or New (from template).

Select the type of journal to be added then press Create.
Enter the required fields.
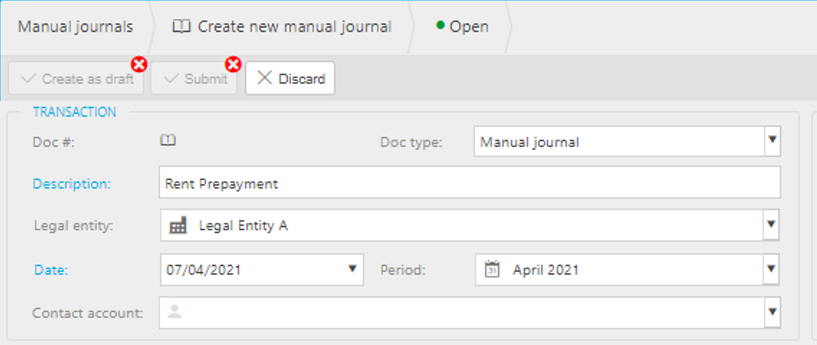
- Doc #: This will display the Manual Journal number once the document has been saved or submitted.
- Doc Type: This will display the selected Document type, which if incorrect can be amended.
- Description: This is used for a summary description of the journal, which depending on the settings can be left blank, defaulted or made mandatory.
- Legal Entity: The Legal entity field is a mandatory field that may be pre-populated depending on the settings.
- Date: Defaults to today’s date but can be over-written.
- Period: The Period shown here will depend on the settings set on the document type, but can be amended if required.
- Contact account: The journal can be optionally linked to a contact account.
Line information.
Use the
 option to add more lines.
Remove lines by selecting the line and use the
 option.
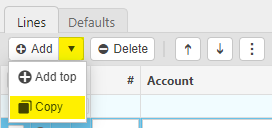
Copy lines by selecting the line and use the copy option.

Account – This is a mandatory field which relates to the Chart of accounts code that this line is to be posted to. The account can be selected from the dropdown list or can be searched for by typing in the account code or description.
Description: This is a mandatory field which will be pre-populated from the account record but can be amended if required.
Debit: This is for entry of the debit value for the journal.
Credit: This is for entry of the credit value for the journal.
Tax Band: This is a mandatory field which will be pre-populated from the account record and depending on the settings this may/may not be available for amending.
Note
Using the
 icon allows you to select what fields to display.
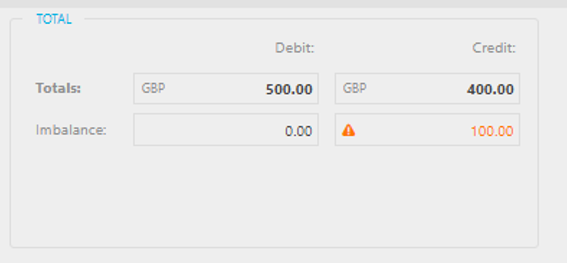
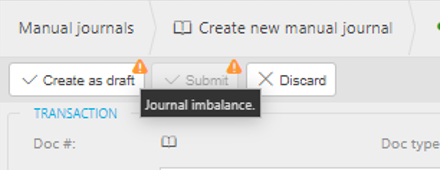
Check The total of the debit column equals the total of the credit column. If the totals do not balance the submit button will be greyed out and a message will be displayed saying that there is a journal imbalance.
Tip
In the totals section of the journal, it will indicate the value of the current imbalance on the journal which can assist you in rectifying the imbalance.
When all lines are entered the journal can be saved using:

Create as draft - allowing further editing.
Discard - removes the transaction altogether.
Submit - updates to a Pending status, if applicable this will enter the authorisation workflow or automatically convert to an approved status.

How to create Multico Journals
Create a Multico journal
This will enable you to post a Manual journal to multiple Legal entities in a single journal, instead of inputing multiple journals; thus reducing work and potential error.
Select Manual journals from one of the options as shown above in Viewing Manual journals.
From the drop-down menu, select either New.

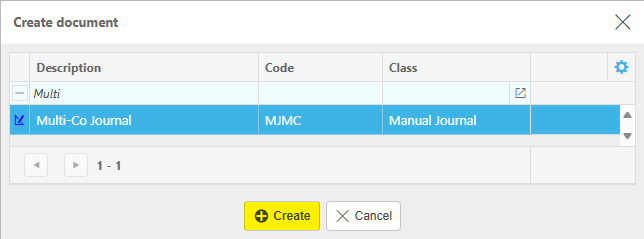
Select Multi-Co Journal type, then press Create.
Enter the required fields.
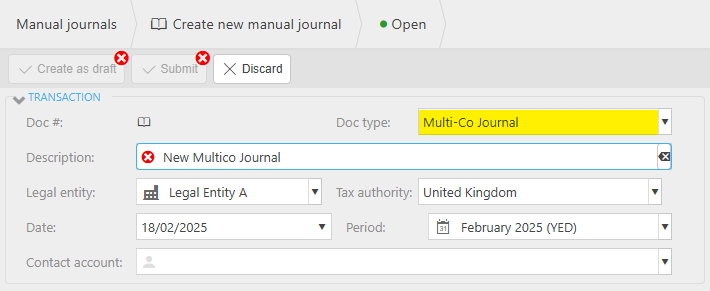
- Doc #: This will display the Manual Journal number once the document has been saved or submitted.
- Doc Type: This will display Multi-Co Journal.
- Description: This is used for a summary description of the journal, which depending on the settings can be left blank, defaulted or made mandatory.
- Legal Entity: This is the primary Legal entity for the Multi_co Journal.
- Date: Defaults to today’s date but can be over-written.
- Period: The Period shown here will depend on the settings set on the document type, but can be amended if required.
- Contact account: The journal can be optionally linked to a contact account.
Line information.
Use the
 option to add more lines.
Remove lines by selecting the line and use the
 option.
Copy lines by selecting the line and use the copy option.


Account – This is a mandatory field which relates to the Chart of accounts code that this line is to be posted to. The account can be selected from the dropdown list or can be searched for by typing in the account code or description.
For a Multi-Co Journal, the Account must be Interco enabled.

Description: This is a mandatory field which will be pre-populated from the account record but can be amended if required.
Debit: This is for entry of the debit value for the journal.
Credit: This is for entry of the credit value for the journal.
Tax Band: This is a mandatory field which will be pre-populated from the account record and depending on the settings this may/may not be available for amending.
Note
Using the
 icon allows you to select what fields to display.
Posting attributes.
The posting attributes are derived from the chart of account rules related to the account code. Common attributes include cost centre and department but can also include custom attributes.
As this is a Multi-Co Journal, the Interco attribute will show.
Leaving this attribute blank will assume the primary Legal entity entered in the main details above.
A different Legal entity can be entered as this is a Multi-Co Journal.

Check The total of the debit column equals the total of the credit column. If the totals do not balance the submit button will be greyed out and a message will be displayed saying that there is a journal imbalance.


Tip
In the totals section of the journal, it will indicate the value of the current imbalance on the journal which can assist you in rectifying the imbalance.
When all lines are entered the journal can be saved using:

Create as draft - allowing further editing.
Discard - removes the transaction altogether.
Submit - updates to a Pending status, if applicable this will enter the authorisation workflow or automatically convert to an approved status.

How to import Manual Journals
Import a Manual journal
Select Document Imports.
Press New.

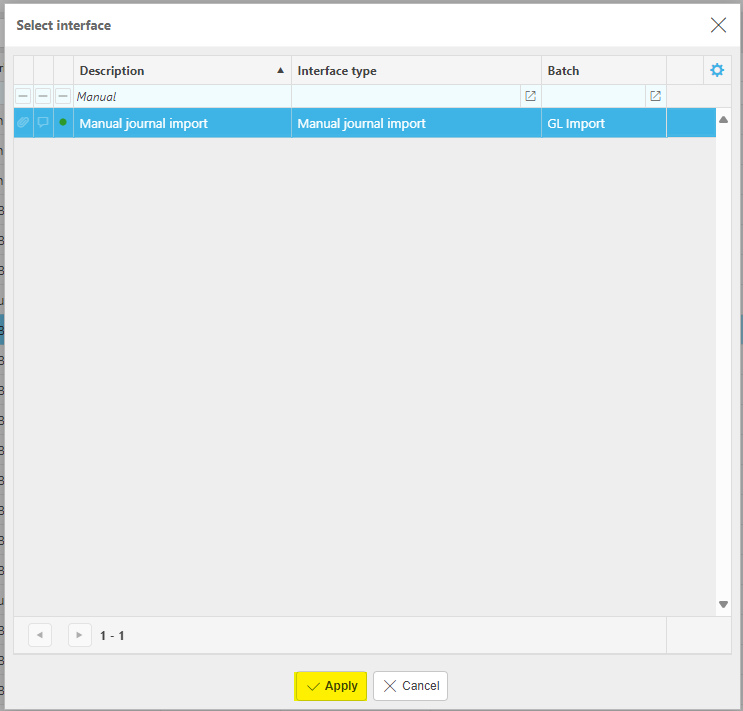
Select Manual journal import from Document type to import and select Apply.
Fill out the document import information.
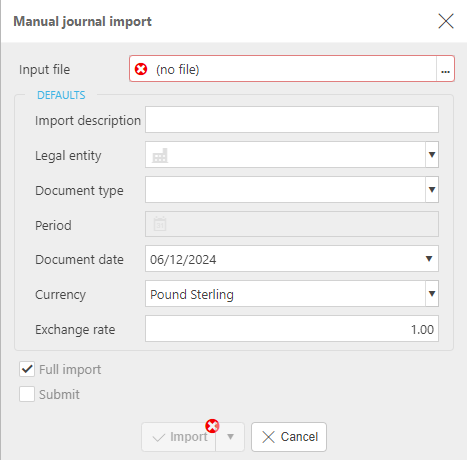
Input file: select the file that you would like to import.
Input description: Enter a description of the import to be logged in the finder.
Legal entity: Select the Legal entity that you would like the imported document to logged under.
Document type: Select the Document type e.g. sales invoice.
Period: Select the Period that you would like the document to be logged in.
Document date: Enter appropriate date.
Currency: select the Currency of the document.
Exchange rate: Select the Exchange rate.
Press Import.
Once Import has completed, then new document will be created in Manual journals and in Imports.
Note
If any required attributes were missing from the import, then the following error message will show on the Manual journal

If Relax posting attribute validation option is selected on the Manual Journals - Opening Balances document in Document types, then the import will load without the error message.
How to update currency on Manual Journals
Currency update when date changed on manual journal
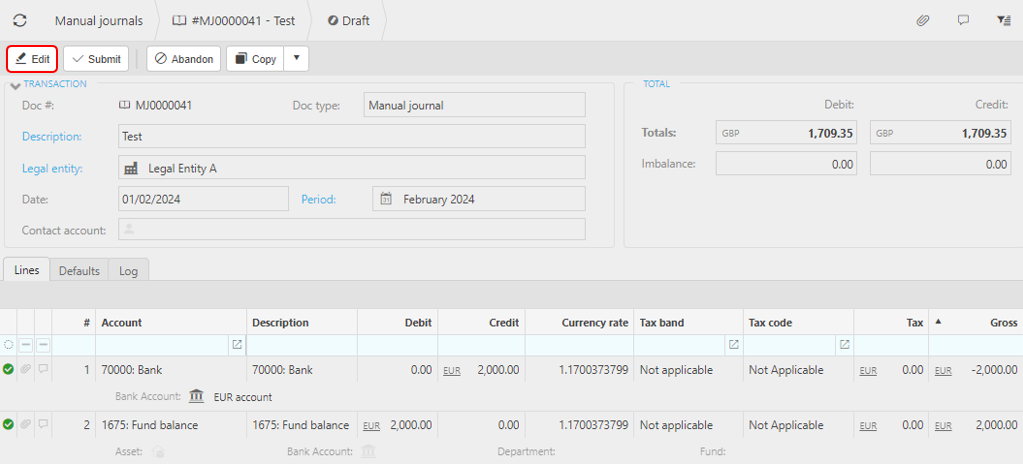
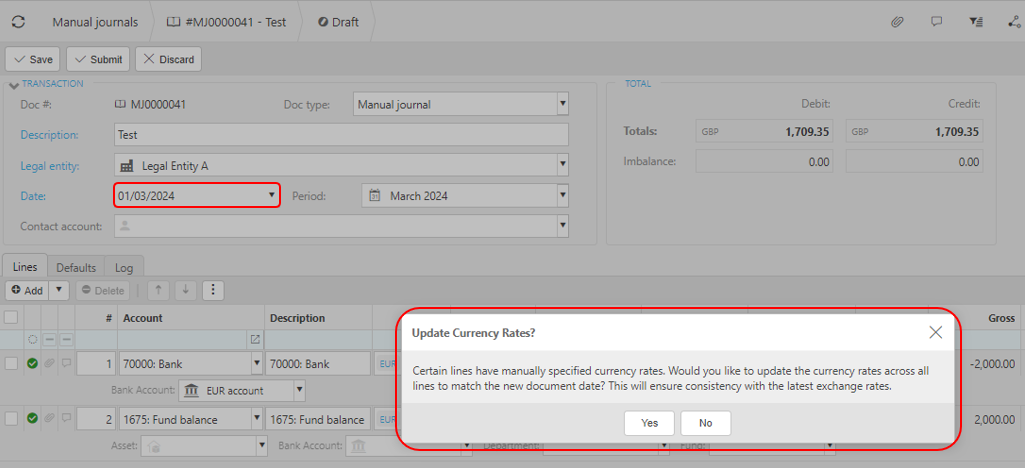
On the Draft Manual Journal where currencies are involved other than GBP, there could be an exchange difference if the document date is changed.
A warning message will appear to make you aware that some lines specify currency rates and asks if you want to update the currency rate to match the new document date.
If the Manual Journal is using the base currency, then no warning message will appear.
How to copy Manual Journals
Copy a Manual Journal
The copying of a manual journal is typically a time saving action where you copy an existing manual journal and then make some changes to the newly created journal.

Copy: This will create a copy of the selected journal but with the date amended to today’s date.
Copy Exact: This will create a copy of the selected journal with the date remaining the same as the date on the original journal.
Reversing Copy: This will create a copy of the selected journal but with the debit and credit entries reversed. As with the copy option the date will be amended to today’s date.
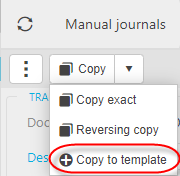
Copy to template: This will copy the details of this journal to a template so that this can be used to create further journals in the future. (See Templates section below for details).
How to create a template for a Journal
Create a template journal
Templates are created for journals that are likely to be repeated, and this aids the creation of a manual journal at a future date.
Select an existing manual journal, followed by Copy to template.
Enter a description for the template.
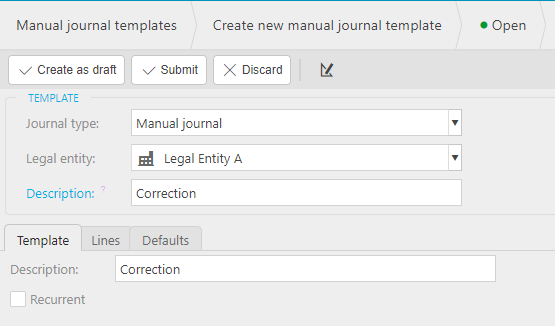
Create as draft or Submit to save the template
The Recurrent box can be ticked if you wish for the journal to be automatically posted on a regular basis.
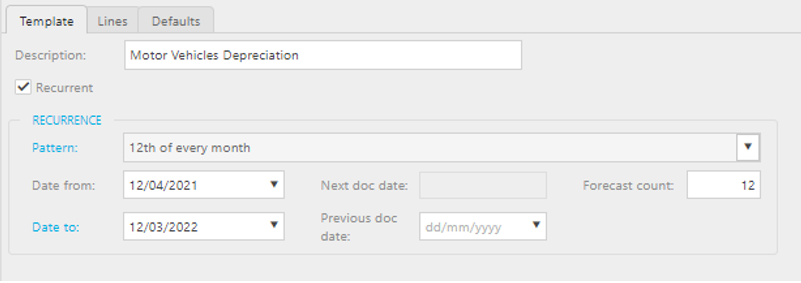
If ticked, additional information will need to be entered as follows:
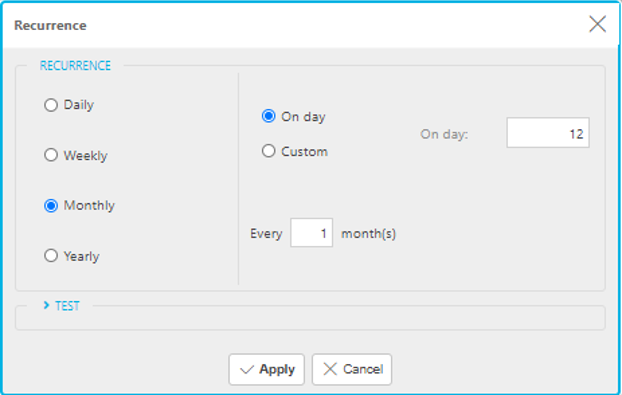
Pattern – This is to enter how often you wish for the journal to be posted and when you click on the dropdown menu you will be presented with the following screen to select from the choices available.
Date from – The date on which you wish the first journal to be posted.
Date to – The date on which you wish the last journal to be posted.
Previous doc date – This field will automatically populate once the journal has started posting and so there is no need to enter a date in this box unless you want to record a date for reference purposes.
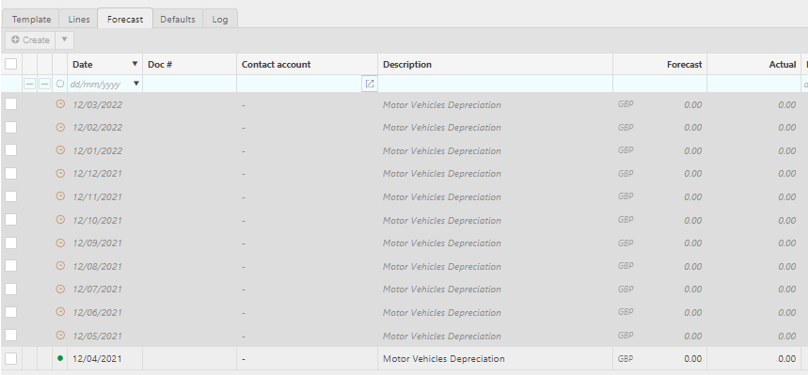
Forecast Count – This is the number of journals it will show on the forecast tab so you can see what the future postings of the template will be.
Once completed you will need to enter the lines that you wish to appear on the template. This is entered in the same way as manual journal.

Additionally, a date from and a date to can be entered on each line of the journal, although if the journal has been set as a recurring journal this is not required as by setting up the recurrent options the journal will automatically post on the relevant dates.
This could be used if you wished for different lines on the journal to repeat for different lengths of time.
The
 Cog button can be used if there are attributes that are relevant to the account codes selected and you wish to select default values for these.
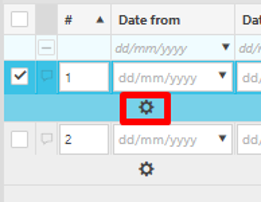
If clicked, the following screen will be displayed for you to set these defaults.
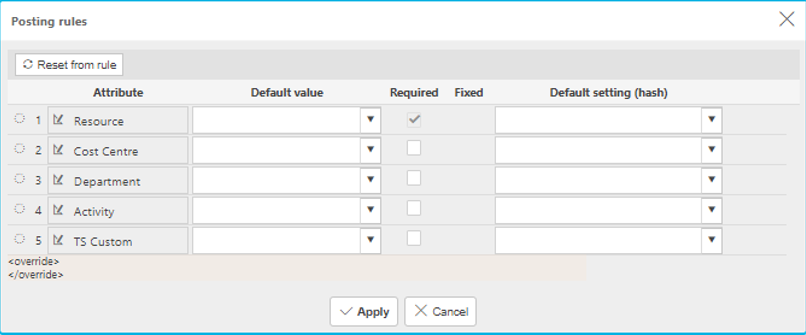
Once the journal lines have been added, the template can be submitted and used as a template going forward.

If you go back into the journal template, you can view the journals that are forecasted to be posted by clicking on the forecast tab.
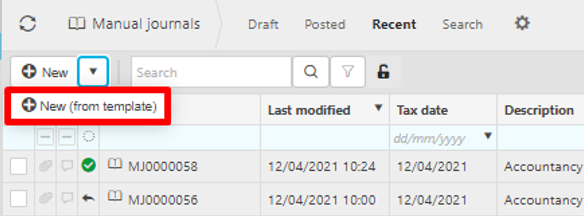
Now that the template has been created it will either be posted through a scheduler task set-up to post recurring manual journals (See Scheduler help section) or through using the option in the manual journal daybook to enter a new journal using a template if the template has not been set-up as a recurring journal.
How to abandon Manual Journals
Abandon a Manual Journal
A manual journal is abandoned where it is recognised that it is not required.
Note
Only draft manual journals can be abandoned.
Select Abandon.

Enter a reason, then click Abandon.
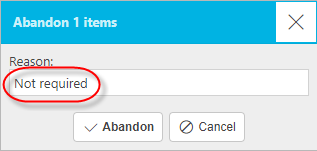
Note
The reason is stored as a note against the manual journal.
Tip
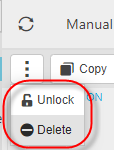
Following Abandon, the document can be unlocked (if you change your mind) or deleted. You should use this option with caution as there will no longer be a record of this document once deleted.
How to reverse Manual Journals
Reverse Manual Journals
- As the name suggests, a reversal allows the reversal of document that has already been posted to the **General Ledger**.- Unlike an Unpost, a reversal creates a mirror image of the document being reversed (date(s) and period may vary).
Select the journal you wish to reverse.
Select Reverse from the
 dropdown menu option.
Note
If this is a Multi-co or Inter-co document and there are linked documents, then a warning that reversing will also reverse all linked documents.

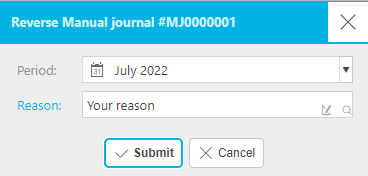
Enter a reason for the reversal followed by Submit
Note
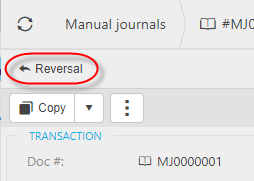
A note will be entered against the journal being reversed. To see the effect of this reversal you can click back into the journal and click on the Reversal button. Within this document you can see how the reversal has affected the General Ledger.
How to make corrections to Manual Journals
Make corrections to Manual Journals
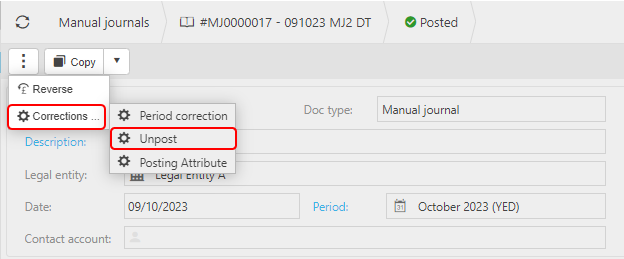
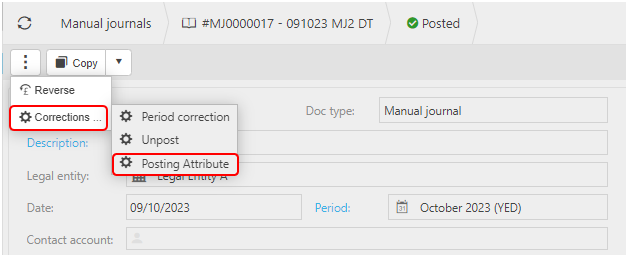
Select and open the Journal (either highlighted on the list or open the Payment), then select the  button and select Corrections.
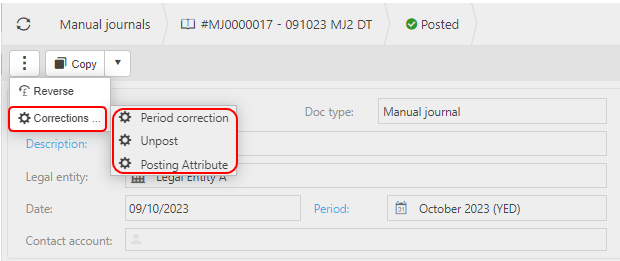
Period correction
This option is used to correct one or more of the following document date, tax date and period and is only performed on posted journals.
Period correction can be used if you wish to amend the Period that the journal has been posted to after it has been submitted.
Select Period correction from the
 dropdown menu option.
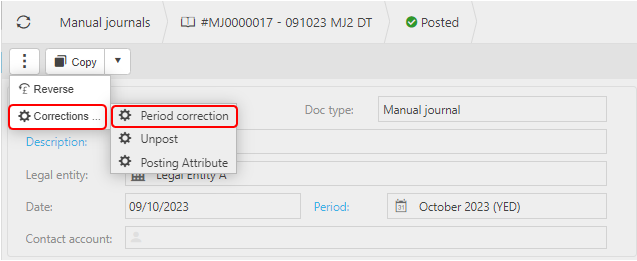
A warning will show informing that changes will not be updated on any linked documents, and asking if you wish to continue.

Amend one or more of the following document date, tax date and period.
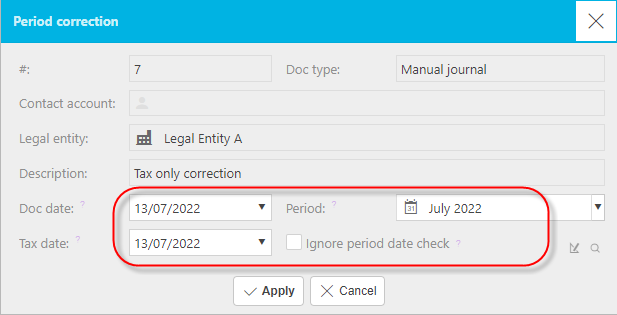
Note
You can only change the period to open periods. The process will also check if the period selected is before the document date and, if so, an error will be displayed, and the correction process will be aborted.
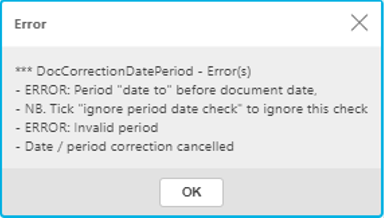
Tip
If you wish to enter a Period that is before the document date then you can tick the Ignore period date check box and the correction will proceed and the changes to the document will be made.
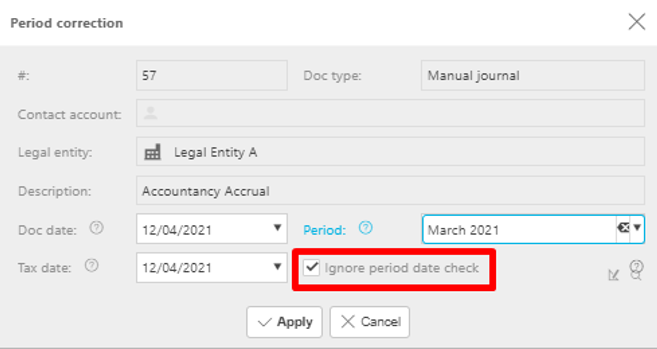
Make corrections to the Period, then select Apply.
Unpost
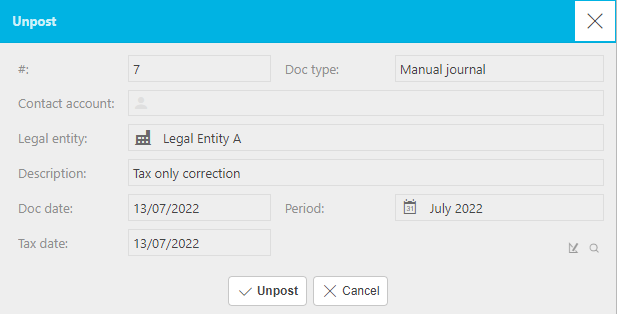
The unpost option can be used if you wish to unpost a journal that has been previously posted to the General Ledger, so that it changes to a draft status and can then be amended or abandoned.
Select Unpost from the
 dropdown menu option
Note
If this is a Multi-co or Inter-co document and there are linked documents, then a warning that unposting will abandon all linked documents.

Clicking the button will display a popup-box giving a summary of the journal where you will be able to proceed with the unpost or cancel.
Select Unpost from the pop-up.
If Unposting a Multi-Co Journal and there are VAT reconciled lines on the journal, then the User will be get an error message saying the journal cannot be Unposted and they must manually reverse the journal.
Any linked documents will be abandoned. A User cannot unpost any linked docs; this can only be done via the source journal.
Note
Following Unpost, the document status will be reset to draft.
Posting Attribute to make corrections to individual attribute values on the Journal.
Note
If the document is a Multi-co Cash Journal, then correcting the Posting attribute will not be an option.

See Correcting Posting Attributes for further details.
How to create a tax only correction
Create a tax only correction
- This type of journal is typically used where a previous document has an incorrect tax coding. In the example below, a purchase expense was incorrectly entered.Enter the journal lines.
Select Tax only tax band followed by the appropriate tax code.
Enter a tax amount
How to auto reverse Manual Journals
Auto reversing Manual Journal
Auto-reversing journals work in much the same way as manual journals except that that an additional journal will be created to reverse the original journal entered.
An example of where this could be used would be accrued expenses that have occurred in the current Period, but for which you will not be invoiced until the next Period. You therefore wish to account for the expense this period but reverse it in the following month when the invoice arrives.
Select New
Select an Auto reversing Journal type followed by Create

Enter the journal details including the Reversing period.
Note
This is the Period in which you wish to reverse the journal and this can be set to any open Period greater than the period set for the journal being entered. So, if the period of this journal is April 2021, the earliest period you will be able to select for the reversing journal will be May 2021.
Updated March 2025
