Goods Received Note
A Goods Received Note (GRN) can be created directly from a Purchase order or you can create one from new. Either option will allow you to create GRNs based on quantity or amount.
How to view GRNs
Viewing GRNs
Either select GRNs in Purchases section from the pulse menu -
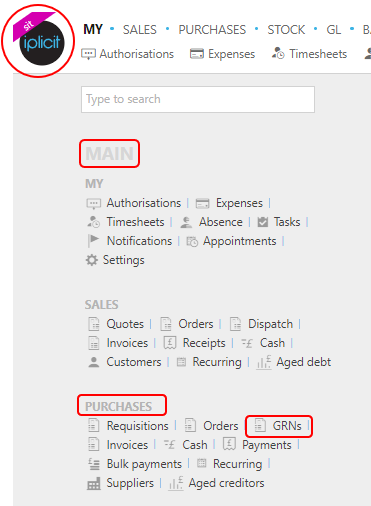
Note
This is an example screen shot of the pulse menu.
Position of the menu items within pulse will vary according to available options and dependant on personal screen resolution.
or from the Main Menu select Purchases then GRNs -

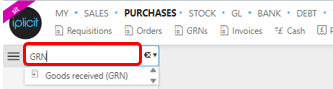
or enter GRN in the Quick Launch Side Menu.
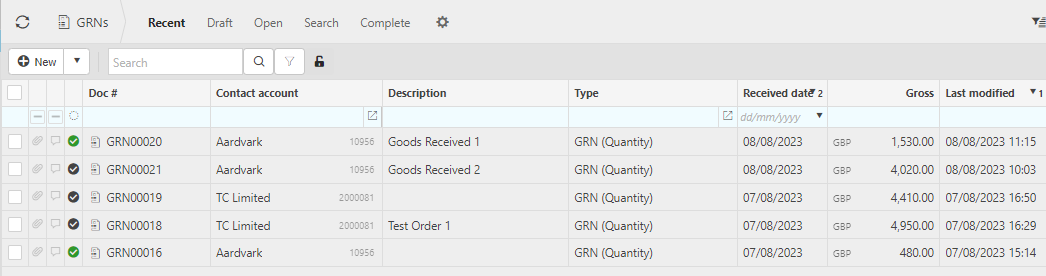
Once you have entered the appropriate menu for GRN, the screenshot below shows a sample grid of GRN's, which includes some key information and where normal customisation of Sets can be used. Also, depending on User roles, the My/All option will be showing.
Select the Search option or the
 icon to display the fields which will enable you to filter the results.
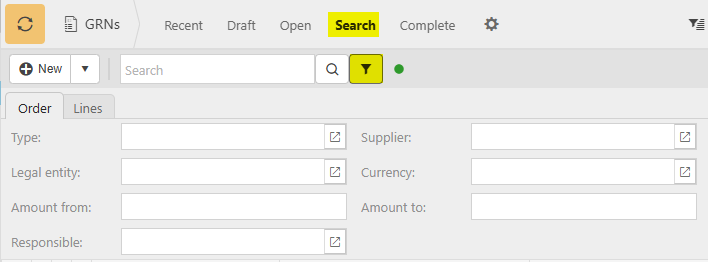
On each displayed column on the header, you can easily filter and sort all the documents - see tip to display other columns.
The icon
 = Complete.
  = Approved.
  = Draft.
GRN type: Either amount or quantity.
Order no: This will be the Purchase Order number.
Tip
To modify the columns displayed, select
 on the top right of the page, then tick/untick the information you want to hide or display.
How to create GRNs
Create a GRN
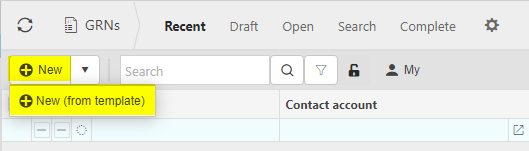
Press New or New from Template.
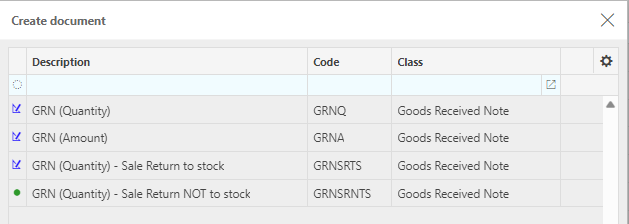
Select the document type that you require then press Create.
Enter a Supplier.
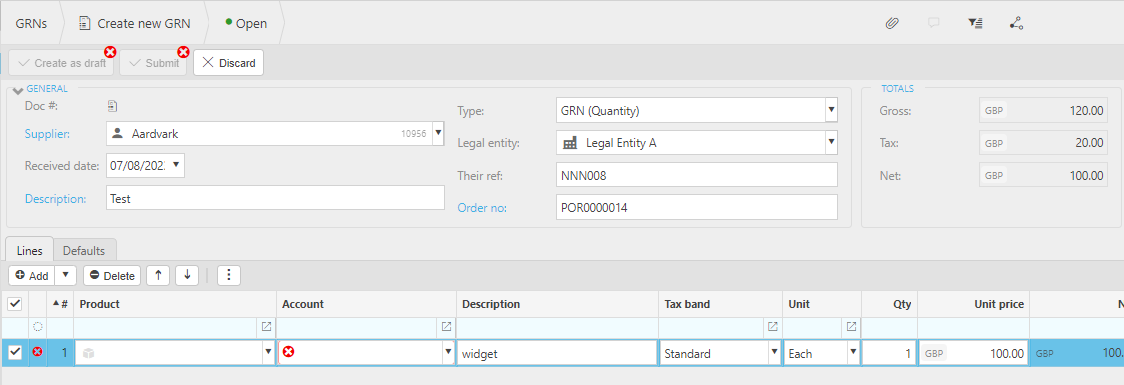
Once the Supplier has been entered, any outstanding Purchase orders will show on the Available section.
Enter a description. If Description required option has been ticked in the Document type, then this field will be mandatory. It will be automatically entered if a Default description was entered in the Document type.
Fill in the remaining fields as required.
Received Date: The date the goods were received.
Note
This date will default to the current date unless the Don't default current date option is ticked in Others tab within the Document type. In this case, when a user creates a new document this date is left blank.
Stock date: This date will default to the Invoice date. It can be changed, but will reset to the Invoice date if the latter is changed. If this date differs from the Invoice date, then a
 icon will show with a warning message saying Stock date / document date mismatch.
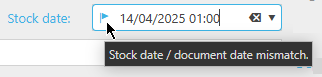
Note
Stock date date will only show if the Document type has Stock option selected and the appropriate Stock is enabled in Stock setup.
Type: This will be auto filled with the document type selected in step 2.
Legal entity: Select the legal entity.
Their Ref: The unique reference given to identify the document. If Their ref required option has been ticked in the Document type, then this field will be mandatory.
Order no: enter Purchase order number to link to this GRN.
On the Available section you can further filter the available Purchase orders by ticking the filter box for your selected Purchase order, if it hasn't already defaulted to the Purchase order number. Multiple Purchase orders can be entered, separated by commas.
Note
This option will appear if the Order filter is selected in the GRN document when set up in Document types.
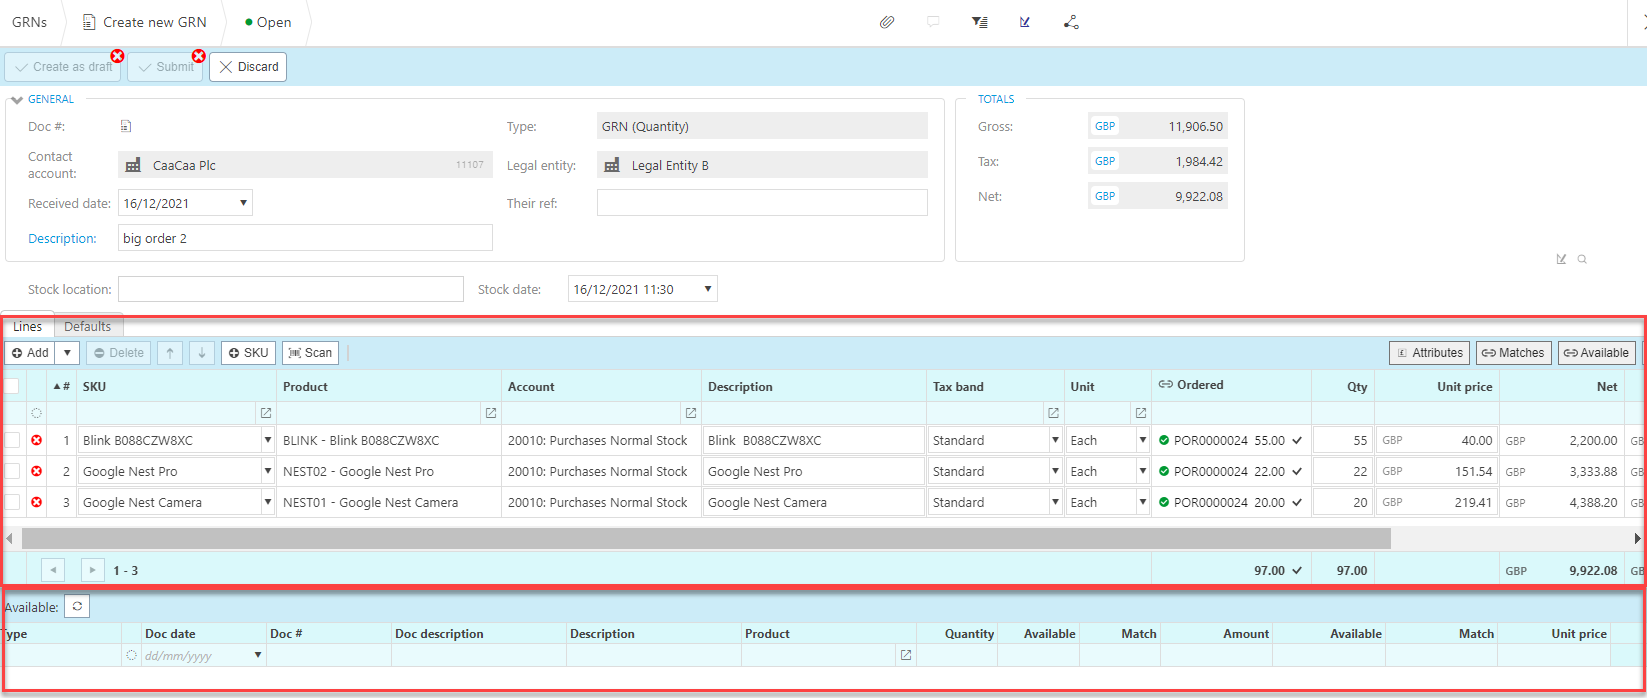
Lines
If the Available section doesn't appear and there are outstanding Purchase orders, then an Available button will show on the Lines section -
 . Selecting this option will display the Available section with any matching outstanding Purchase orders.
If a Purchase order number was entered in the General section above, then on this Available section an Order filter box appears
 which, if ticked, will filter to your selected Purchase order/s.
You can now select any Purchase orders and move them to the Lines section.
Stock date: If this date differs from the Stock date in the header section, then a
icon will show with a warning message saying Line stock date / document stock date mismatch.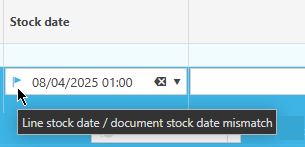Product: This is the product being received.
Account: If a product is being used, this will be auto-completed otherwise select an account from the available list.
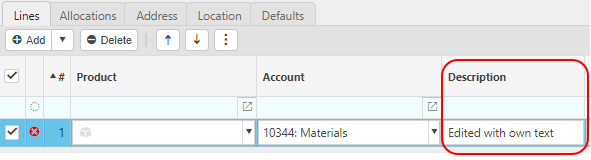
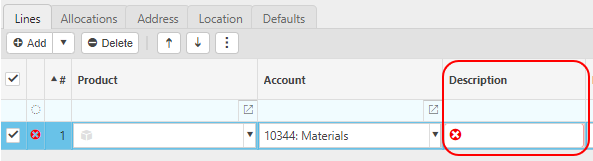
Description: Depending on the Force change setting in Chart of Accounts

If the Force change is not ticked, then the Description field will be auto-filled ...
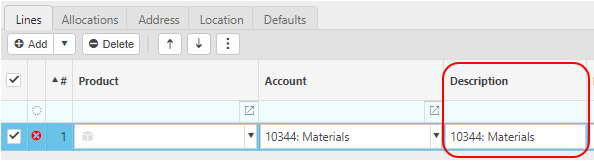
... however it can be edited.
If the Force change is ticked, then the Description field will be blank and you will be forced to enter a description.
Tax Band: The tax band can be selected here.
Unit: This is the unit to measure the product.
Qty: This is the quantity of the product.
Unit price: This is the price per unit of the product.
If the total amount/quantity on the GRN is equal to that on the Order, then the Order will only show on the product line section, and nothing will be in the Available section (blank line).
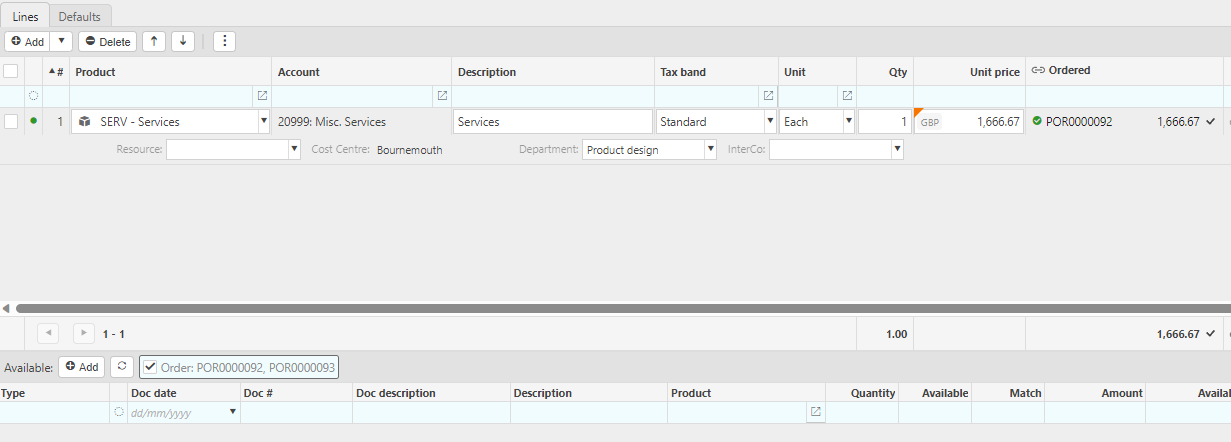
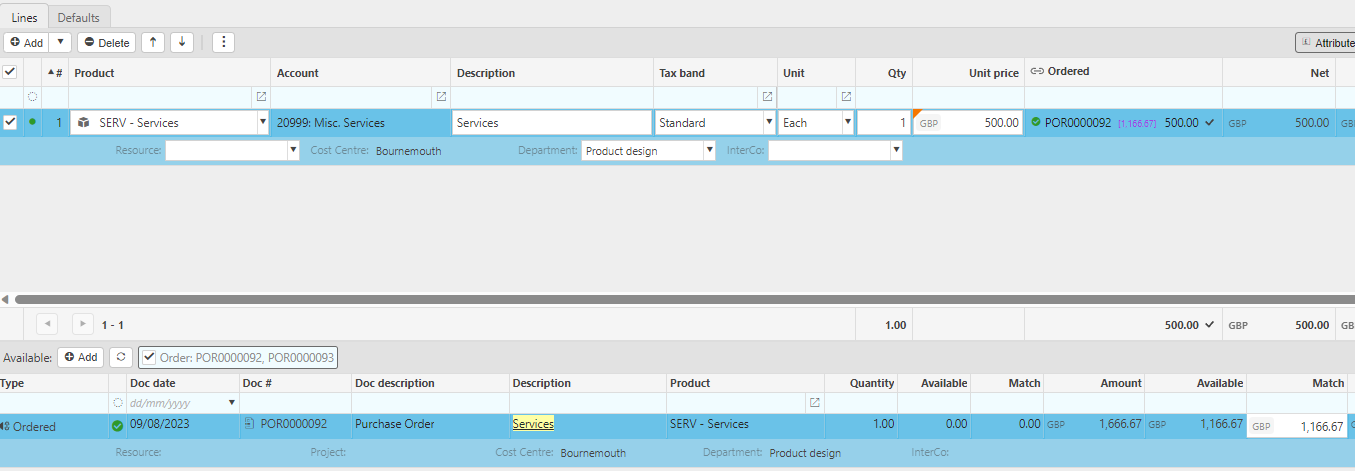
If you only wish to create a GRN for part of the Order by manually changing the amount/quantity, then the Order number will show on the product line with the amount/quantity entered and any other remaining amount/quantity will show below on the Available line.
Tip
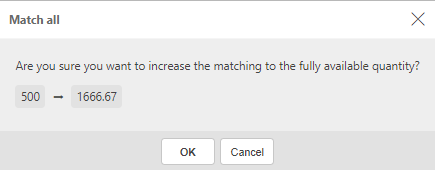
If you have only created a GRN for part of the Order, then on the Product line in the Ordered column there is a purple number in square brackets that shows the remaining amount/quantity.

Clicking on that number allows a quick way to match the full amount/quantity.
Posting attributes
- The posting attributes are derived from the chart of account rules related to the account code. Common attributes include cost centre and department but can also include custom attributes.
If there is a requirement to buy from a Supplier and have the goods delivered where the tax authority treatment is different, then set the Supplier up as a Multi Tax Authority Supplier.
Select either Submit once happy with details or Create as draft to be able to edit further before submitting.
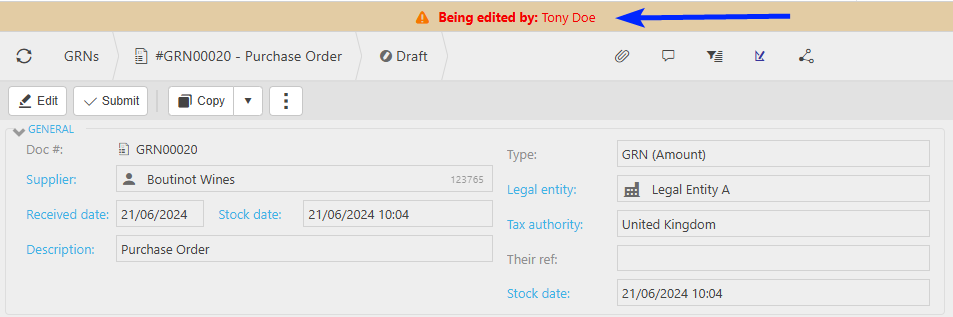
Note
Returning to this document via the Edit option will notify other users viewing the same document that it is being edited.
The GRN can now be invoiced - see Invoice a GRN section below.
How invoice GRNs
Invoice a GRN
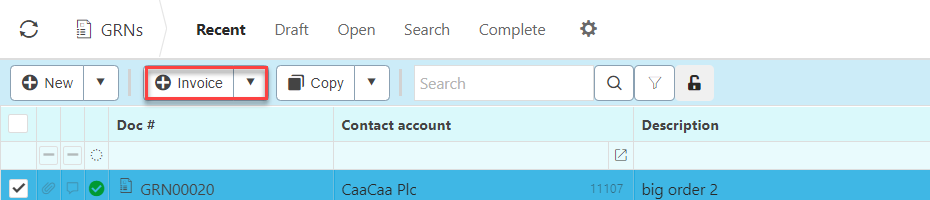
You can invoice a GRN straight from the GRN section by selecting a GRN then pressing Invoice.
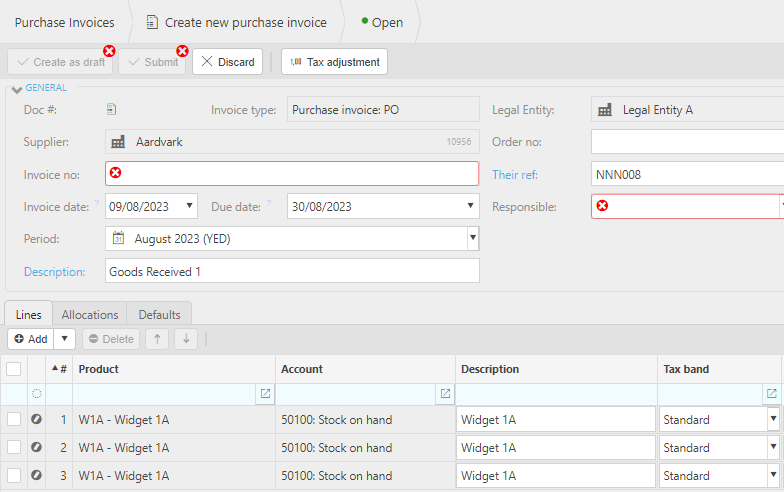
This takes you to creating a new Purchase Invoice
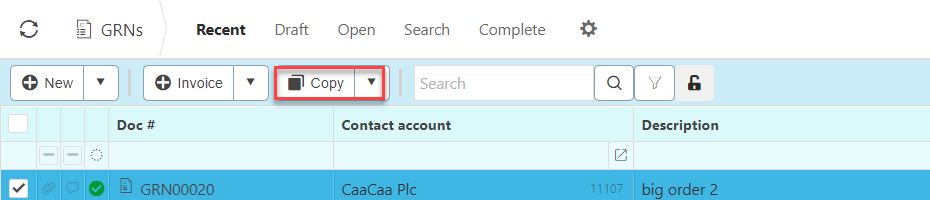
How to copy GRNs
Copy a GRN
Rather than filling out a new GRN you can copy a pre-existing one to speed up the process. This is particularly useful when you are creating the same GRN frequently.
Select the pre-existing GRN that you would like to copy.
Press either Copy exact or Copy to template.
Updated May 2026