Stock setup
Important
This Setup MUST ONLY be completed on implementation by the iplicit implementation team.
Stock is also an extra chargeable module.
The enabled stock setup will determine which Document types effects stock and when Stock levels states are populated.
The screenshot below shows a sample grid of stock setups, which includes some key information.

- Code: this must be unique.
- Description: used to clearly identify the stock setup configuration.
- Enabled: only one stock setup can be enabled at one time.
- Author: author based setups cannot be modified but can be copied to your own configuration.
- Last modified: this will present the UTC date and time.
- Last modified by: This shows who was the last person to modify the stock setting.
Tip
To modify the columns displayed, select
 on the top right of the page, then tick/untick the information you want to hide or display.
How to view Stock setup
Viewing Stock setup
Select Stock / Stock setup from the Settings section of the pulse menu -

Note
This is an example screen shot of the pulse menu.
Position of the menu items within pulse will vary according to available options and dependant on personal screen resolution.
or enter Purchase Orders in the Quick Launch Side Menu.

This will then show the Stock setup documents on the system where normal customisation of Sets can be used.

Tip
To modify the columns displayed, select  on the top right of the page, then tick/untick the information you want to hide or display.
How to create Stock setup
Create a new Stock setup
Select Stock setup from one of the options as shown above in Viewing Stock setup.
Select New.

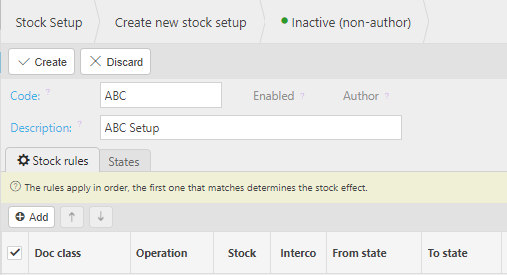
Enter a Code and a description.

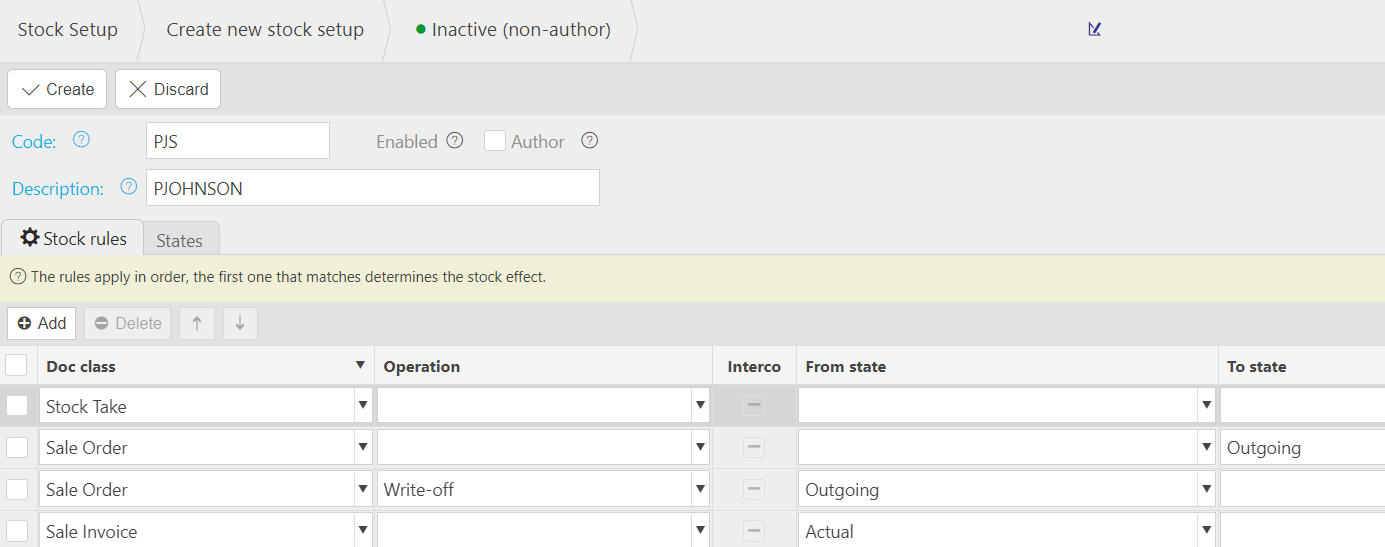
Add Stock rules by pressing Add under Stock rules.
Choose a Document class, operation and the from and to state.
These rules determine how document classes operate, which in turn affects the Stock levels e.g. a purchase invoice (doc class) operating as a credit note would minus from the state and a sales return would return to the state.

Tip
You can add multiple stock rules by following this process again however, the order they are presented in is the order they are evaluated in.

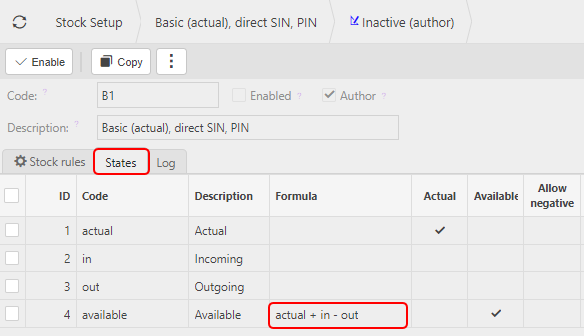
Create States.
These are the columns that will appear in the stock levels. The minimum is incoming, outgoing, actual and available but it is also possible to add additional states e.g. free stock.
The states can also be computed values.

Select Create.

Select Enable

How to find Stock setup
Find a stock setup
Type a code or description e.g. standard in the search bar and it will find all stock setups that contain that key word in the description.

Toggle the padlock icon to show/hide locked items.

How to lock Stock setup
Lock a stock setup
You can lock a stock setup to disable it.
Choose the stock setup that you wish to disable.
Select Lock via the
 icon.
icon.
Note
These steps can be applied to unlock locked setups.
How to copy Stock setup
Copy a Stock setup
- If you would like to create a similar stock setup to another author based setup, you can copy a stock setup and make changes to it.
To do so, choose the stock setup that you would like to copy.
Press Copy.

Once you are happy with the stock setup press Save.
How to preview enabled Stock setups
Preview enabled Stock setups
In enabled stock setups there is a document type preview tab.
The document types preview tab presents the stock rules associated with the stock setup.

The stock movement column presents the following icons:
 = Adding the actual amount to the state.
 = Minus the actual amount from the state.
 = Adding the returns to the state.
 = Plus or minus actual.
 = Minus incoming upon matching.
 = Minus actual plus actual.
 = Minus outgoing upon matching minus actual.
 = Minus returns upon matching plus actual.
How to edit current Stock setup
Edit a current stock setup
Select the stock setup you would like to edit.
Select Edit.

You can now make changed to the input areas that are white.
You can also Add, Delete or Move stock rules by selecting a document class then using the action icons.

When you have finished editing the stock setup, select Save.

Updated December 2025