Disbursement Automation
Disbursement automations can be run in the Automation finder or they can be Invoiced manually in the Sales invoice finder.
All available disbursements to be invoiced can be seen in the Available automation finder.
Disbursements are your expenses that you charge out to your Customers.
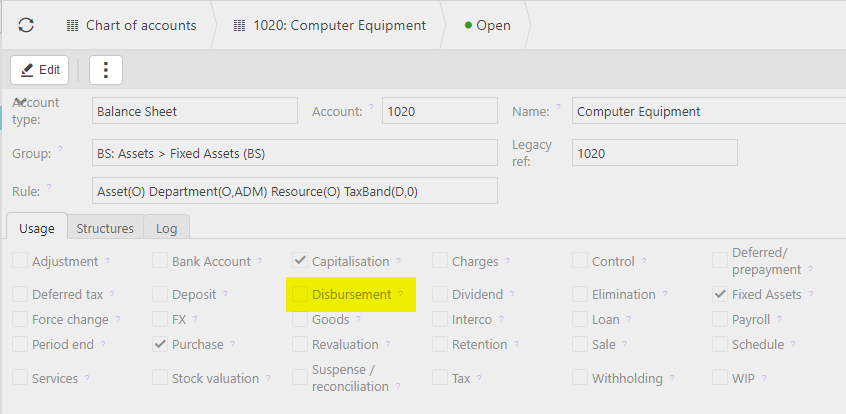
The Chart of account usage must have disbursements ticked.

If you are using disbursement automation on Projects you must allow it in the project setup as seen below.

How to view Disbursement Automation
Viewing Disbursement Automation
Select Document / Automations from the Settings section of the pulse menu -

Note
This is an example screen shot of the pulse menu.
Position of the menu items within pulse will vary according to available options and dependant on personal screen resolution.
or enter Automations in the Quick Launch Side Menu.

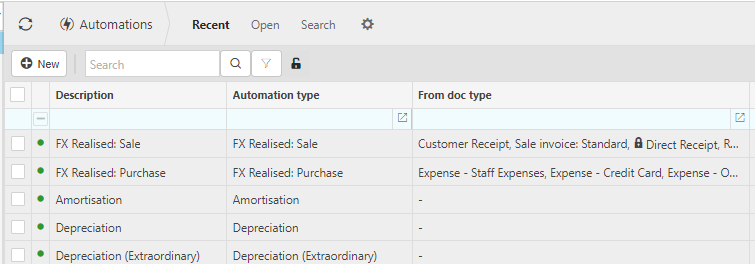
This will then show the Automations on the system where normal customisation of Sets can be used.

Tip
To modify the columns displayed, select  in the top right of the page, then tick/untick the information you want to see or not.
Select Disbursement from the list of Automations.

How to run disbursement Automation
Running Disbursement Automation
Select Disbursement from Viewing Disbursement Automation above.

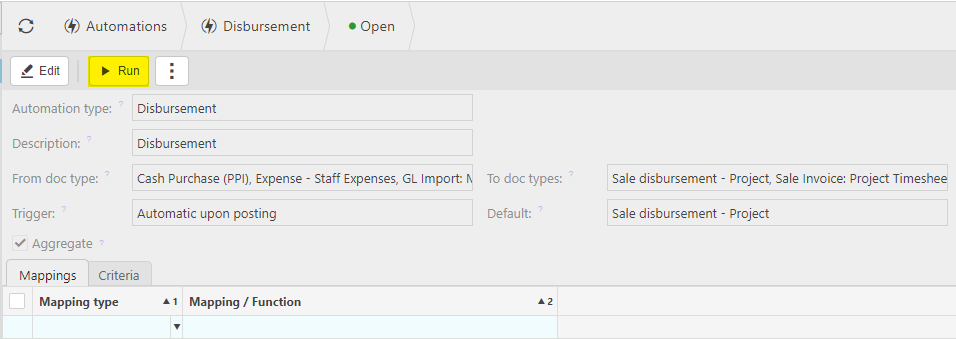
Select using the tick box, or Select and open, the automation, then press Run.

Automation type: Selected from the list Automation types.
Description: Defaulted to be the Automation type description.
From doc type: Select from the available Document Type(s), the ones you wish to be included in the document(s) evaluated.
To doc types: Select all possible Document Type(s) for this Automation.
Trigger: This defines when the automation will be run e.g. Automatic upon posting means the automation will automatically run for the selected documents upon posting into the General Ledger.
Default: Select the Document Type(s) for the document(s) that will be created.
Aggregate: Tick this box if you wish the detail line(s) to be aggregated.
Note
If the Trigger field is set to Document selection only then the Run option will not be available.

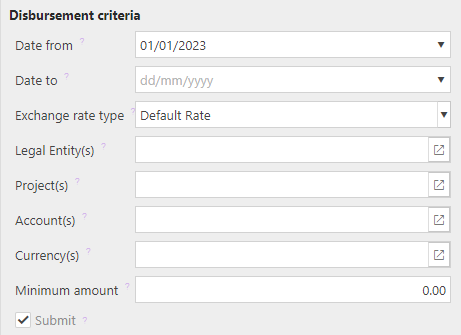
Enter the automation criteria.

Date from: Leave this date blank if you want to select all available documents or enter a date to restrict documents to be 'greater than or equal to' this date.
Date to: Select the latest Document date that you wish to include.
Exchange rate type: Select the Exchange rate to be used for foreign currency Documents.
Tip
The exchange rate will be defaulted from the Environment defaults.
Legal Entities: By filling this out the document automation will process the correct Documents for the correct Legal Entity.
Currency: Select the correct Currency.
Minimum amount: Enter the minimum amount in base Currency to be selected for the disbursement.
Documents: Select the Document to be disbursed.
The 'Submit' tick box: If this is ticked the automation will create the disbursement and submit it for Authorisation.
Tip
If needed, multiple document automations can be made.
When you are happy with the selected criteria and setup, press Submit.
Select OK to continue working. Automation progress will show on the bottom left of the screen showing either In progress or Complete - see details in step 5 of How to run Automations.
Updated August 2025