My Authorisations
You will only be able to view your personal authorisations in My authorisations, whereas you will be able to see all authorisations for all users in Pending authorisations.
Communications can be setup to email a user when they receive an authorisation.
How to view My Authorisations
Viewing My Authorisations
Select My / Authorisations from the Main section of the pulse menu -

Note
This is an example screen shot of the pulse menu.
Position of the menu items within pulse will vary according to available options and dependant on personal screen resolution.
or from the Main Menu select My then Authorisations -

or enter My authorisations in the Quick Launch Side Menu.

This will then show My authorisations on the system, which identify the item that needs authorisation and the Workflow step. Normal customisation of Sets can be used.

Further information
Reference: Typically the document number awaiting authorisation.
Description: Description from the document awaiting authorisation.
Contact account: This will be the Contact account that the document is linked to.
Assigned to: The user that the authorisation was assigned to.
Workflow: This will be the Document type e.g. purchase or sales invoice.
Step: This is the workflow step.
Tip
To modify the columns displayed, select  on the top right of the page, then tick/untick the information you want to hide or display.
Actions for Multiple Authorisations
Actions for Multiple authorisations
On the My authorisations screen, you can tick multiple authorisation boxes  at once, as long as they are in the same Workflow.

You will then be able to action one of the following options that appear along the top of the My Authorisations finder -

This will Approve the Workflow allowing the document to move to the next step.

This will Reject the Workflow stopping the document from moving to the next step and will put the item back into a draft state.

This will Authorise the Authorisation Workflows.
Note
Selecting My authorisations from differing Workflows will prevent the Approve, Reject, Authorise buttons from displaying.
Actions for Individual Authorisations
Actions for Individual authorisation
Double clicking on an individual My authorisation will open up further details for that authorisation only.

You will then be able to action one of the following options that appear along the top of the My Authorisations finder -

This will Approve the Workflow allowing the document to move to the next step.

This will Reject the Workflow stopping the document from moving to the next step and will put the item back into a draft state.

This will Cancel the Authorisation, showing a message for confirmation.

Note
Selecting My authorisations from differing Workflows will prevent the Approve, Reject, Authorise buttons from displaying.
Actions for authorisation of Individual Lines
Actions for authorisation of Individual Lines
To get the Approve/Reject buttons to show on each individual Line and/or the Detail line, the appropriate Workflow for the Attribute needs to be created.
Using Sales Invoices as an example -
Setting Approve/Reject buttons to show on the Lines and the Details area.
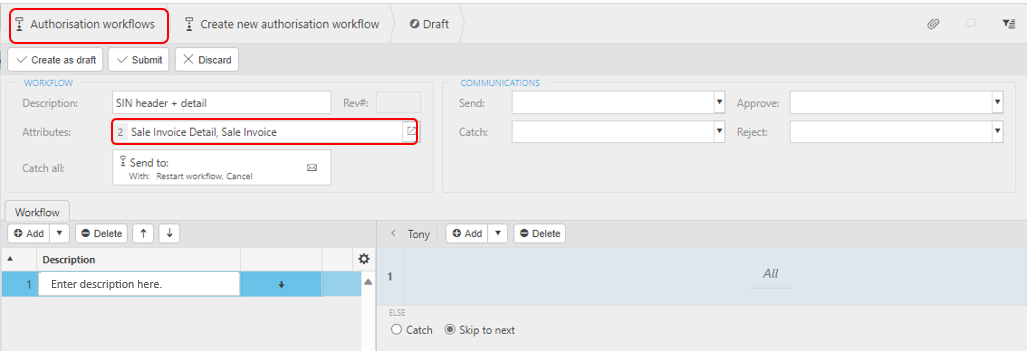
After a Sales Invoice has been entered and Submitted, the Invoice shows as Pending authorisation.

Refreshing the screen and opening the Invoice will now show Approve/Reject buttons on the individual Lines and the Details line.
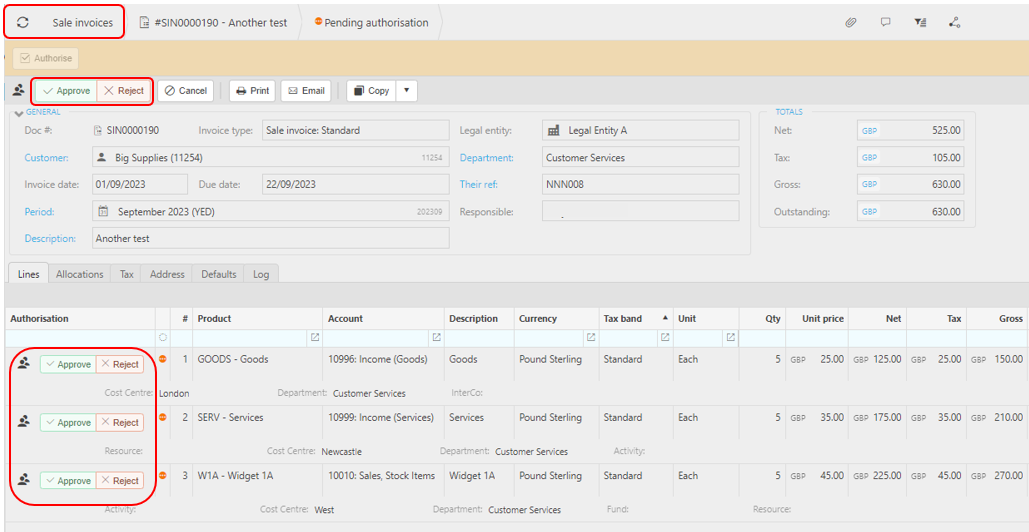
On the Details line -
Approve - Approves the whole Invoice once Authorise button selected.

If, after Approval, you need to reverse this process you can by selecting the Cancel button - a popup will show asking for confirmation.

You can now either Edit this Invoice and re-Submit ready for Authorisation, or you can Abandon the Invoice, which will need a reason entered into the resulting popup.
Reject - Rejects the whole Invoice once Authorise button selected.

Enter Reason for rejection, then press Apply.
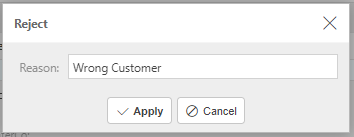
The Invoice list will now show Rejected.

You can now either Edit this Invoice and re-Submit ready for Authorisation, or you can Abandon the Invoice, which will need a reason entered into the resulting popup.
On the individual Lines -
Approve - Approves one or more of the individual Lines, then select the Authorise button.
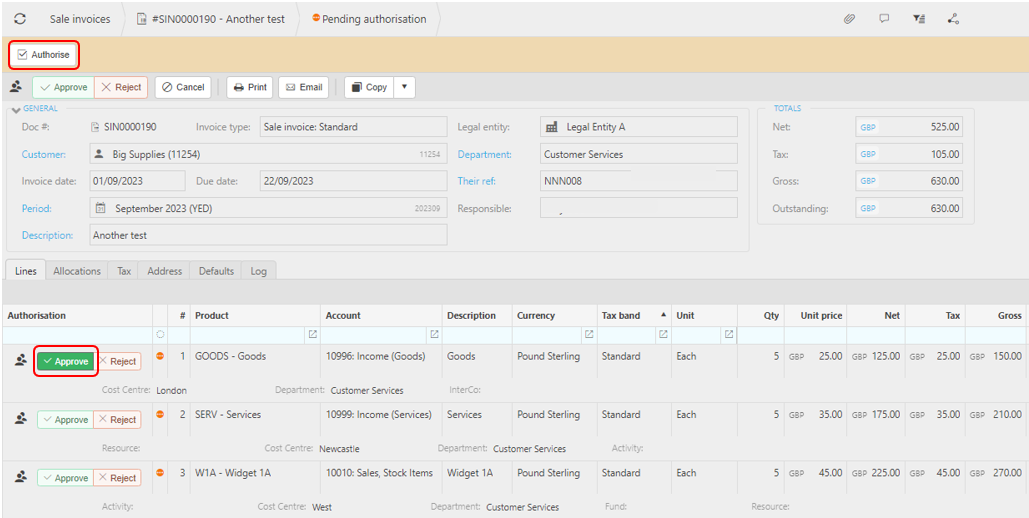
Once Invoice has been refreshed, the Approve/Reject option will be removed from the Line.
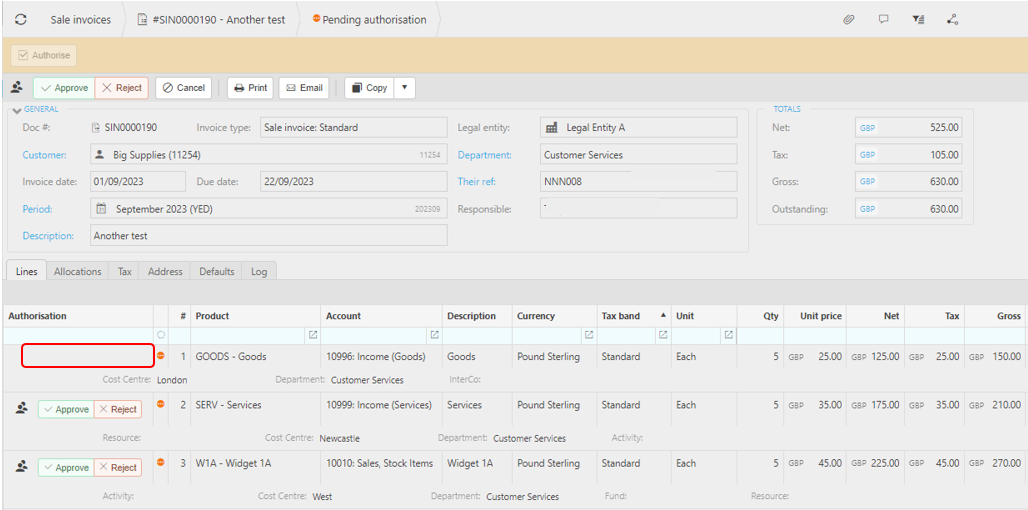
When all Lines have been individually Approved, the Approve button on the Details line needs to be selected to finish the process.
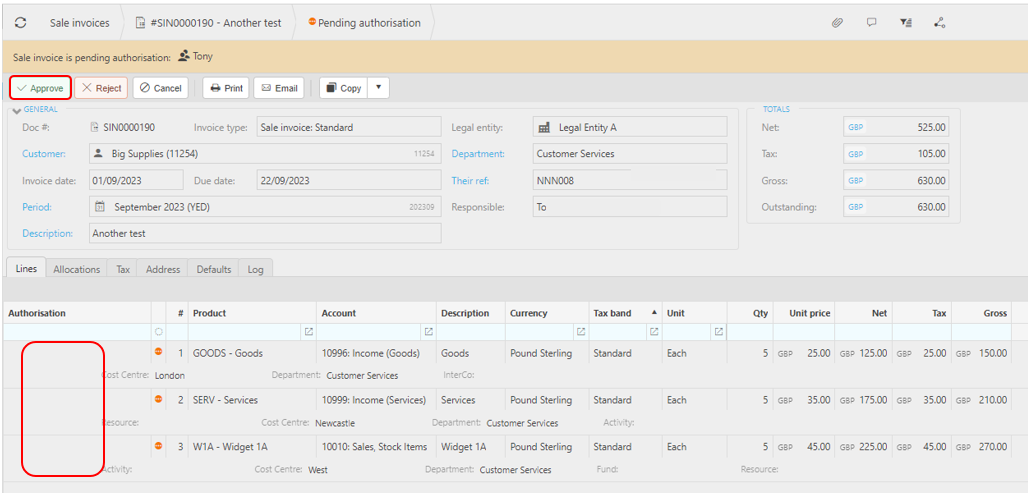
If, after Approval, you need to reverse this process you can by selecting the Cancel button - a popup will show asking for confirmation.

You can now either Edit this Invoice and re-Submit ready for Authorisation, or you can Abandon the Invoice, which will need a reason entered into the resulting popup.
Reject - Rejects one or more of the individual Lines, then select the Authorise button.
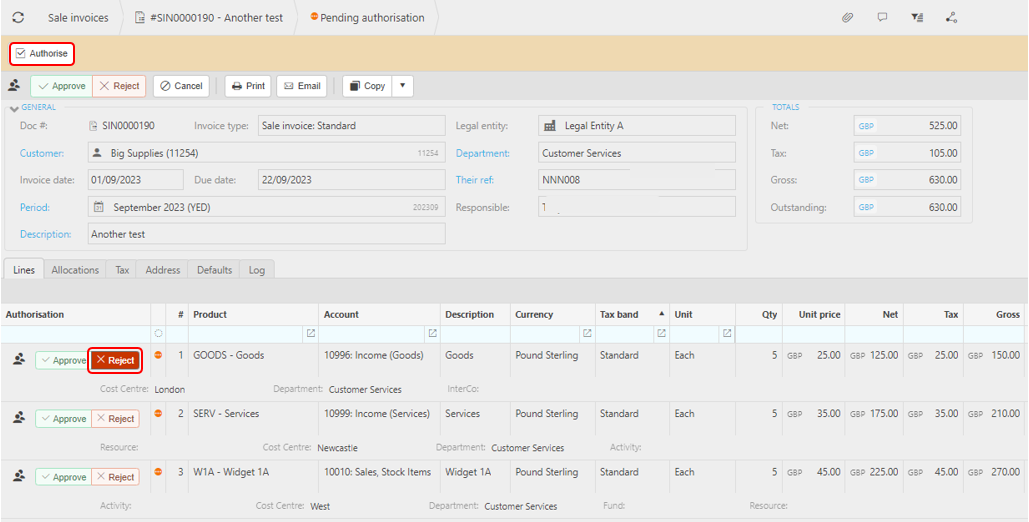
Enter Reason for rejection, then press Apply.

The Invoice list will now show Rejected.

You can now either Edit this Invoice - removing the Rejected line, if need be - and re-Submit ready for Authorisation, or you can Abandon the Invoice, which will need a reason entered into the resulting popup.
Updated June 2025