Authorisation Workflows
How to view Authorisation Workflows
Viewing Authorisation Workflows
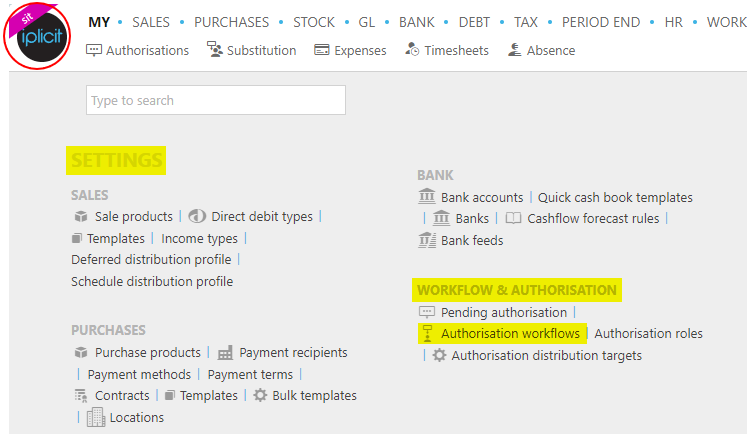
Select Workflow & Authorisation / Authorisation workflows from the Settings section of the pulse menu -
Note
This is an example screen shot of the pulse menu.
Position of the menu items within pulse will vary according to available options and dependant on personal screen resolution.
or enter Authorisation workflows in the Quick Launch Side Menu.

This will then show the Authorisation workflows on the system where normal customisation of Sets can be used.

Tip
To modify the columns displayed, select  on the top right of the page, then tick/untick the information you want to hide or display.
How to create a new Authorisation workflow
Creating Authorisation Workflows
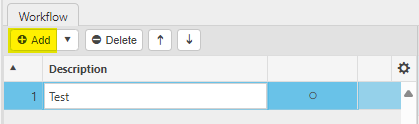
Select Authorisation workflows from one of the options as shown above in Viewing Authorisation workflows.
Select New.

Enter Workflow -

- Description: This description will be displayed when an item is pending authorisation under this workflow. You can use this to give more context to the authorisation being performed (e.g.: "Customer authorisation").
- Attributes: An attribute that this workflow will apply to.
- Rev#: The number of revisions for this workflow.
In Communications check that the correct catch actions are being set to ensure this workflow is properly supported. Also see the Authorisation settings page on how to set defaults.

Choose what emails are sent when different actions in the workflow take place.
- Send: The email that is sent when a request is sent to a user for approval.
- Approve: The email that is sent when a request is approved.
- Catch: The email that is sent when there is a problem with the workflow.
- Reject: The email that is sent when a workflow is a rejected.
The email templates can be configured on the Communication setup page by CTRL + clicking.
How to setup an Authorisation workflow
Setting up Authorisation Workflows
Select Authorisation workflows from one of the options as shown above in Viewing Authorisation workflows.
select the Workflow to setup.
Select Add to add a step to this workflow.
Enter a Description.

Add any criteria for this Workflow. e.g. Only if the Amount is greater than £500.
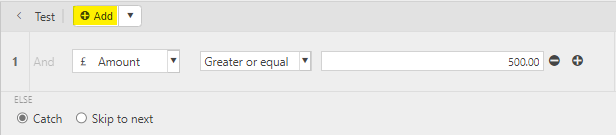
Clicking the same Add button again will add an additional OR condition.
If you would like to create another AND statement, select the
 icon at the end of the criterion.
For each if statement separated by an OR, you can define the action that takes place.
Approve step will automatically approve the step and move the workflow onto the next step.
Approve workflow automatically skips the rest of the steps and approves the workflow.
Reject workflow will reject the item and will not test any other steps.

Send to -
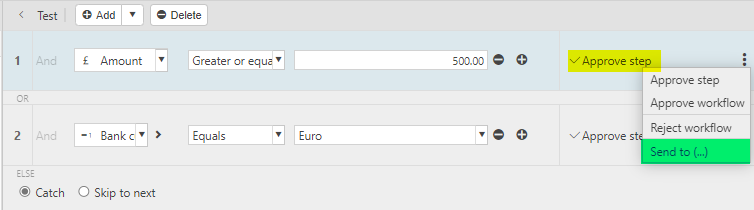
This will open a menu showing Authorisation Distribution Targets (
 ), Authorisation Roles (
 ), User Groups (
 ) and individual Users (
 ).
).Select any of these so you can edit who can perform actions further in the Approval section below the selected users.
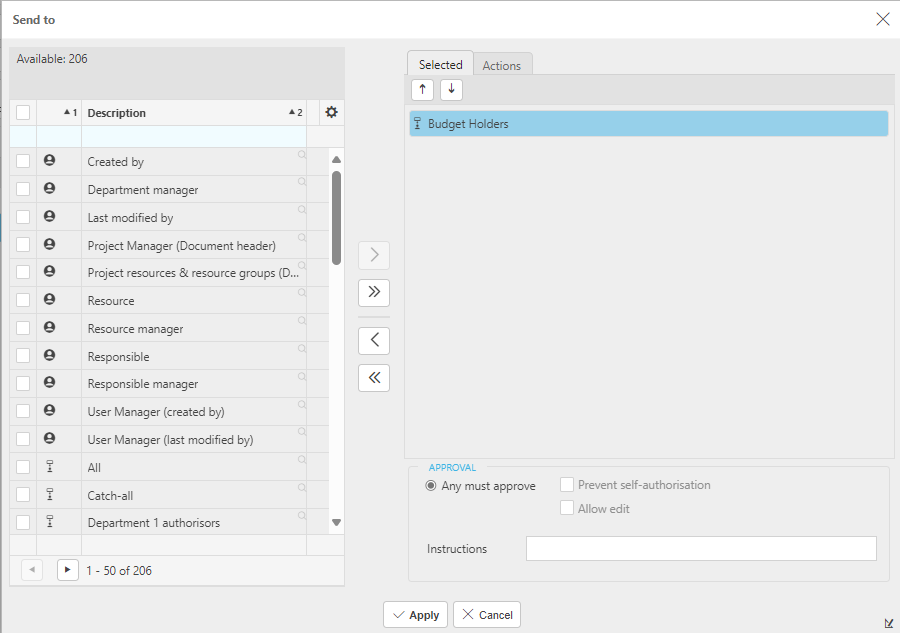
- Any must approve: Any of the users selected must perform an action to continue/end the workflow.
- Prevent self authorisation: If one of the users that can perform the actions selected has submitted the request then they cannot authorise their own request.
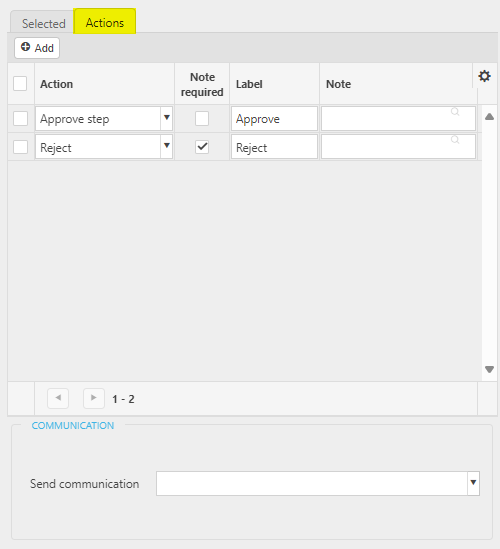
Actions:
To setup what action the selected users can perform for the send to step.
Add or Delete actions as well as changing the label (what appears to the user) for each action.
Efficient workflows will label the approve workflow action differently to the approve step action. If you wanted to inform users why the request was approved/rejected you can enforce that the user leaves a note.
At the end of each step, you will have an option to either 'catch' or skip to next. If you are confident that your workflow allows for no anomalies then you can click catch, however, it is recommended that you click skip to next until the final step which should be a catch statement.
Select Submit or Create as draft when the workflow is complete.
Once Workflows are created, they can be Disable at any time.
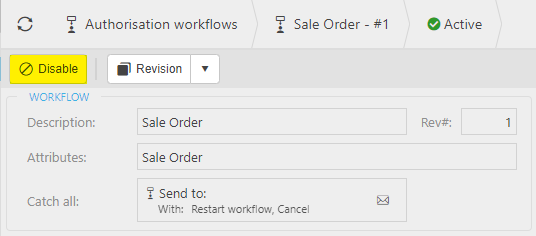
To make changes to a Workflow, select the Revision button.
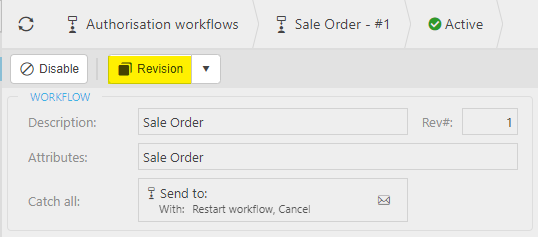
You can see all of your previous revisions and the current revision you are on, in case you wanted to bring back an old workflow.
The number of revisions will show in Rev# field.
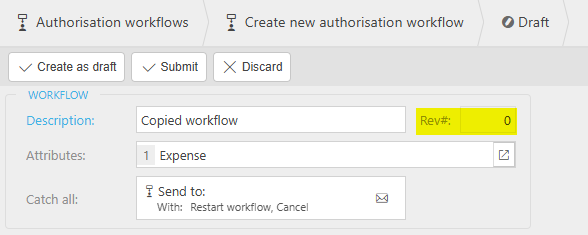
To make a copy of a Workflow, select the Copy button from the dropdown list.
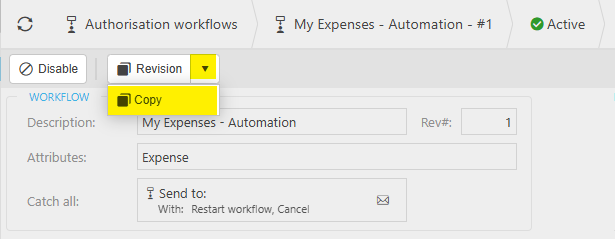
- This enables you to create a new Workflow based on the one you have copied from. The Rev# field will show as 0 because previous revisions will not be copied over.
Submitting for authorisation
Submitting for Authorisation
When submitting an item in iplicit, the status may vary. If the Status has changed to Pending, then a Workflow has been setup by a member of your team. Your request will need to be authorised by the appropriate user.
You will receive a notification stating the confirmation of your submission request. (You can change these settings in My Settings under Notifications).

You can Cancel a request at any time by going back to the item in question and clicking the Cancel button.
Environment settings
Environment settings
Default workflow catch actions
Select who needs to be notified in the case of a catch, ideally these users will be system admins.
The catch actions are used when the authorisation workflow is in an exception and cannot determine what the next step is.
A catch is when there has been an issue in the logic of a workflow and the workflow does not get approved nor rejected. Catch will catch all of the requests in a limbo. The defaults can then cancel or restart the request.
Default workflow send actions
Select the people most likely to have to approve most workflows. This is not necessary.
Select the ideal default action that people could perform when a request gets sent to them. Usually the default will be "approve" and "reject".
Updated June 2025