Tax Groups
- A Tax Group (TG) must be created where Tax Returns are due for the related Tax Authority. A TG may represent multiple Legal Entities but the primary responsibility for the Tax Return Payment is assigned to the Legal Entity shown on this form. Where multiple Legal Entities exist in a Tax Group, they must share a common Tax Registration, Periodicity and tax handling including Partial Tax.
How to view Tax Groups
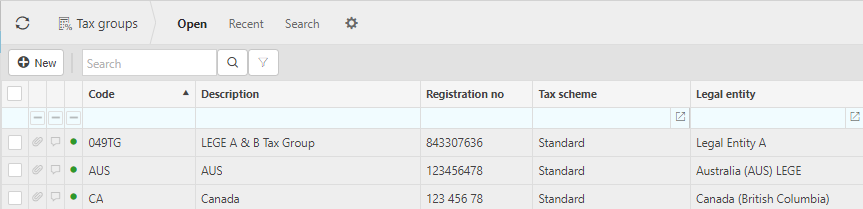
Viewing Tax Groups
Select Tax / Tax groups from the Settings section of the pulse menu -
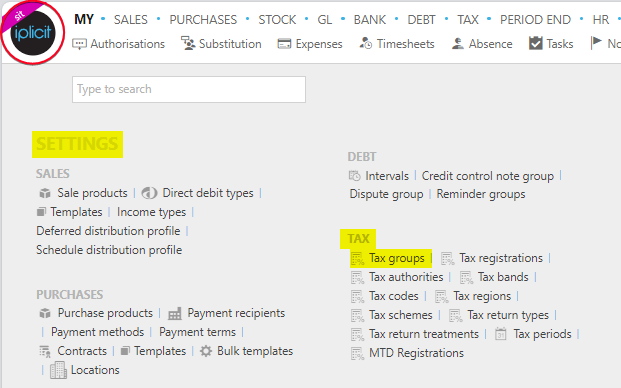
Note
This is an example screen shot of the pulse menu.
Position of the menu items within pulse will vary according to available options and dependant on personal screen resolution.
or enter Tax groups in the Quick Launch Side Menu.

This will then show the Tax groups on the system where normal customisation of Sets can be used.
Tip
To modify the columns displayed, select  on the top right of the page, then tick/untick the information you want to hide or display.
How to create Tax Groups
Create Tax Groups
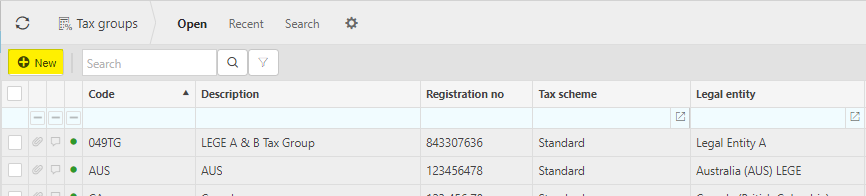
Select Tax group from one of the options as shown above in Viewing Tax Groups.
Press New.
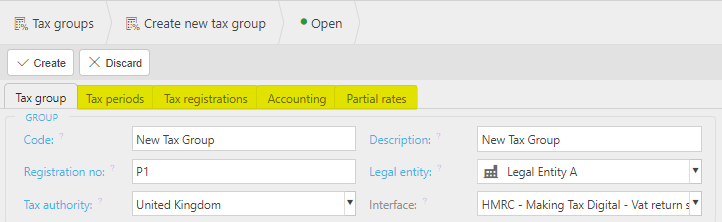
Enter the mandatory attributes.
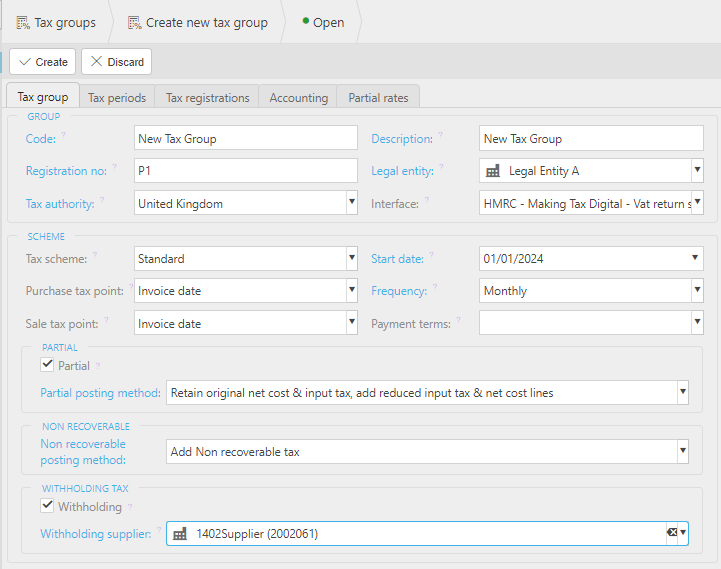
Code: Unique code to identify the Tax Group.
Registration no: Enter the unique registration number assigned by the Tax Authority.
Tax authority: Select the Tax Authority that associated tax returns are submitted to.
Description: Enter a unique description to identify the Tax Group.
Legal entity: Select the Legal entity that is responsible for the payment of returns. Each Legal Entity must have a minimum of one Tax Group but the Tax Group can be related to many Legal Entities, as appropriate.
Interface: This interface is used when an automated tax return is available for the Tax Authority.
Tax scheme: Select the Tax scheme.
Purchase tax point/Sale tax point: Select a purchase and sale tax point, this is the date column used on sale and purchase documents that will be defaulted as the tax date.
Start date: Choose the Start date for the auto creation of Tax periods.
Frequency: Select the frequency for which the Tax returns are created. This will be used for the auto creation of future returns.
Payment terms: The payment terms identify how long before payment is due, following the tax return period "date to". This is also used to default the due date on the tax periods.
Partial: Tick this checkbox if the Tax Group is registered for Partial tax recovery. An additional partial rates tab will then be shown - see details below. Your selection determines how a partial tax document is posted into the GL.
Partial posting method: This option will be available if the Partial option is ticked. Your selection determines how a partial tax document is posted into the GL.
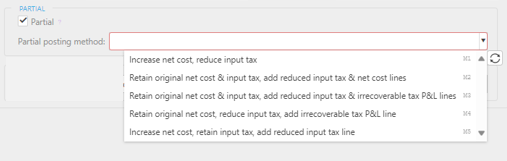
- See Partial posting method section above.
Non recoverable: This is used to code non-recoverable tax e.g. when no tax invoice available.
Withholding: Tick to enable the Withholding Tax process on the tax group.
Withholding supplier: If the Withholding Tax process is selected, then a Supplier must be selected.
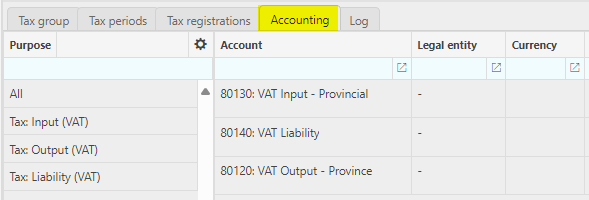
The remaining tabs.
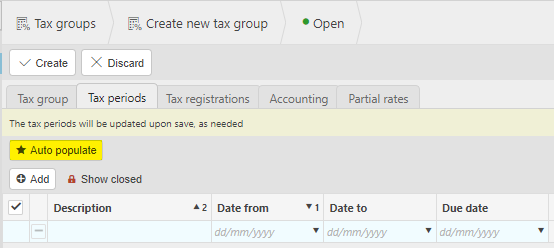
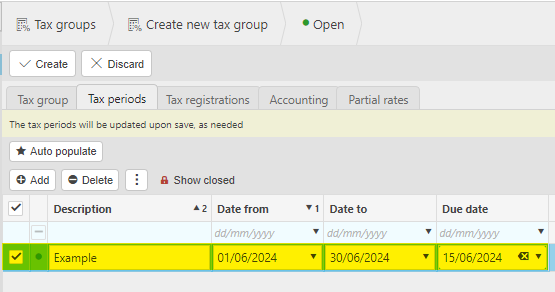
You can auto populate the Tax periods or enter manually using the Add button then entering the tax period fields.
Auto populate will be based of the Start date and Frequency filled out previously above.

- When you are happy with the details entered for the Tax group, press Create.
How to view Partial Tax Rates
Partial tax rates
Partial Tax is used in the UK when a business makes both taxable and exempt supplies, meaning that some goods or services are subject to tax and others are not.
Example of these businesses would be Not for profit businesses.
Examples of exempt goods/services -
- Exports to non-VAT imposing countries.
- Healthcare and educational.
- Basic food and agricultural.
- Charitable and non-profit activities.
- Financial services e.g. Insurance.
- Cultural e.g. Theatre productions.
- Second hand goods.
- Renewable energy
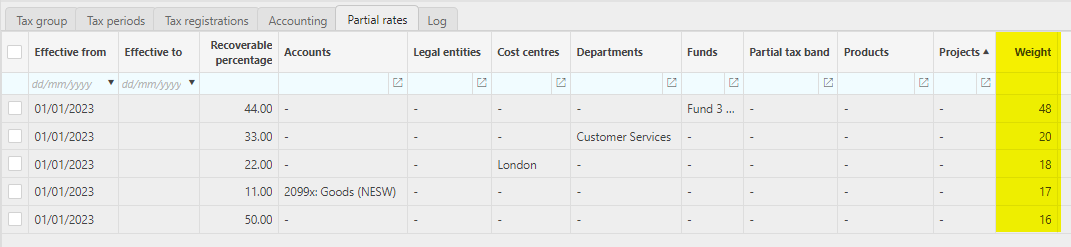
Partial Tax recoverable percentage rates can be set with an Effective from date and an Effective end date, although end date can be left blank if it isn't applicable. Differing recoverable rates can be assigned to the following posting attributes -
- Chart of accounts
- Legal Entities
- Cost Centres
- Departments
- Document Classes
- Document Types
- Funds
- Products
- Projects
All these attributes can have multiple values  on each line.

Partial tax band - this is an author-based attribute where the customer can set their own recoverable rates on their own attribute.
Note
The recoverable percentage is a percentage of the tax amount derived from the tax rate applicable at the tax date for the tax authority & tax band. This applies distinctly to each individual invoice line (e.g. 20% VAT in England & Wales on 31/07/2020)
The order that these Tax rates are processed is defined by a Weight value that is assigned to each line.
Once these Tax rates have been saved, adding new lines to a document with the Partial tax on the Legal entity, the tax rates will show under a new attribute called Tax rec(%).
For example -
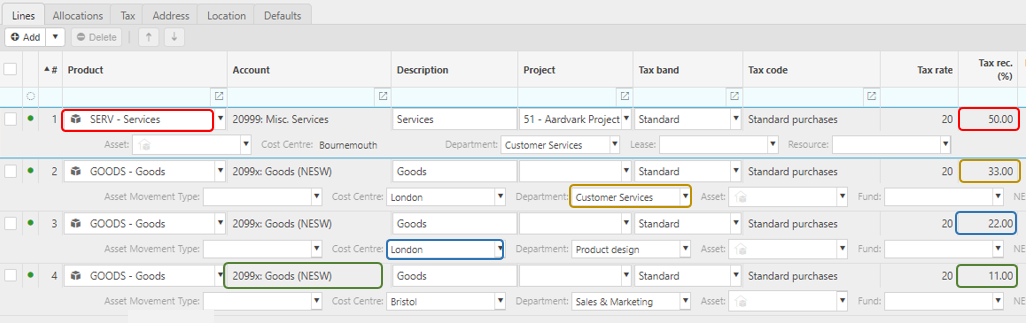
The Partial tax rate can be ignored on individual lines by selecting the Partial tax ignore box. In doing so, the Tax rate will revert to the Tax rate specified under Tax band.

Tax recoverable can be assigned per document/line as you enter them, or you can perform an annual tax adjustment at the end of the financial year.
Partial posting method
Partial posting method
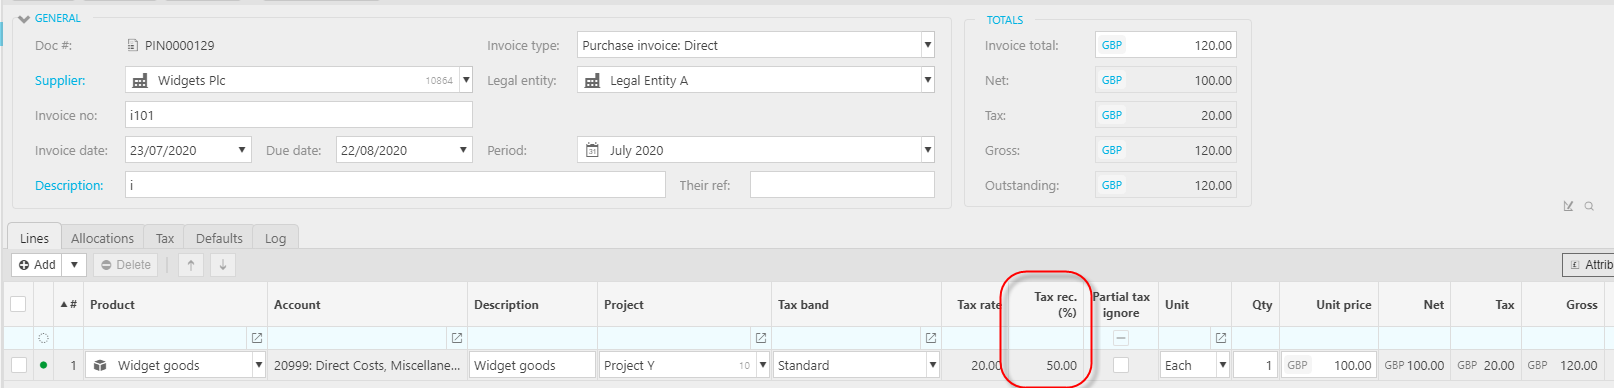
For a Purchase Invoice with a Legal Entity that is subjected to 50% recoverable VAT for the invoice date.
Tip
There may be some instances where partial tax is not applicable for a particular invoice line. Where this is the case, tick the check box Partial Tax Ignore and then 100% of the tax rate will be applied.
Warning
Restrict access to Partial tax ignore via User access.
This Supplier invoice has £120 gross, £100 net, £20 input tax, 50% recoverable. The following examples demonstrate how each of the Partial posting methods will post to the GL.
Increase net cost, reduce input tax.

Retain original net cost & input tax, add reduced input tax & net cost lines.

Retain original net cost & input tax, add reduced input tax & irrecoverable tax P&L lines.

Retain original net cost, reduce input tax, add irrecoverable tax P&L line.

Increase net cost, retain input tax, add reduced input tax line.

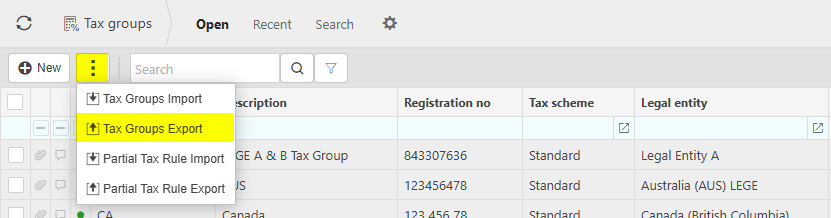
How to Import/Export Tax Groups
Import/Export Tax Groups
Select Tax Groups from one of the options as shown above in Viewing Tax Groups.
Select the
 icon and select Tax Groups Import.
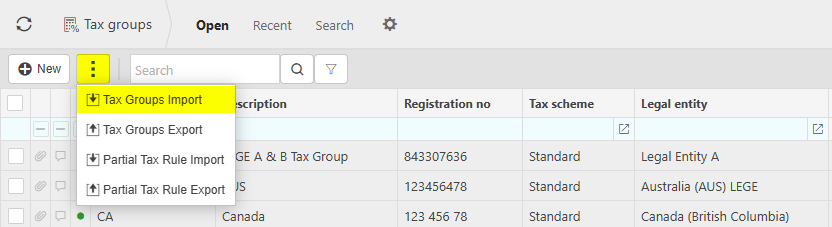
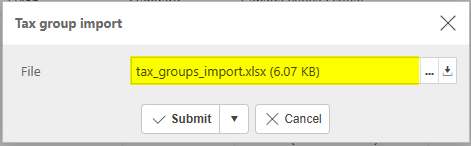
Enter the name of the Excel file, which is saved on an external source.
Tip
To create an Import file with the correct field names and formatting, Export a file first and save to your external source. Then use this file to add details ready to import.
Fields to be included in the file are as follows (Fields in bold are mandatory):
Code: Unique Code for the Tax groups - no spaces or characters such as commas and apostrophes. If the import includes a code that already exists, the import will assume the Tax Group is being updated and not try to create it. If there is more than one code that is the same in the file, the import should error.
Description: Description of tax group.
Registration no.: Registration no for tax group.
Legal Entity: Legal entity for tax group. This will be validated against the legal entities set-up in iplicit.
Tax Authority: Tax authority for tax group. This will be validated against tax authorities set-up in iplicit.
Interface: Interface linked to tax group. This will be validated against the interfaces set-up in iplicit.
Tax Scheme: Tax scheme for tax group. This will be validated against the tax schemes set-up in iplicit.
Start date: Start date for tax group.
Purchase tax point: Purchase tax point for tax group. This will be validated against tax points set-up in iplicit.
Frequency: Frequency of tax returns for tax group. This will be validated against frequencies set-up in iplicit.
Sale tax point: Sale tax point for tax group. This will be validated against tax points set-up in iplicit.
Payment terms: Default payment terms of tax returns for tax group. This will be validated against payment terms in iplicit.
Partial: Tick box for if partial VAT is relevant for this tax group.
Partial posting method: Partial posting method for tax group. This will be validated against the partial posting methods set-up in iplicit. This is mandatory if the Partial box is ticked.
Non recoverable posting method: Non recoverable posting method for tax group. This will be validated against the Non recoverable posting methods set-up in iplicit.
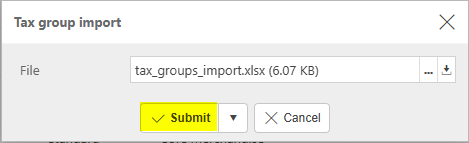
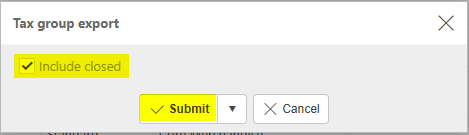
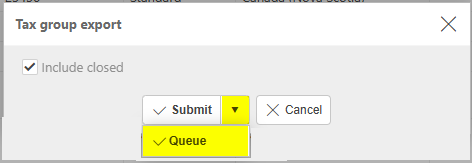
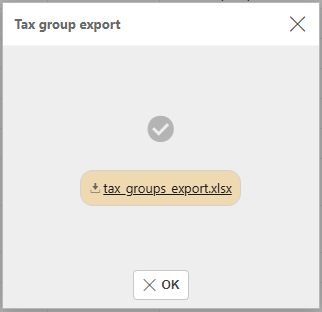
Select Submit.
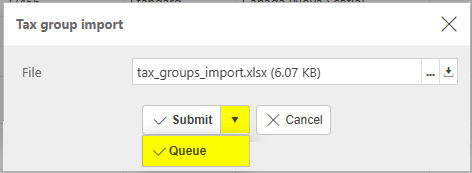
Selecting Queue from the dropdown option will queue the import process until other actions in iplicit are completed.
Warning
iplicit allows a maximum of 5,000 rows in a single Import.
If your Import is too large, an error message will tell you that the Import cannot be processed and will advise you to create smaller Import files.
If the latter is not possible, please contact Customer support.
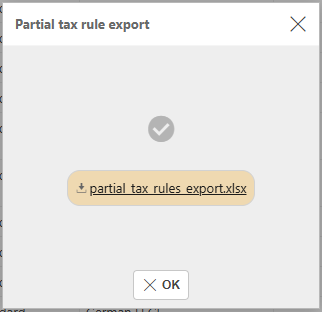
How to Import/Export Partial Tax Rules
Import/Export Partial Tax Rules
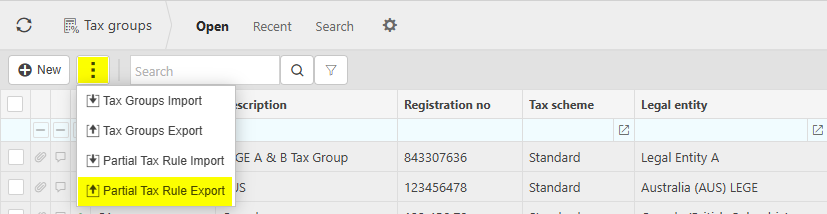
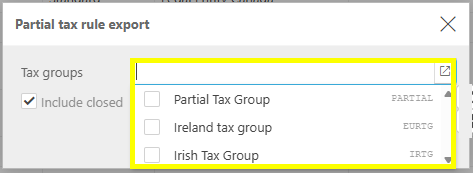
Select Tax Groups from one of the options as shown above in Viewing Tax Groups.
Select the
icon and select Tax Partial Tax Rule Import.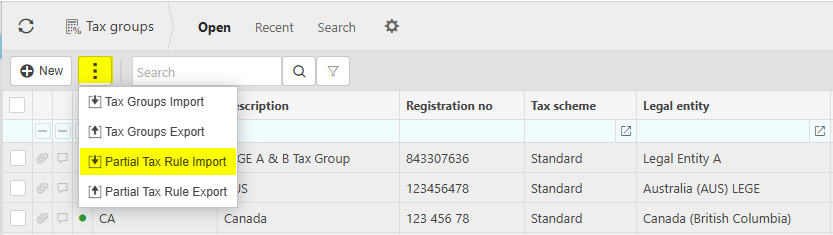
Enter the name of the Excel file, which is saved on an external source.
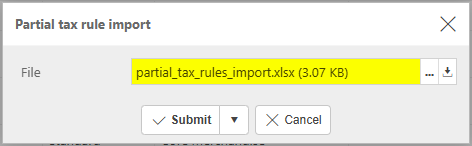
Tip
To create an Import file with the correct field names and formatting, Export a file first and save to your external source. Then use this file to add details ready to import.
Fields to be included in the file are as follows (Fields in bold are mandatory):
Effective from: Date that the Partial tax group rule is available from.
Effective to: Date that the Partial tax group rule is available to.
Recoverable percentage: Recoverable percentage for partial tax rule. This is a number field which should allow a number from 0 to 100 and to 2.d.p.
Accounts: G/L accounts for partial tax rule. This will be validated against accounts in iplicit. This is a multi-select field and each account listed in the import will be separated by a semi-colon.
Legal entities: Legal Entities for partial tax rule. This will be validated against Legal Entities in iplicit. This is a multi-select field and each Legal entity listed in the import will be separated by a semi-colon.
Partial tax band: Partial tax band for partial tax rule. This will be validated against Partial tax bands in iplicit. This is a multi-select field and each Partial tax band listed in the import will be separated by a semi-colon.
Cost Centres: Cost Centres for partial tax rule. This will be validated against Cost centres in iplicit. This is a multi-select field and each Cost centre listed in the import will be separated by a semi-colon.
Departments: Departments for partial tax rule. This will be validated against departments in iplicit. This is a multi-select field and each department listed in the import will be separated by a semi-colon.
Document classes: Document classes for partial tax rule. This will be validated against Document classes in iplicit. This is a multi-select field and each Document class listed in the import will be separated by a semi-colon.
Document types: Document types for partial tax rule. This will be validated against Document types in iplicit. This is a multi-select field and each Document type listed in the import will be separated by a semi-colon.
Funds: Funds for partial tax rule. This will be validated against Funds in iplicit. This is a multi-select field and each Fund listed in the import will be separated by a semi-colon.
Products: Products for partial tax rule. This will be validated against products in iplicit. This is a multi-select field and each product listed in the import will be separated by a semi-colon.
Projects: Projects for partial tax rule. This will be validated against Projects in iplicit. This is a multi-select field and each project listed in the import will be separated by a semi-colon.
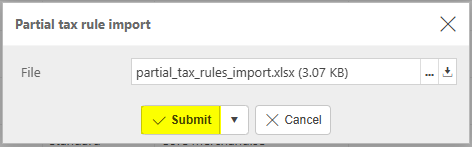
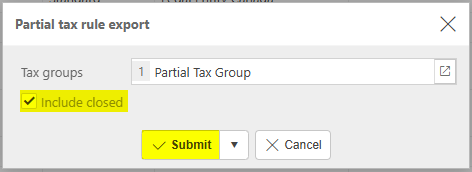
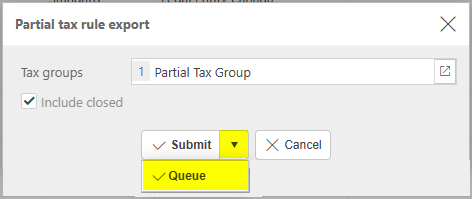
Select Submit.
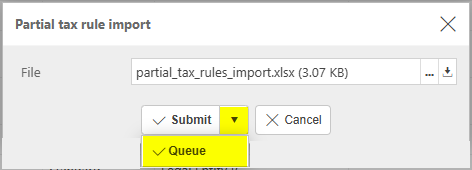
Selecting Queue from the dropdown option will queue the import process until other actions in iplicit are completed.
Warning
iplicit allows a maximum of 5,000 rows in a single Import.
If your Import is too large, an error message will tell you that the Import cannot be processed and will advise you to create smaller Import files.
If the latter is not possible, please contact Customer support.
Updated February 2026