Projects
Projects refer to specific financial undertakings that require detailed tracking and management of costs, revenues, and profitability, rather than the overall financial health of an organisation.
This feature allows documents such as sales invoices and purchase orders to be logged in a project. This will then result in the project having its own trial balance and P&L.
Several projects can be created at the same time; these individual projects can be linked to a parent project.
You can import and export projects to and from Excel, for further details see section below.
How to view Projects
Viewing Projects
Select Project / Projects from the Main section of the pulse menu -

Note
This is an example screen shot of the pulse menu.
Position of the menu items within pulse will vary according to available options and dependant on personal screen resolution.
or from the Main Menu select Project then Projects -

or enter Projects in the Quick Launch Side Menu.

This will then show the Projects on the system where normal customisation of Sets can be used and the Tree option is available to filter the results.
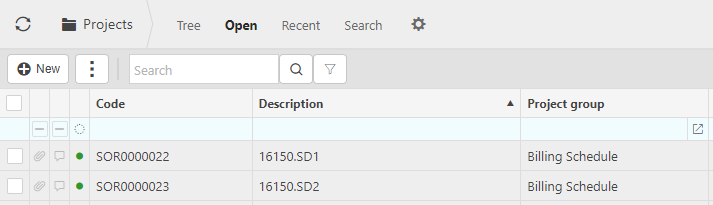
Project group: The project group determines the defaults adopted, for more information please see project groups.
Parent project: A number of sub-projects can be in operation under a parent project.
Timesheets, Tasks and Parent: these columns will be ticked if the project enables these features.
Tip
To modify the columns displayed, select
 on the top right of the page, then tick/untick the information you want to hide or display.
How to create a new Project
Create a new Project
Select Projects from one of the options as shown above in Viewing Projects.
Press New.
Fill out the required fields appropriate to your project.
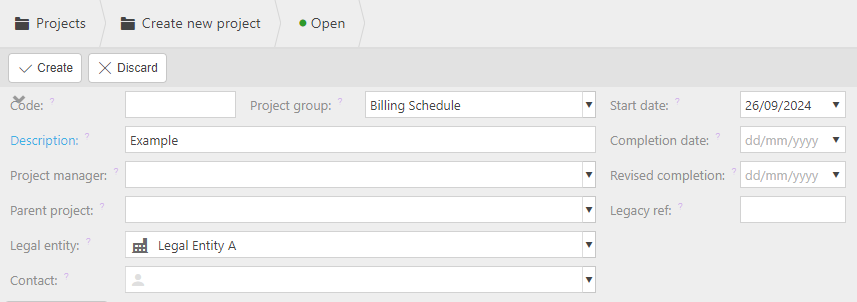
Code: Enter a unique code or leave blank to be filled in automatically.
Project group: Enter Project group for the project. This will inherit the defaults that were set for the project group.
Description: Enter a unique description.
Project manager: Enter Project manager, if required.
Parent project: Enter Parent manager, if required.
Legal entity: Enter Legal entity, if required.
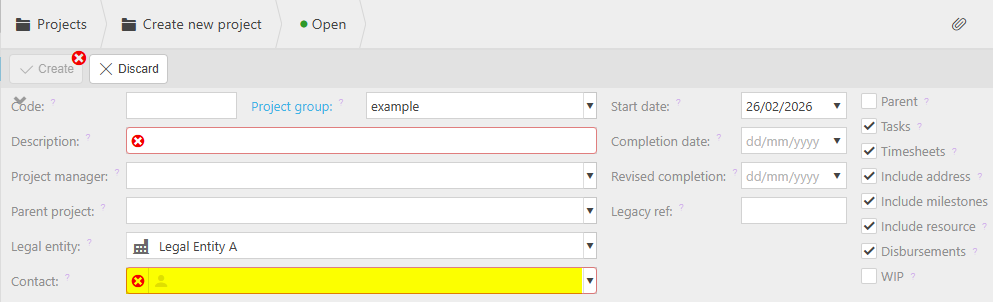
Contact: If Contact account required is selected in the Project group selected above ...
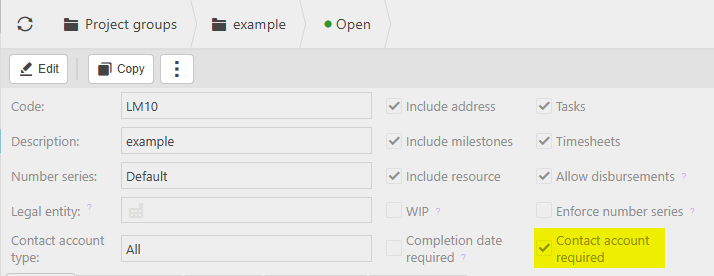
... then Contact is mandatory.
Otherwise, a Contact can be manually entered or left blank.
Start date: Enter the target start date for the project.
Completion date: If Completion date required is selected in the Project group selected above ...
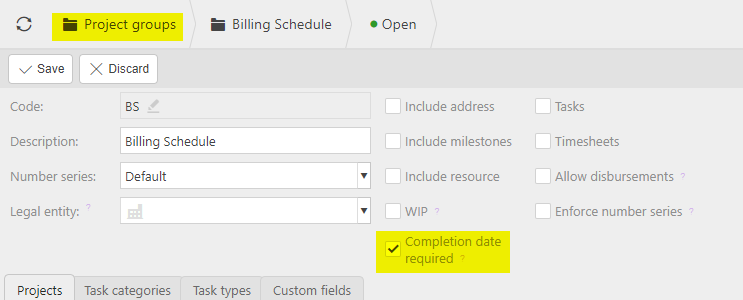
... then Completion date is mandatory.
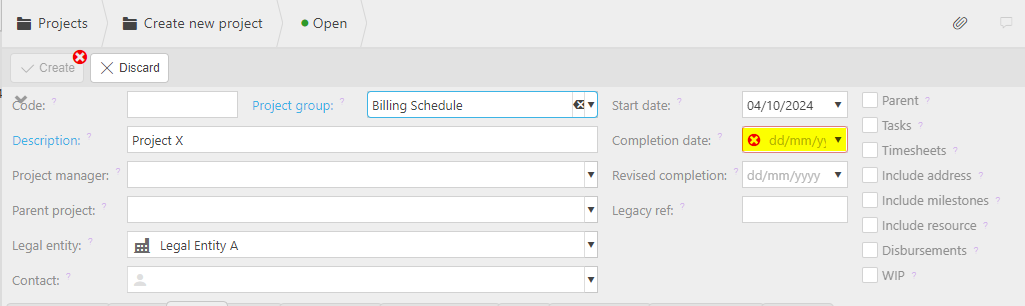
Otherwise, a date can be manually entered or left blank.
Revised completion: Enter a revised completion date.
Legacy ref: Enter a reference if this project has been used in another system.
Tick the following boxes as required.
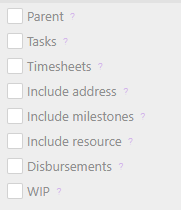
Tip
Hovering over the help icon
 will explain each box.
Note
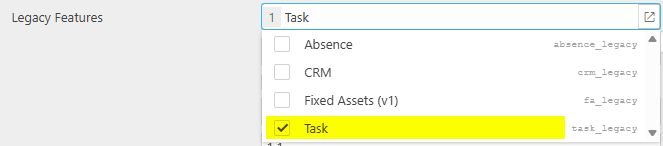
Tasks: This option will only be present if Task is ticked in Legacy Features in Environment defaults
Check the tabs.
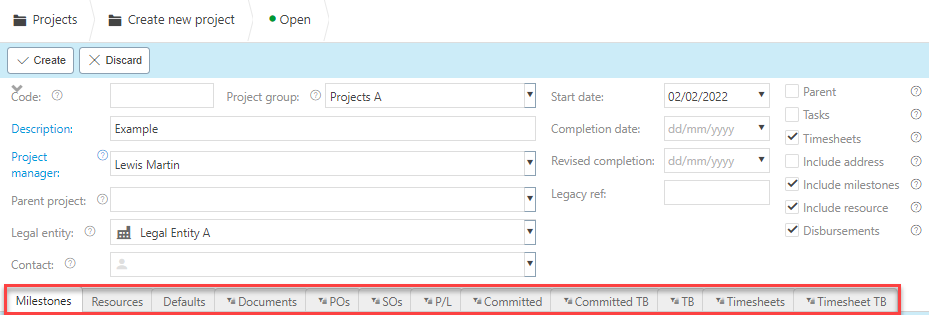
- Milestone
- Resources
- Defaults
- Documents
- PO's
- SO's
- P/L
- Committed
- Committed TB
- TB
- Timesheets
- Timesheets TB
You can add multiple milestones to a project by pressing the  icon, then filling out the selection criteria.

 , then add resources either individuals or groups by selecting them then pressing the single chevron.
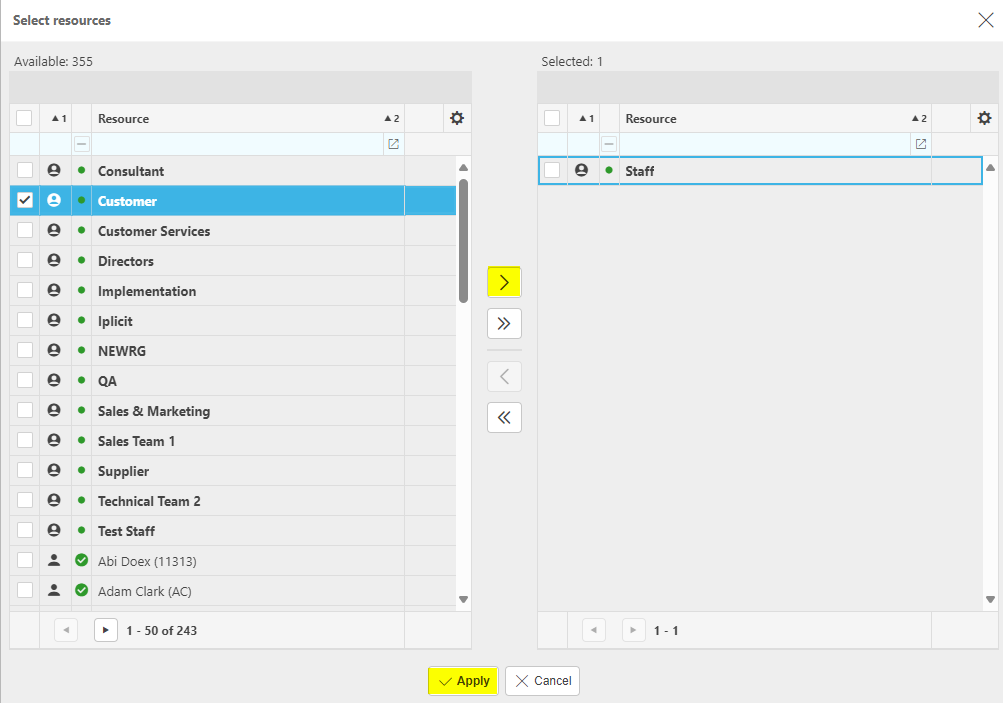


How to Import/Export Projects
Import/Export Projects
For those Customers who create high volumes of projects, there is the option to export and import projects, thus saving time by providing an alternative to manual creation of projects.
Import
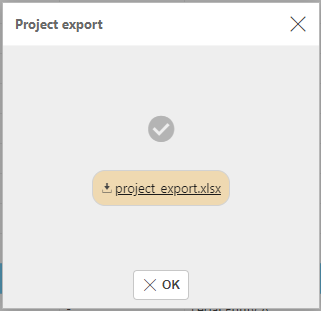
- Once you are happy with your changes, save the excel file then head back to the project finder in the system.
Tip
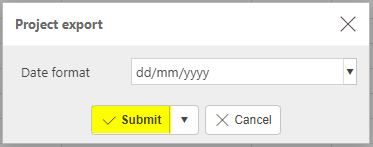
To create an Import file with the correct field names and formatting, Export a file first and save to your external source. Then use this file to add details ready to import.
Press Import.
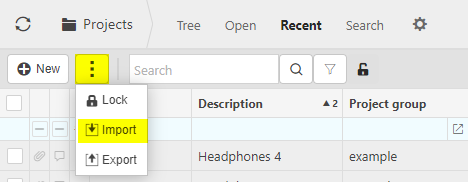
Select the file then press Submit.

Tip
Tick Skip errors to import the file regardless of the errors.
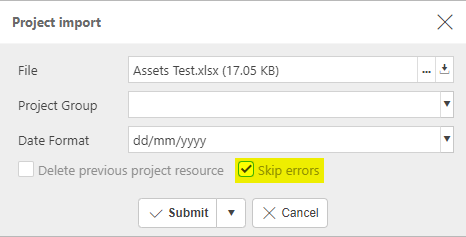
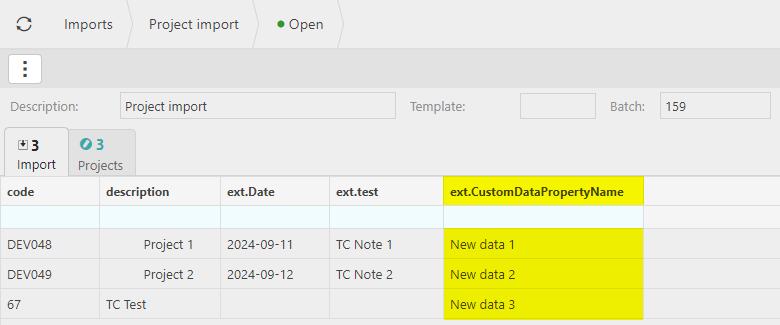
The changes made will be made and your project will now be updated.
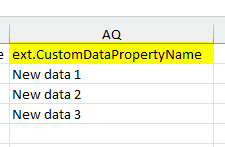
This will include any new Custom fields that were added to the spreadsheet via the above export process.
Warning
iplicit allows a maximum of 5,000 rows in a single Import.
If your Import is too large, an error message will tell you that the Import cannot be processed and will advise you to create smaller Import files.
If the latter is not possible, please contact Customer support.
 icon, then select Export.
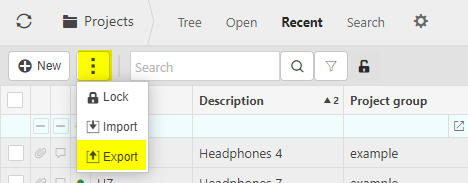
Updated February 2026