FX Revaluations
Foreign Currency Revaluation is a common accounting process for restating the value of your foreign currency balances by comparing the exchange rates at the time of creation of the foreign currency transaction to the rate that applies at the date of revaluation.
Example:
- The following example assumes that GBP is the base currency.
- On 5th March, an invoice was posted for $1400.
- The Exchange Rate between USD and GBP on the 5th March was 1.4 USD to 1 GBP. Therefore, the GBP value of the invoice as at 5th March is £1000 (1400/1.4).
- On the 31st March it is decided to run a revaluation and at this time the exchange rate between USD and GBP is 1.273.
- Based on this the GBP value of the above invoice should now be £1100 (1400/1.273).
- The revaluation routine will therefore restate the GBP value of the invoice in the accounts accordingly and create a Journal to account for the difference of £100 between the original GBP value of £1000 and the new value of £1100.
- This would typically be posted to an Unrealised Currency Variance account in the profit and loss section of the accounts.
How to view FX Revaluations
Viewing FX Revaluation
Either select FX Revaluations in the Period end section in the Main area of the pulse menu -

Note
This is an example screen shot of the pulse menu.
Position of the menu items within the pulse will vary according to available options and dependant on personal screen resolution.
or from the Main Menu select Period end then FX Revaluations -

or enter FX Revaluations in the Quick Launch Side Menu.

This will then show the FX Revaluations on the system where normal customisation of Sets can be used. Also, depending on User roles, the My/All option will be showing.

Tip
To modify the columns displayed, select
 on the top right of the page, then tick/untick the information you want to hide or display.
What are the requirements and settings for FX Revaluation
Requirements and Settings for FX Revaluation
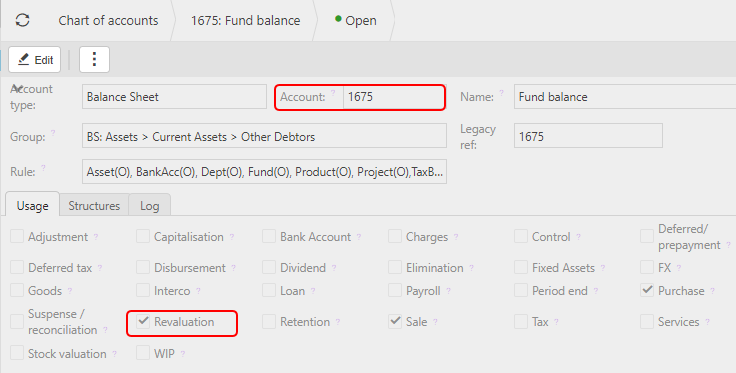
In Chart of Accounts select the accounts where revaluation box is ticked.

Then selecting one of those accounts check that the Revaluation box is ticked - this should be the same for any Balance Sheet accounts for Revaluation.
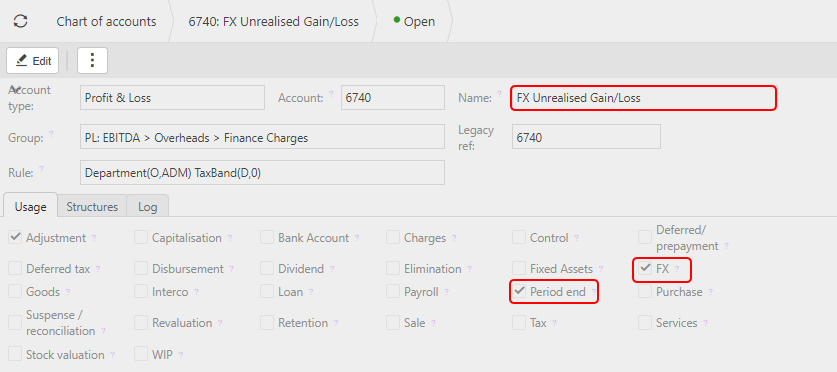
Similarly, you will need to check any FX unrealised accounts.

Then selecting one of those accounts check that the Period end and the FX boxes are ticked - this should be the same for any FX unrealised accounts for Revaluation.
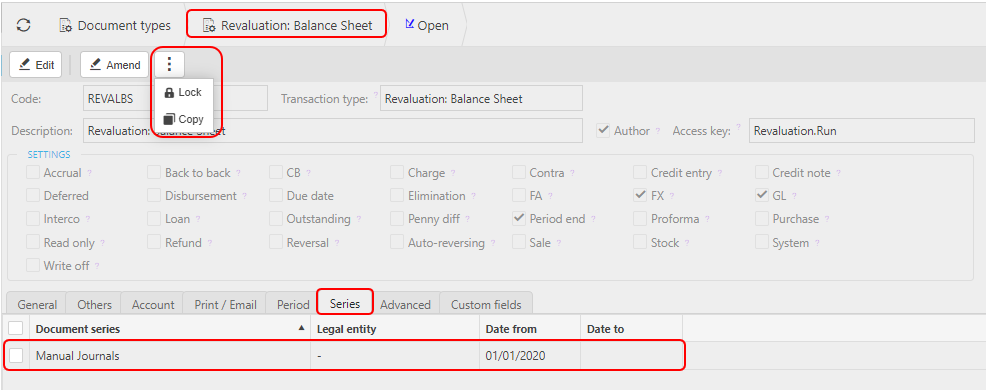
Go to Document Type and filter on Revaluation.

Select Revaluation Balance Sheet and confirm it is Unlocked - (selecting the
 button will show Lock/Copy) and that it is related to a Document series.
Check the Environment settings via the Environment defaults, filtering by Revaluation.
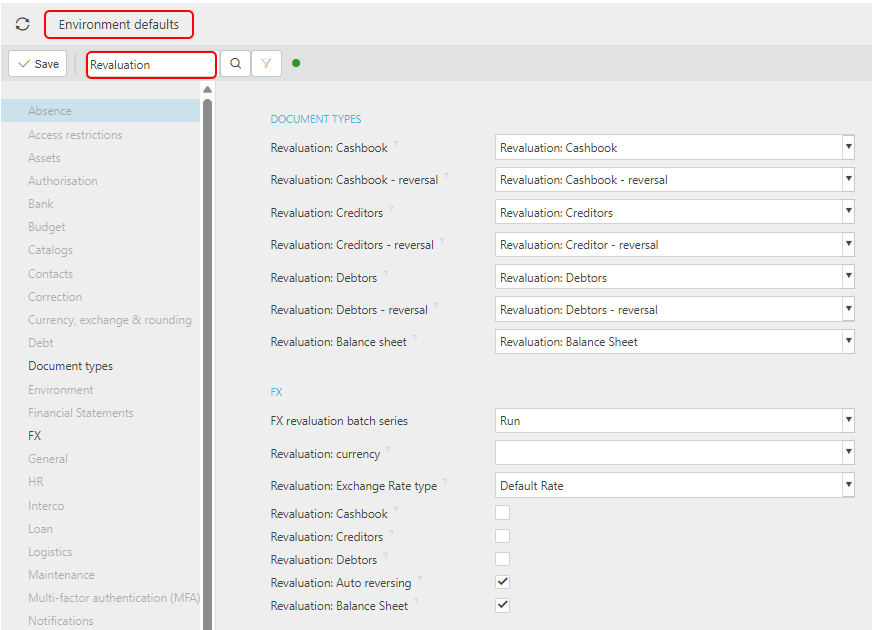
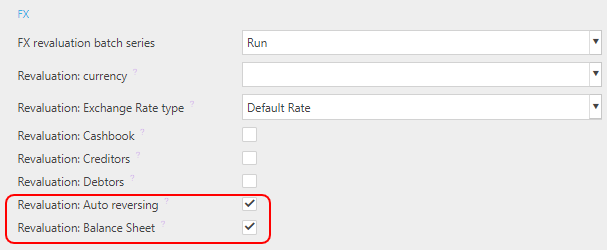
Select the appropriate boxes if you want to default the Revaluations balance sheet when you open the Revaluation. The same applies for Revaluation: Cashbook, Revaluation: Creditors and Revaluation: Debtors.
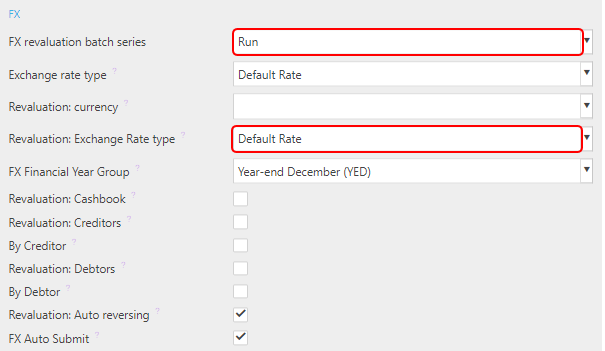
Confirm that FX revaluation batch series is entered and that your default exchange rate is entered in Revaluation: Exchange Rate Type.
Check that Revaluation: Balance sheet is set to the Balance Sheet that you previously specified.
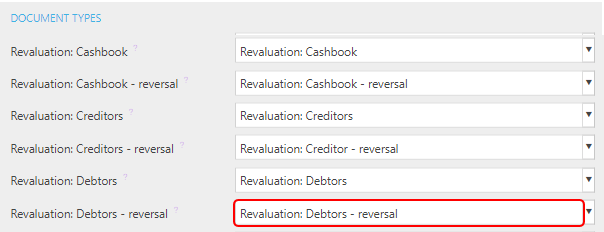
Press Save.
On Chart of Accounts, check FX and Period end boxes are ticked for FX Unrealised.
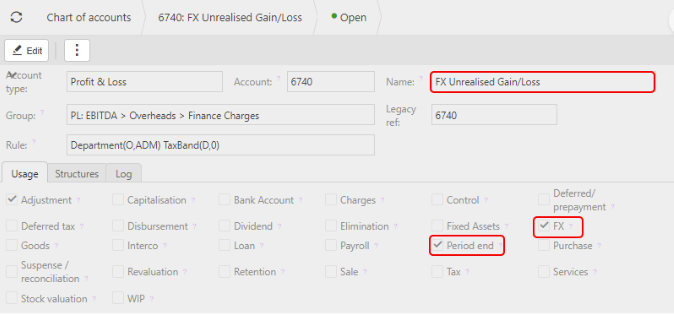
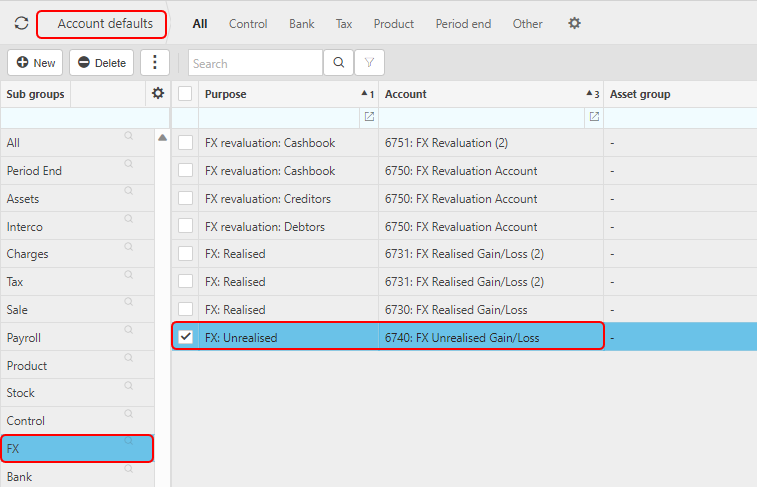
Go to Account defaults, choose FX and make sure that FX: Unrealised is ticked.
Check the User permissions are set correctly. In User Accounts, select user and check they have the appropriate User Group, for example QA Revaluation.

And then check that that User Group has the correct access permissions.
Note
The following user permissions will be required depending on the functions required.
If you just want to use it and you want to be able to do Correction, Post, Delete and Enter, then you just need to put the User into the Revaluation Advanced entry that also includes your evaluation run.
If you want to do all of the Setup, then you need to make sure that the User has Account defaults, Account Admin doctype, Admin Environment settings.
How to run a FX Revaluation
Process for running a Revaluation
Select FX revaluation from one of the options as shown above in Viewing FX Revaluation.
Click on the Revaluation button to open the menu to start the revaluation process.

Complete the parameters for the FX Revaluation you wish to run.
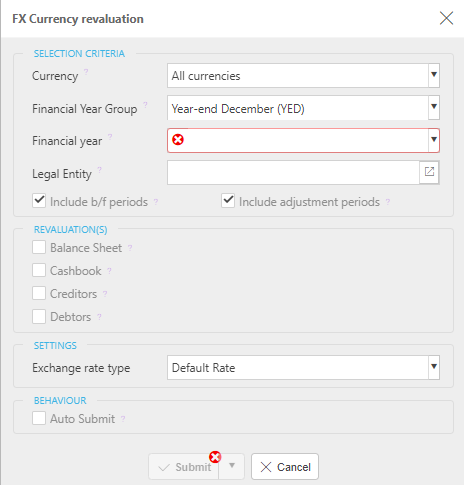
Currency - select an individual Currency or select All currencies to include all foreign currencies.
Financial Year Group - select the financial year group that applies to the legal entities that the revaluation is to be run for.
Financial Year - select the Financial Year that the revaluation is to apply to. The drop-down selection will only list the financial years applicable for the Financial Year Group selected.
Once this has been entered, a field opens in Settings - see Posting period option below.
Period to - select the period up to which the revaluation is to be run for. Only open periods related to the financial year selected will be available for selection. The revaluation will run against balances up to the end of the period selected using the Exchange rate in place on the last date of the period selected.
For example, if the December 2020 period was selected the Exchange rate used would be the rate applicable on the 31/12/2020.
Note
The Period to box only becomes available once the Financial year box has been completed.
Legal Entity - select the legal entity that the revaluation is to be run for. Only legal entities related to the Financial Year Group selected will be available for selection. If the revaluation is to be run for all legal entities within the Financial Year Group selected this field can be left blank.
Note
For fields,
 denotes a single entry,
  denotes possible multiple entries.
Include b/f periods - tick this box if the revaluation is to include b/f periods in the revaluation.
Include adjustment periods - tick this box if the revaluation is to include adjustments periods in the revaluation.
Balance Sheet - tick this checkbox if you wish to revalue the Balance Sheet FX items - i.e. non-Cashbook, Debtors or Creditors.
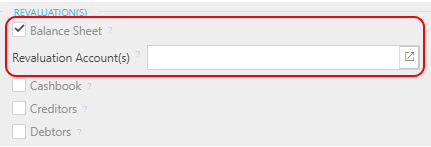
If this is ticked it will enable Revaluation Account(s) box to allow selection of Account(s) for Balance Sheet Revaluation.
Note
For fields,
 denotes a single entry,
  denotes possible multiple entries.
Cashbook - tick this checkbox if you wish to revalue the Cashbook.
Creditors - tick this box if the revaluation should include creditors in the revaluation.

If this is ticked it will enable another tick box to allow selection of whether the revaluation journals are to be split be individual creditors.
If this is ticked an individual journal for each creditor being revalued will be created for the revaluation adjustment related to that creditor.
If this is left unticked one journal will be created for the total revaluation adjustments required for all the creditors being revalued.
Debtors - tick this box if the revaluation should include debtors in the revaluation.
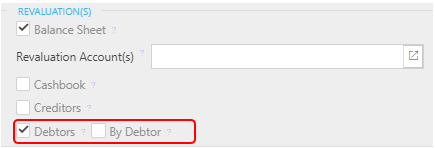
If this is ticked it will enable another tick box to allow selection of whether the revaluation journals are to be split be individual debtors.
If this is ticked an individual journal for each debtor being revalued will be created for the revaluation adjustment related to that debtor.
If this is left unticked one journal will be created for the total revaluation adjustments required for all the debtors being revalued.
Note
In the Environment defaults the FX defaults can be set so the Revaluation options will be ticked automatically.
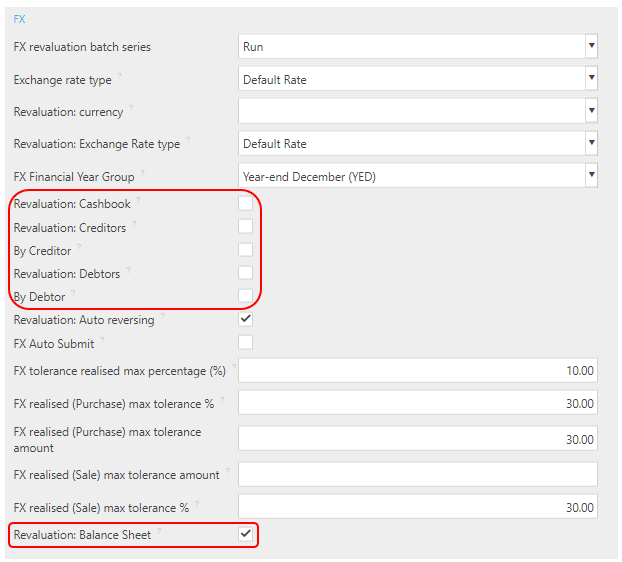
Exchange Rate type - select the Exchange rate type that is to be used for the revaluation.
- As an example, it might be that typically the default rate is used for everyday transactions in the system, but for the revaluation it is required to use the Company rate. This option allows you to select a different rate type than the one used for transactions if required.
Posting Period - select the period that the revaluation journal(s) are to be posted to as part of the revaluation routine. This would normally be the same as the period the revaluation is being run up to, but a different period can be chosen if required. However, note that it is only periods after and including the period selected in the Period to box that can be selected.
Reversal Posting Period - select the period that the revaluation reversal journal(s) are to be posted to as part of the revaluation routine. This would normally be the period directly after the Posting period above, but a different period can be chosen if required. However, note that it is only periods after the period selected in the Posting Period that can be selected - this reversal posting period field doesn't appear for Balance sheet, but does appear for the other options.
Note
The reversal journal will only be created if the Auto reversing tick box is selected in Environment defaults. (covered in more detail below).
Auto reversing - an auto reversing journal will be created to reverse the revaluation journal in a period after the revaluation journal is created (decided by the period selected in the reversal posting period box above).
Auto Submit - tick this box if you want to automatically Submit the resulting Revaluations for authorisation.
- If this is unticked the revaluation will be posted as a draft document and can then either be submitted or abandoned afterwards as required.
Click on the Submit button to process the revaluation.

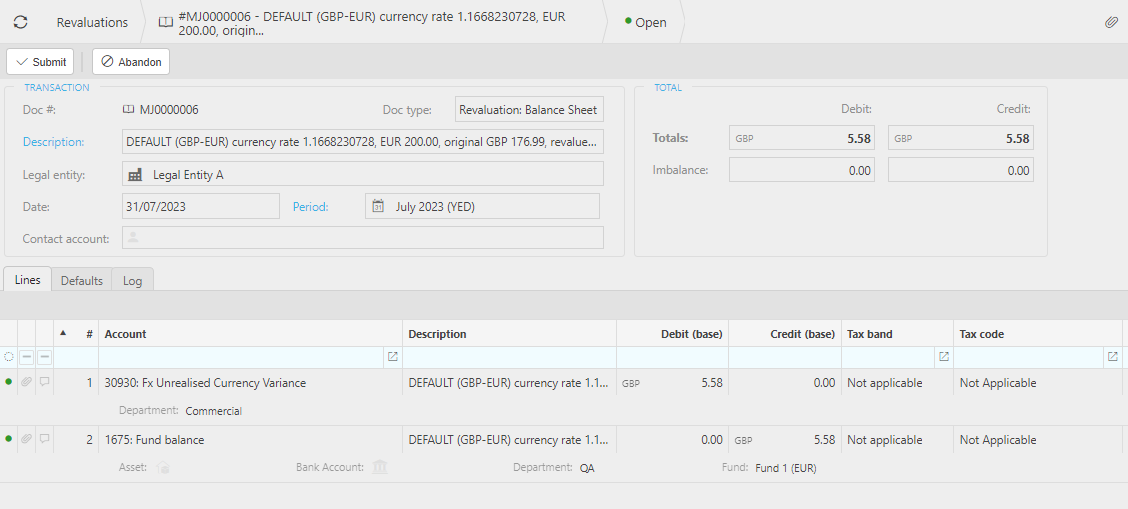
The Revaluation journal(s) and associated Reversal journal(s) (if applicable) will then be created, examples of which are shown below:
Revaluation: Balance Sheet -
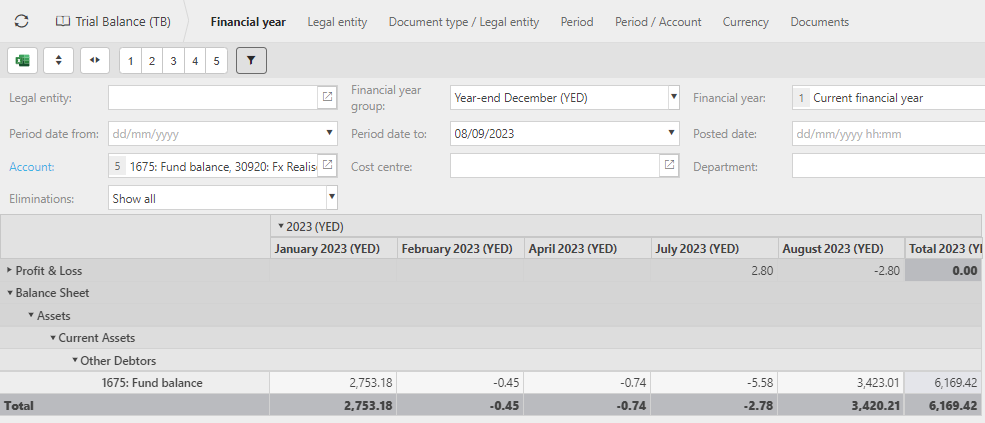
Once these Revaluations are Submitted they will show on the Trial Balance - the example below shows that there were Balance Sheet Revaluations submitted for February, April and July.
Revaluation: Creditors
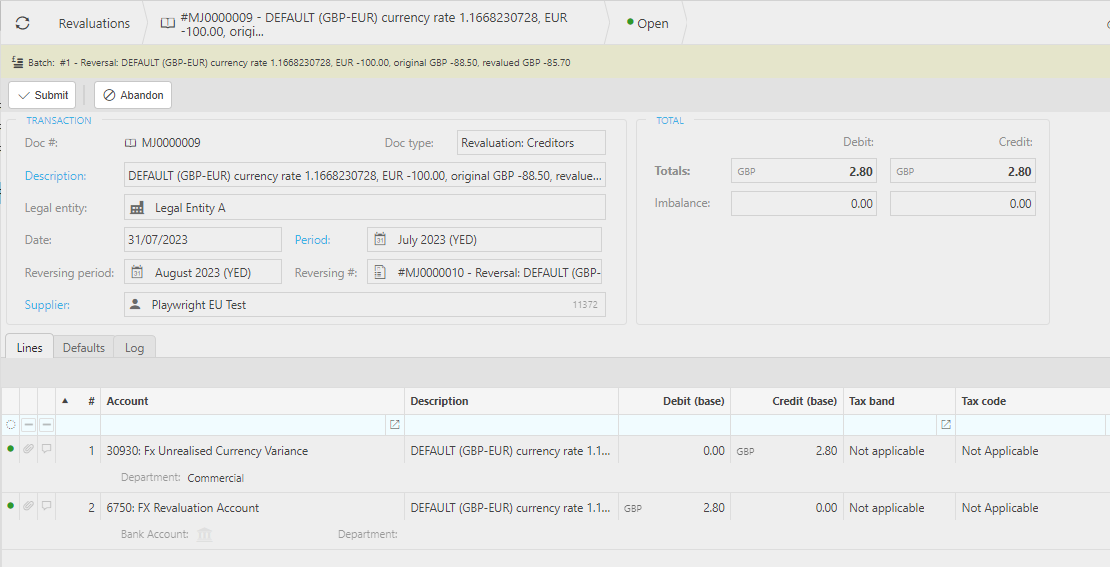
with its associated Reversal journal(s).
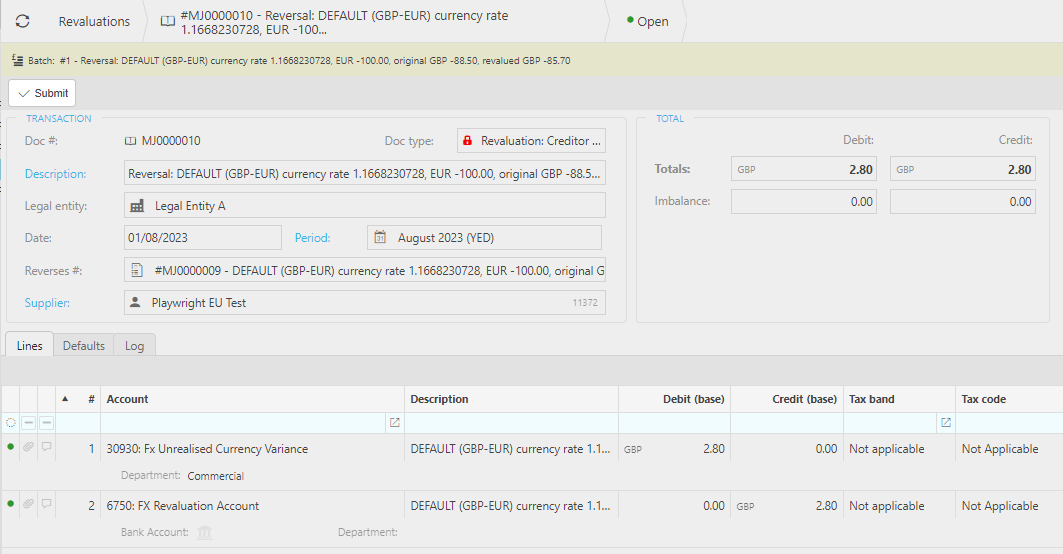
Revaluation: Debtors
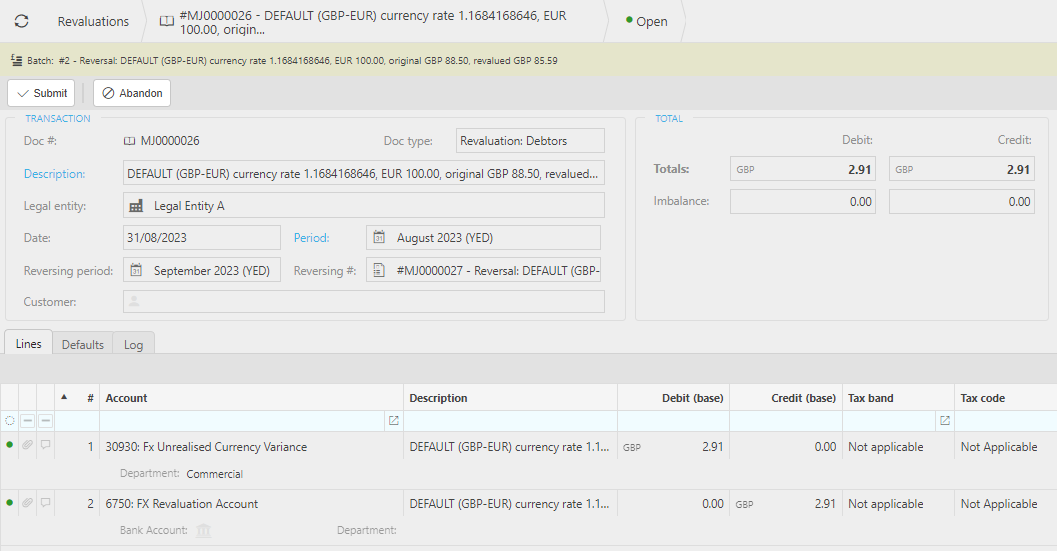
with its associated Reversal journal(s).
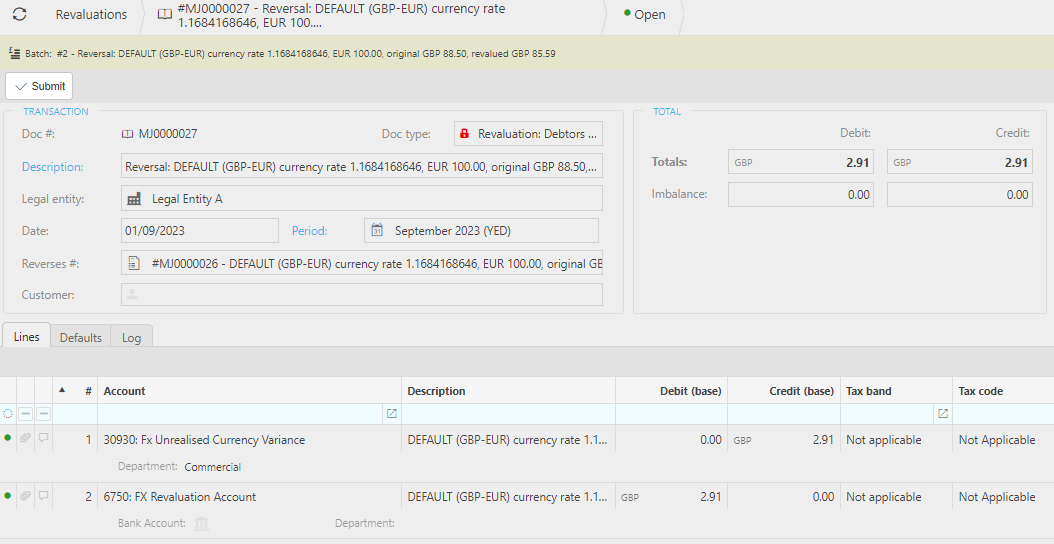
Revaluation: Cashbook
Note
The description field on the journal shows important information about how the value on the revaluation journal was calculated.
It shows the Exchange rate used, the value in foreign currency, the original value in base currency and the revalued value in base currency.
The value of the revaluation journal will be the revalued base value less the original base value.
Note that although the information is condensed on the description line you can hover over the description field with your mouse, and it will show all the above information in a box as per the screenshot below.

How to Reverse FX Revaluation
Reversing FX Revaluation
Where there are Revaluation documents and the User has User roles for Revaluation reversal - e.g. All access or REVALREV.
Select a Transaction that has been successfully posted (either highlight on the list or open the Transaction).
Select the
 icon and select Reverse.
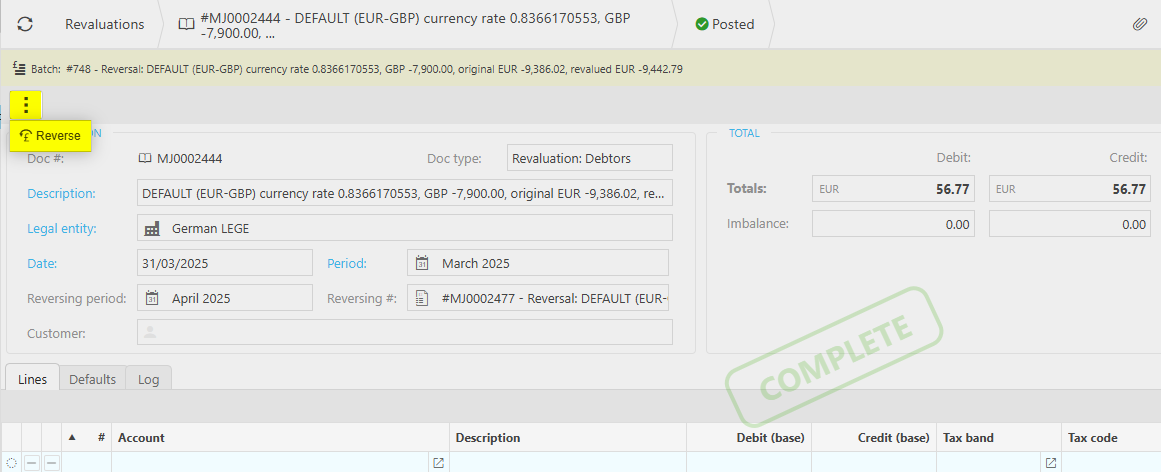
Enter the Reason for the Reversal, then select Submit.
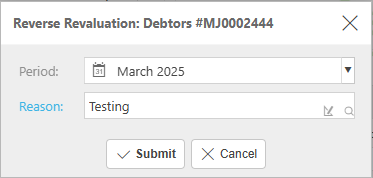
This will Reverse both the Source document and the Reversing document.
Updated December 2025