Asset register
An Asset Register is a complete listing of a business' or an entity's physical resources. This can be used to record details of all assets and include date of purchase, ID numbers, location, supplier, original cost, depreciation rate etc.
The depreciation is determined by the depreciation method that is set in the Asset group.
There are various methods of depreciation.
- Straight line
- Reducing balance
- Double declining
- Non depreciation
- Non-capital
Further details can be found in Asset Depreciation Methods.
How to view Assets
Viewing an Asset
Select Asset from either the pulse menu -

Note
This is an example screen shot of the pulse menu.
Position of the menu items within pulse will vary according to available options and dependant on personal screen resolution.
or from the Main Menu select Asset then Assets -

or enter Assets in the Quick Launch Side Menu.

Highlight the Asset to view, double click to open.
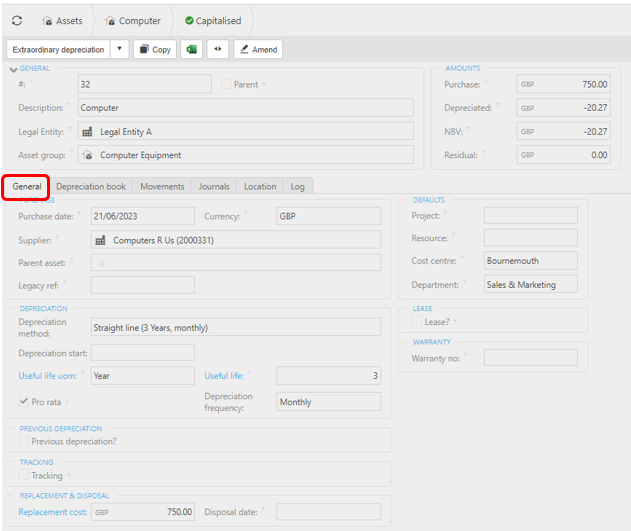
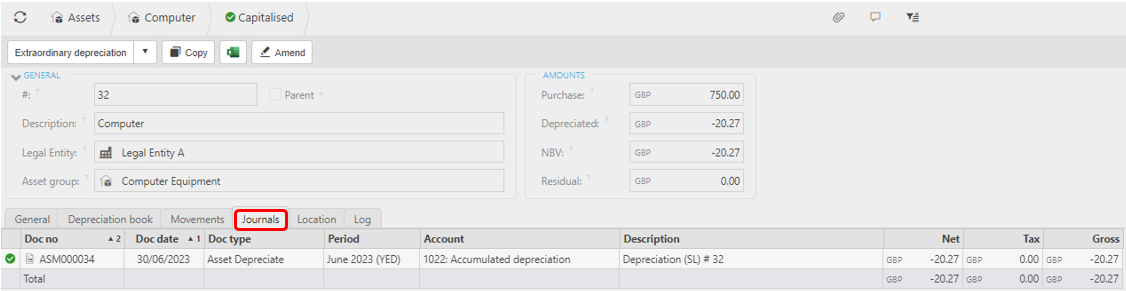
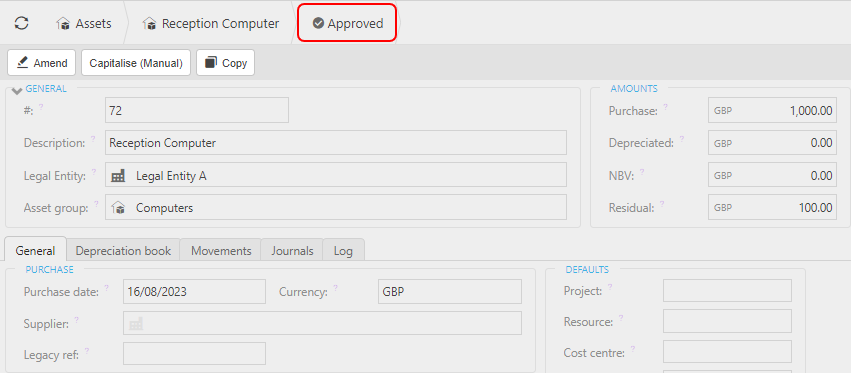
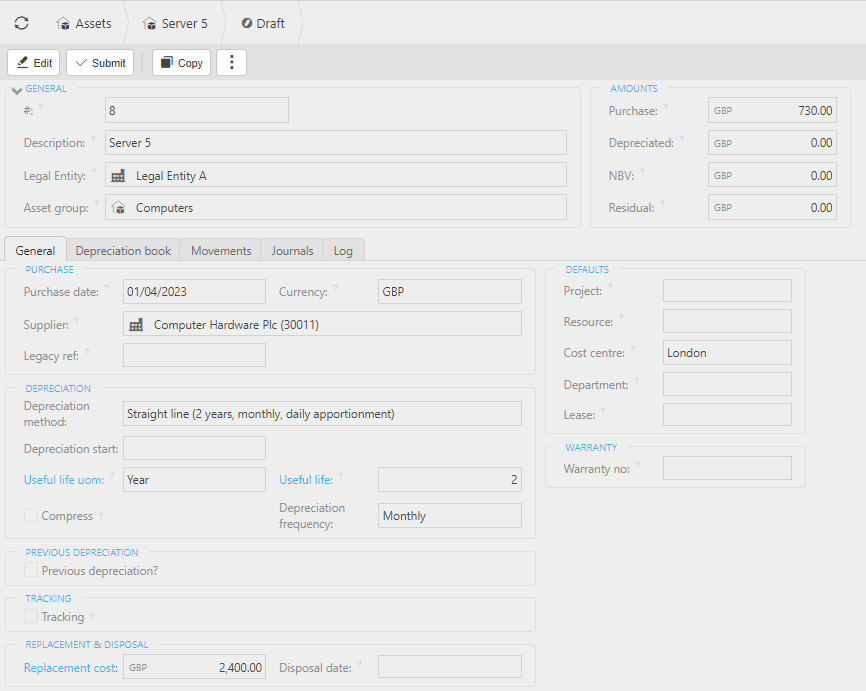
The Amounts tab shows the values associated with the Asset.
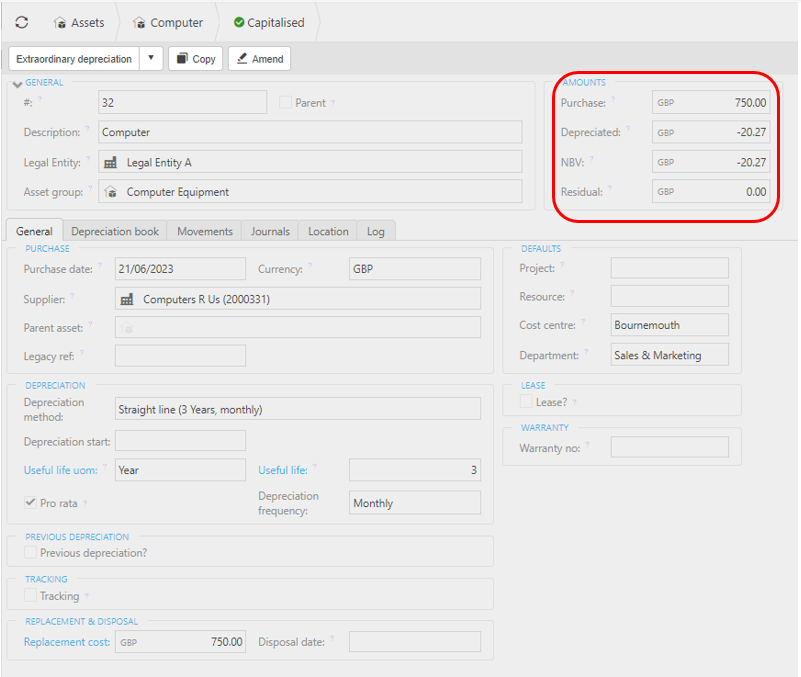
The General tab shows details of Asset's purchase dates, supplier, present and previous depreciation details, tracking and if it is leased.
Note
If the Asset was capitalised automatically via a document, then a Source section will show.

- Source #: Created using the Doc ID and Description. If the description was left blank on the original document, then Doc ID is shown.
How to create Assets
Creating an Asset
Note
If you have Assets from a previous system, you can import these Assets into your iplicit system. Further details on how this can be done are in the Import/Export Assets section below.
Select Assets from one of the options as shown above in Viewing an Asset.
Press New.
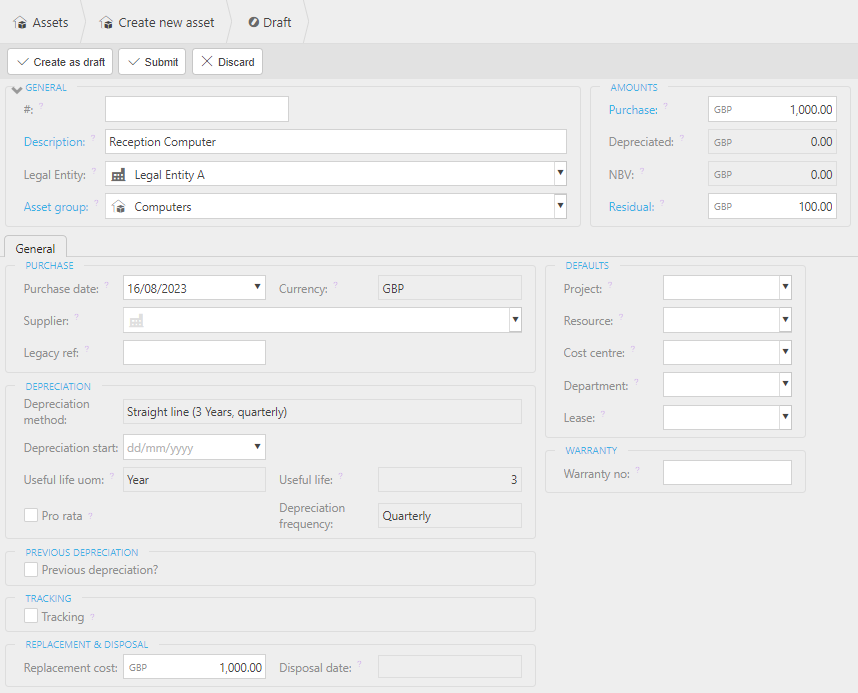
Enter the Asset details as required -
In the General section enter -
- Asset ID - unique code or if you leave blank a number will be assigned automatically upon save.
- Description - description to describe the Asset.
- Legal Entity - the Legal Entity that owns the Asset - selected, via the dropdown box, from the previously created Legal Entities.
- Asset Group - the Asset Group that the Asset belongs to. This will show a default value but can be overwritten for the individual asset.
In the Amounts section enter -
- Purchase Cost - the original cost of the Asset.
- Residual Value - the expected value of the Asset after it has fully depreciated (end of its useful life). Also known as Salvage value.
Tip
The General and Amounts sections can be minimised by selecting the
 symbol on the top left of the General section
  .
.Selecting the resulting
 symbol will maximise the details again.
Under the General Tab -
In the Purchase section enter -
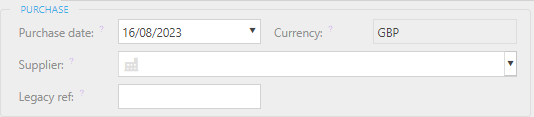
- Purchase Date - purchase date of the Asset.
- Supplier - select previously created supplier from the dropdown box.
- Legacy ref - Asset reference that existed in another system and is useful in recognising an asset when comparing and/or migrating from/to another system.
In the Depreciation section enter -
-
This option will only show and be populated if the Depreciation Method in Asset Group is NOT fixed, therefore allowing you to change the method.
Note
Any locked depreciation methods will not show in the list.
As a default, all 4 Weekly depreciation methods will be locked and will need to be unlocked if required.
If the Depreciation Method in Asset Group is fixed, then it will still appear, but you are NOT able to make a change as it will be locked. They don't appear when the depreciation method is set to non-capital and non-depreciating.
Note
Depending on how the Depreciation methods were originally created, only fields that can be edited will be visible.
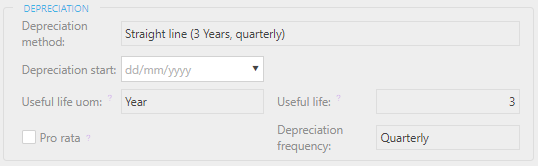
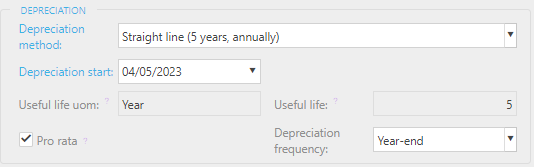
Straight line
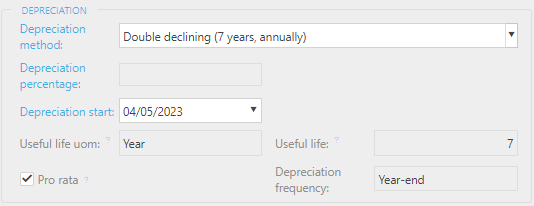
For Straight line - start date, useful life unit of measure (if not already specified), Pro-rata and frequency.
This also includes 4-weekly which will result in 13 equal periods during a year.
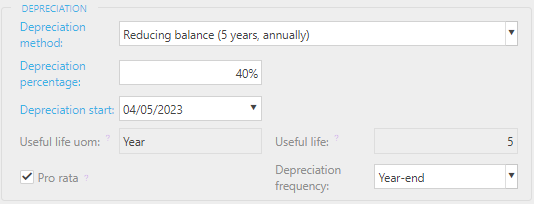
Reducing balance
For Reducing balance - change percentage (must be >=5%), start date, useful life unit of measure (if not already specified), Pro-rata and frequency.
Double declining
For Double declining - change start date, Useful life unit of measure (if not already specified), Pro-rata and frequency.
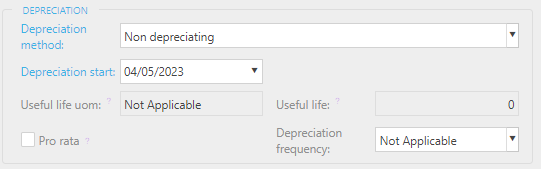
Non depreciating
For Non depreciating - change start date only.
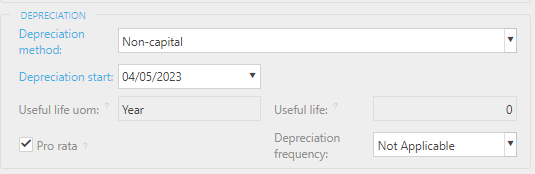
Non-capital
For Non-capital - change start date.
Depreciation start: This date must be after the Purchase date - leaving this field empty will assume that the Purchase date will be the depreciation start date.
If you enter an invalid date, an error will show.
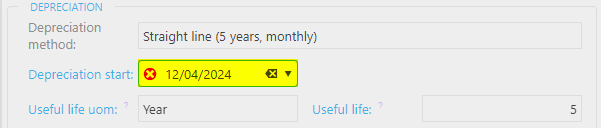
The error message will be -
- Depreciation start date cannot be before purchase date.
In the Previous depreciation section enter -
If the Depreciation revised start date differs from the Purchase date or Depreciation start dates entered above, tick the Previous depreciation option.

The Depreciation revised date must be after the Depreciation start entered previously, or greater than the Purchase date if the Depreciation start date is blank.
If you enter an invalid date, an error will show.

The error message will be either -
Revised depreciation start date cannot be before depreciation start date.
or
Revised depreciation start date cannot be before purchase date.
In the Tracking section enter -
If the Asset has any tracking details you wish to record -

In the Defaults section enter -
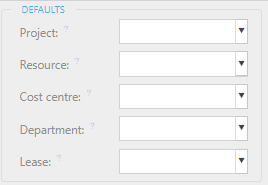
Project - this project will be the default on postings related to the Asset.
Resource - the Resource that is in possession of the Asset e.g. the Asset user.
Cost centre - this cost centre will be the default on postings related to the Asset.
Department - this department will be the default on postings related to the Asset.
Lease - the lease reference, if leased, using the dropdown arrow displaying all the available Asset Leases that have been setup.
What3words - add the what3words location of the asset in the format (alfa.bravo.charlie).
Note
What3words is a geocode system that provides a simple way to mark a location. It divides the world into 3-meter squares and assigns each square a unique combination of three words. (see what3words.app).
Fund: Allows selection of one fund from a drop down list showing the funds as set-up in Account defaults.
Fund type: Allows selection of one fund type from a drop down list showing the fund types as set-up in Account defaults.
If the Asset has a warranty number -

Select Submit to save Asset.

Opening the Asset just created should then show that it has been created and Approved.
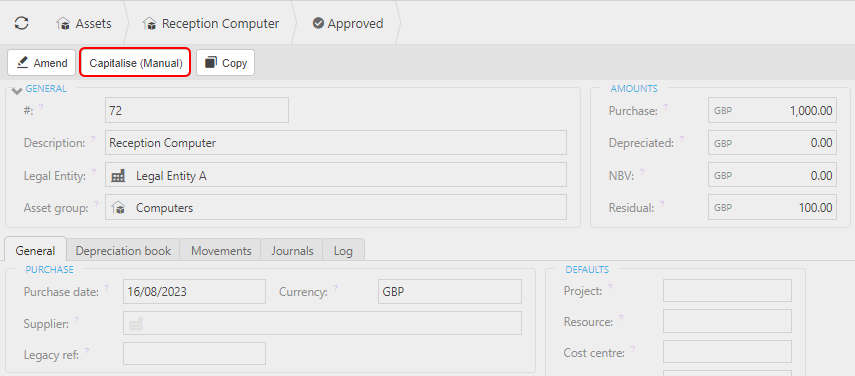
You now have the option to manually capitalise this Asset by selecting the Capitalise (Manual) option, instead of waiting for Auto capitalisation as defined in Asset Capitalisation Rules.
How to edit Assets
Editing an Asset
Select Assets from one of the options as shown above in Viewing an Asset.
Highlight the Asset to edit, double click to open.
Depending on the state of the Asset, different fields will still be available to edit.
For an Asset only in Draft state, select Edit to be able to edit all fields.
Once finished, either select Save to save in draft state again, or select Submit to approve the changes.
For an Asset in Approved state, select Amend.
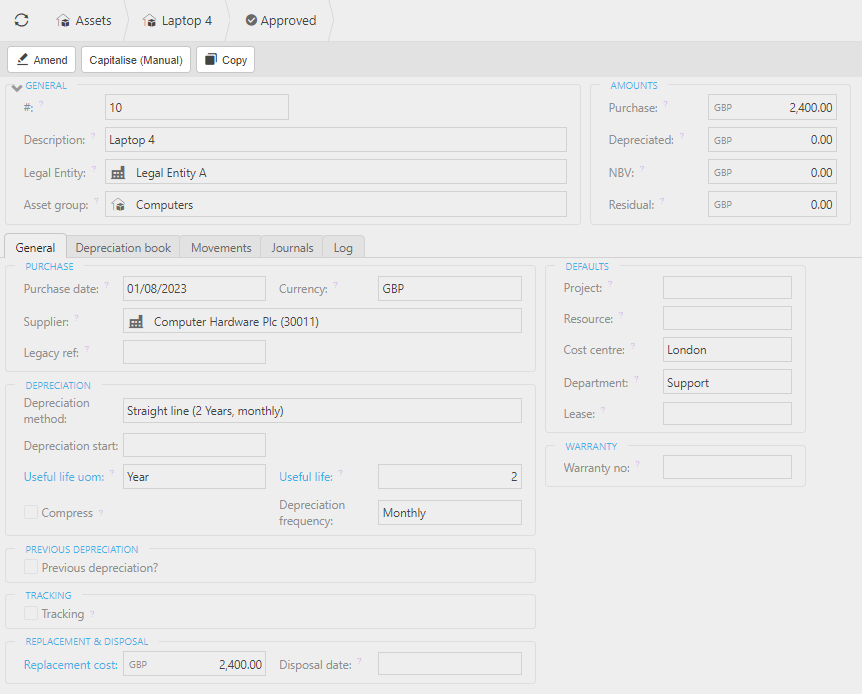
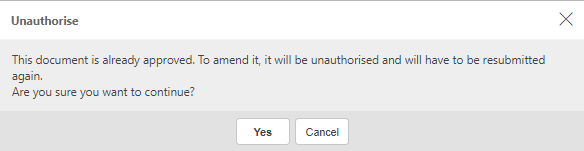
A message pops up as the Asset will be Unauthorised.
The Asset is now in Draft state and all fields can now be edited.
Once finished, either select Save to save in draft state again, or select Submit to approve the changes.
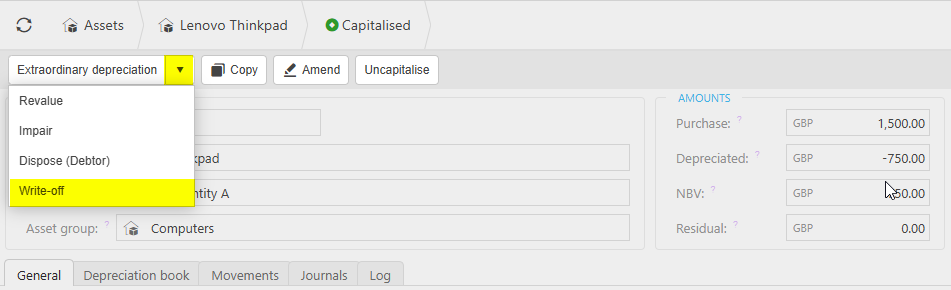
For an Asset that has been Capitalised, you have two options -
Selecting Amend ...
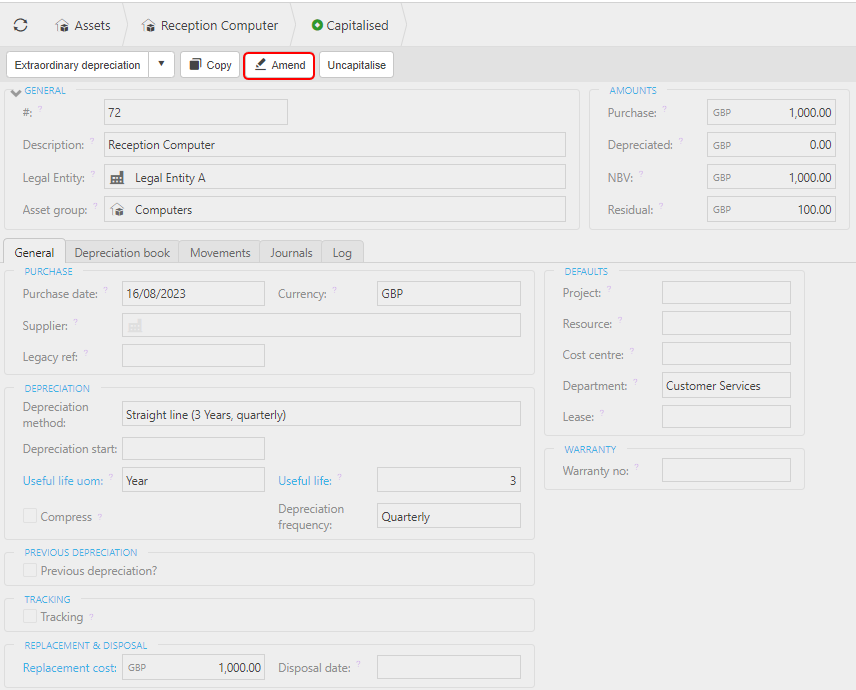
then only the following fields can be edited -
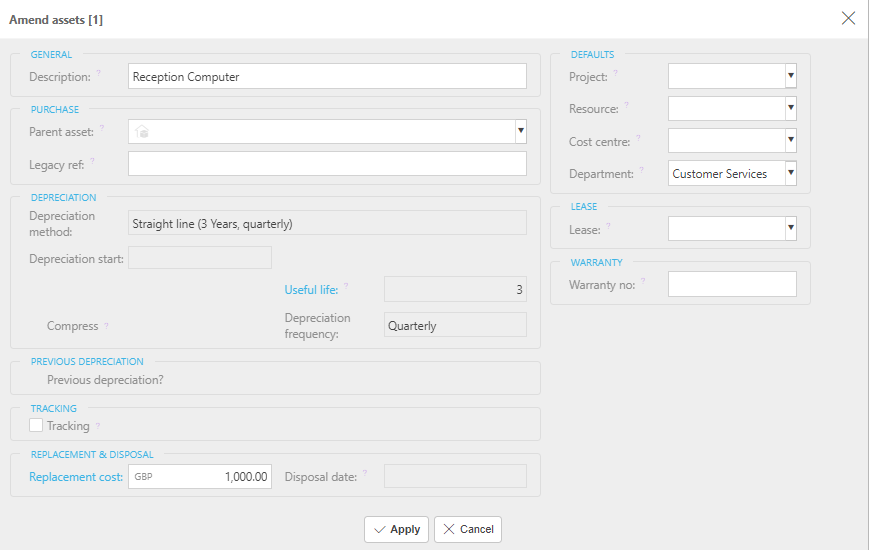
If adding the Asset to a lease, use the dropdown arrow displaying all the available Asset Leases that have been setup.
Once finished, select Apply.
Selecting Uncapitalise ...
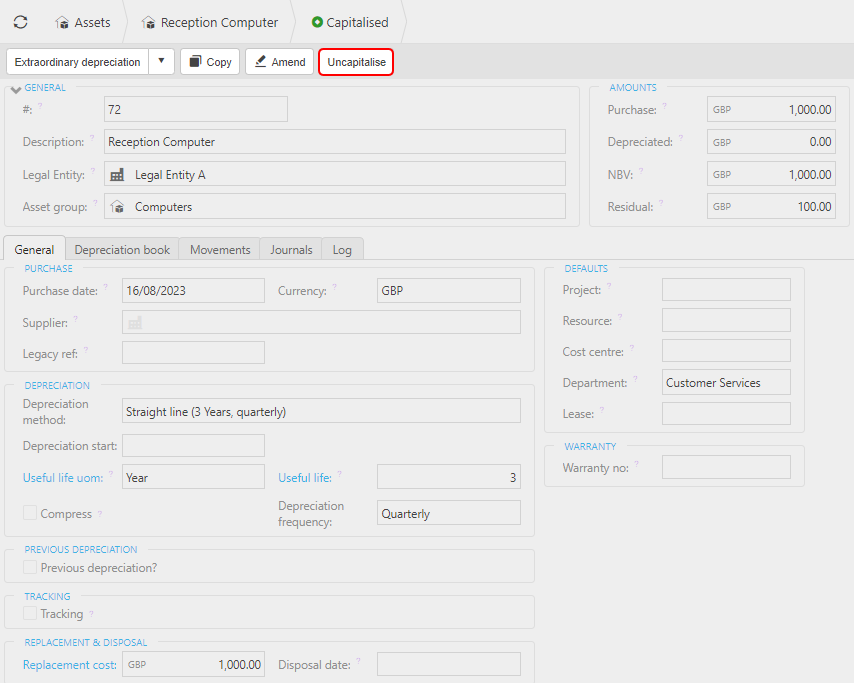
... will prompt you to continue.
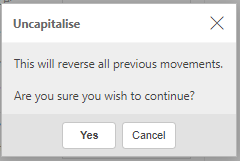
Confirming the Uncapitalise, will then reverse any movements and journals that have been created and returns the Asset to a draft state.
How to Import/Export Assets
Import/Export Assets
To Import Assets from an external spreadsheet follow these User Guides Import/Export Assets.
Use the same notes if you want to Export your Assets to a spreadsheet for use in external reports.
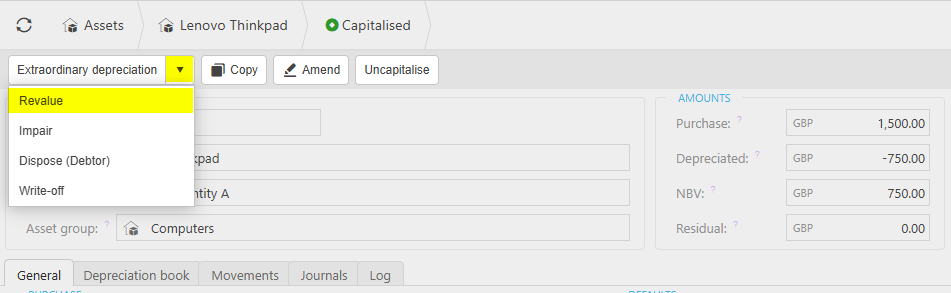
How to Move/Dispose Assets
Moving/Disposing Assets
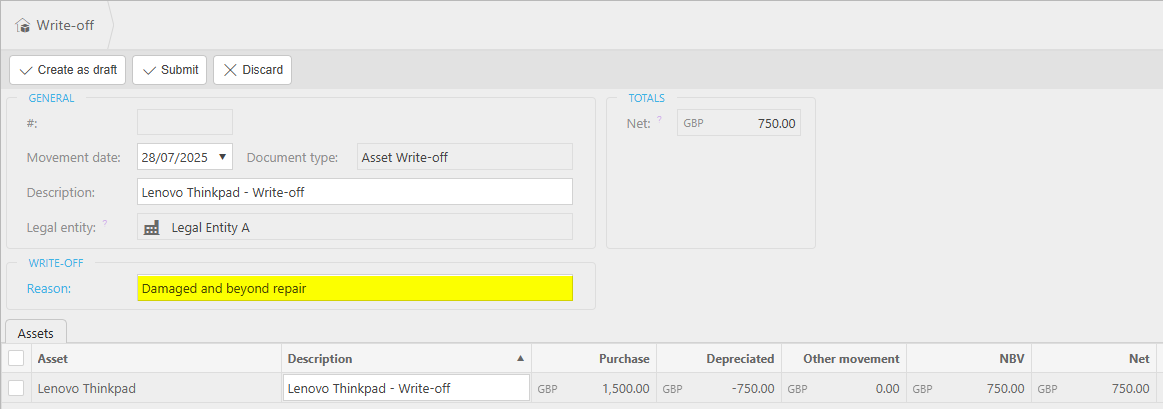
For an Asset to have any Movement against it, it must be Capitalised - that is it must be stated on the Balance sheet as an Asset - See step 6 in Creating an Asset above.
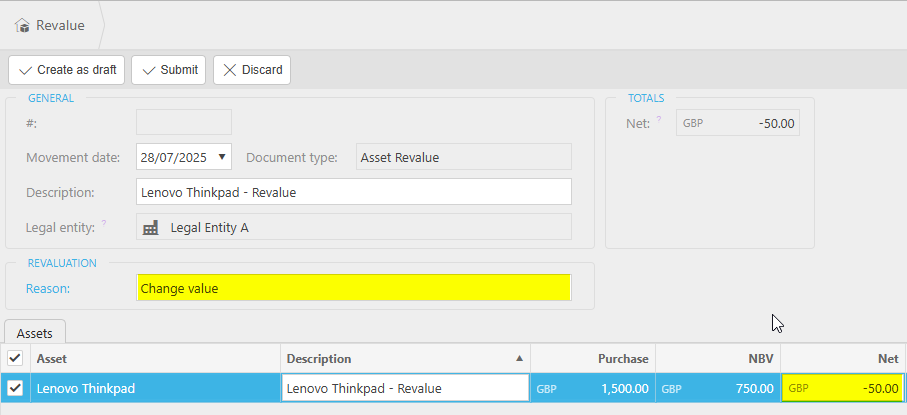
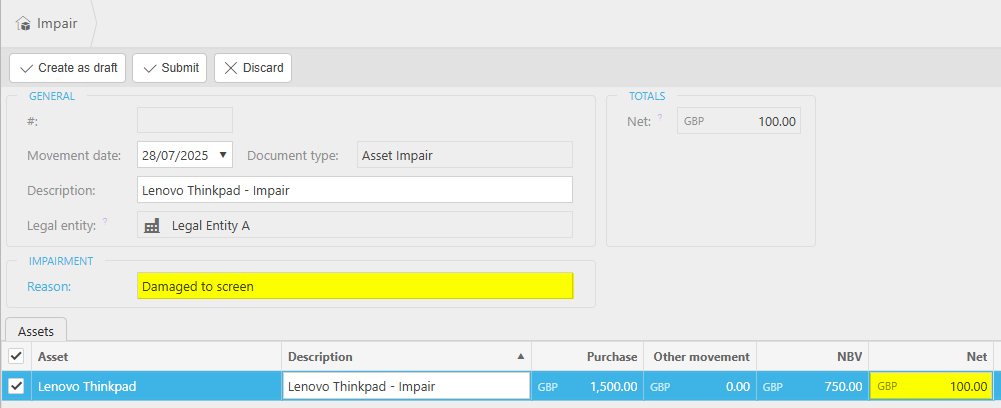
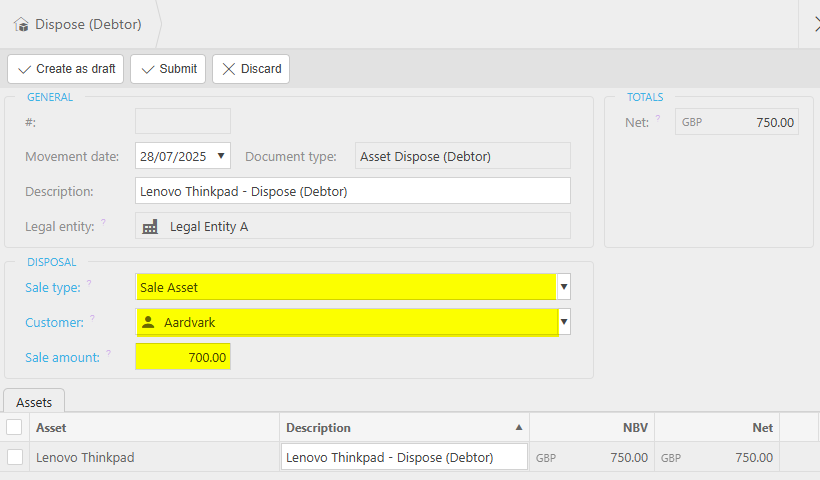
The different options are -
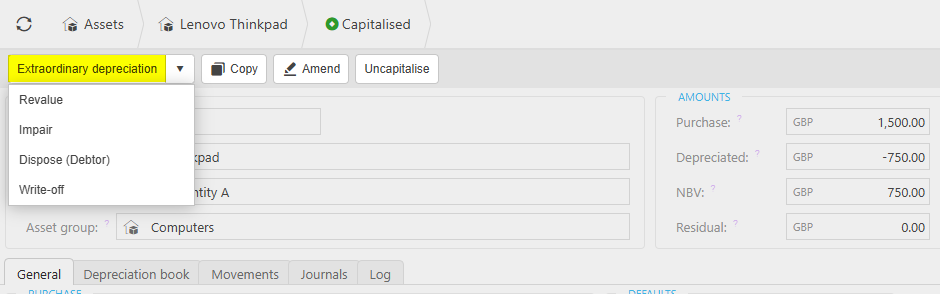
Adding an extra depreciating value.
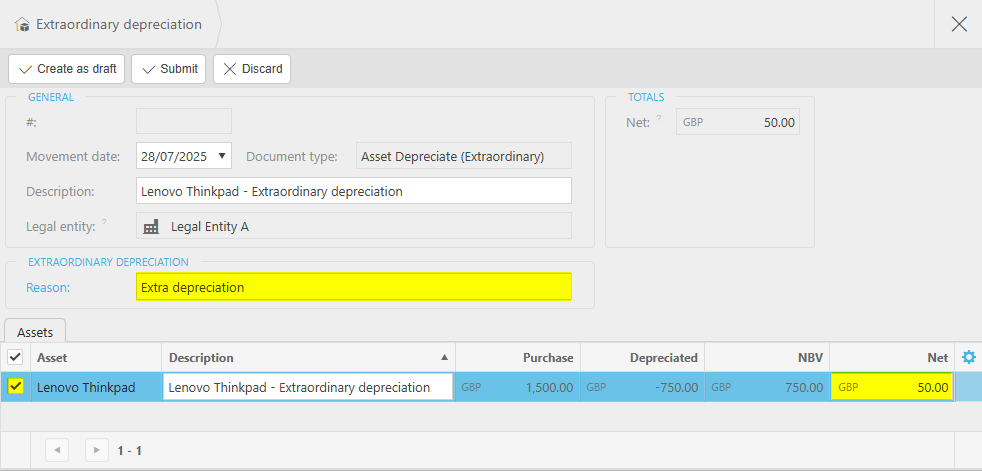
Enter the Reason for the extraordinary depreciation.
Enter an Extraordinary depreciation net amount (positive amount).
Note
This will now repopulate the depreciation book because the Asset has less depreciation value.
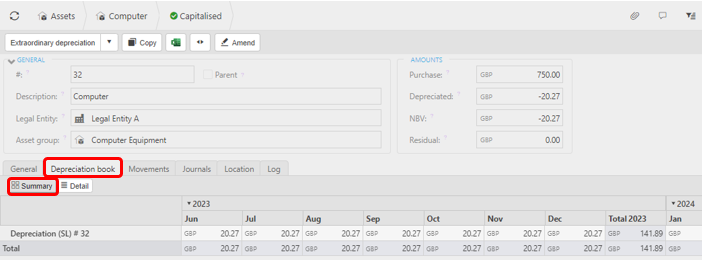
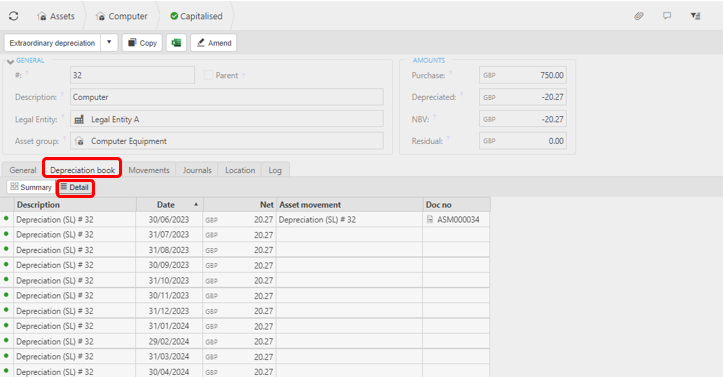
See Depreciation book tab in the Viewing Asset User Guide.


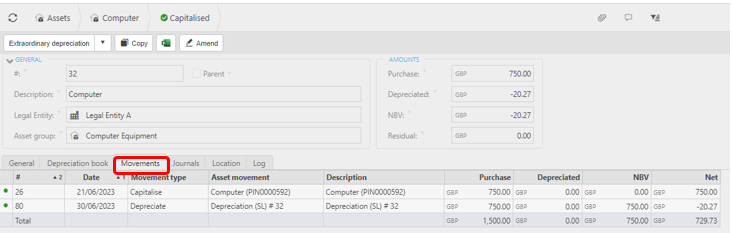
See Asset Movements for Asset movement details.
Updated August 2025