Bank Feed
Bank Feed is a way to automatically import bank transactions from one Bank Account to another. To be able to process data you consent to allow your bank to securely share data with iplicit via Open Banking. At the moment, iplicit are using the following providers to connect the bank accounts.
Yodlee - which only serves UK Banks
Yapily - serving European Banks
More providers will come on board as iplicit moves into other geographical areas.
Tip
The Bank feed feature must be explicitly activated for each environment. Speak to the Customer Services team if you wish to use Bank feeds and they will activate it for you.
To be able to import bank transactions and subsequently create and populate bank statement(s), the process is broadly as follows:
Connect each Bank account.
Link each connected Bank feed bank account to an iplicit Bank account.
(You can unlink and even disconnect bank accounts in the future if you no longer wish to use them for Bank feeds).
Automatically receive the bank transactions
(Manually refresh of the bank feed can also be performed).
Setup the Scheduler to automatically populate the Bank statement(s).
(Manual Bank Statement population can also be performed).
Tip
The Bank feed feature uses Open Banking. This requires consent from the Customer for the bank feed to be re-authenticated. This is done via re-connect feed.
The screenshot below shows a sample grid of the Bank feed finder.

More Information
iplicit bank account: The bank account shown here is linked with the bank feed.
From Date: This is the date that you want the bank feeds to populate from.
Consent status: This is the status of the bank feed.
Account name: This is the bank account that will be linked with the system.
Account status: This is the status of the connected bank account.
Tip
To modify the columns displayed, select the cog button
 in the top right of the page.
You can then tick/untick the columns you want to see.
Once your columns are displayed, you can 'click & hold' to move them in the table to show in the order you wish.
How to connect a new Bank Feed
Connect a new Bank feed
Select Bank Feeds option on the Side Menu.
Press Connect feed.

Select Bank that you would like to connect. Selecting Show all button displays a full list of banks.
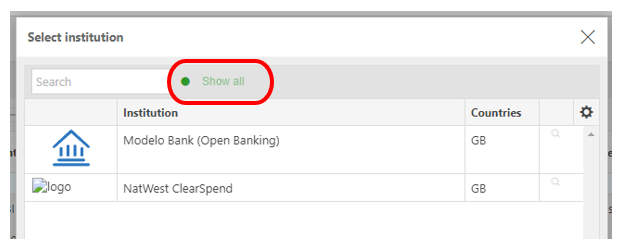
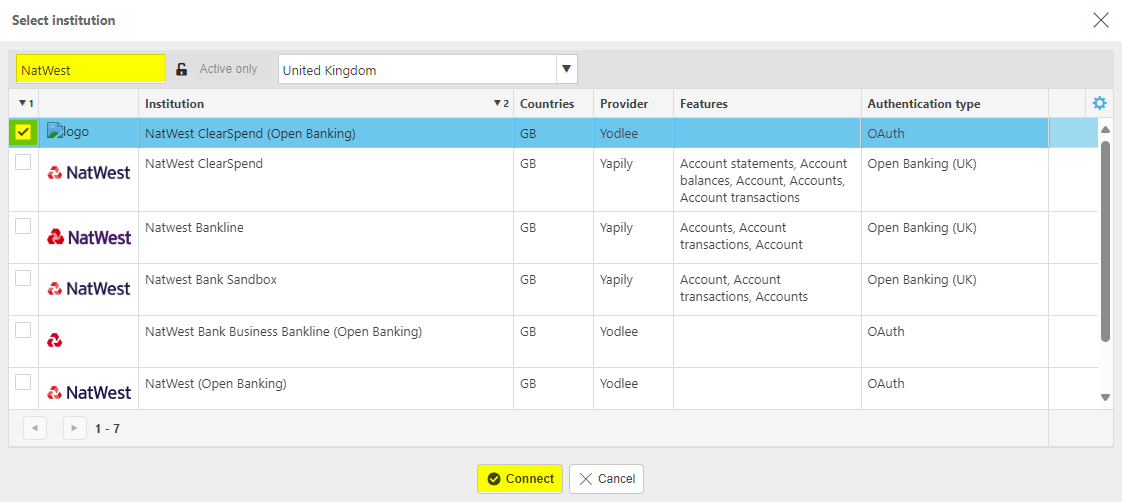
Filter the selection screen with Bank name. Further filtering can be done by entering the bank's country. Once your bank is selected, select the 'Connect' button, found at the bottom of the screen.
Note
Some Banks may show various accounts. Make sure the Account you select is a Business Account.
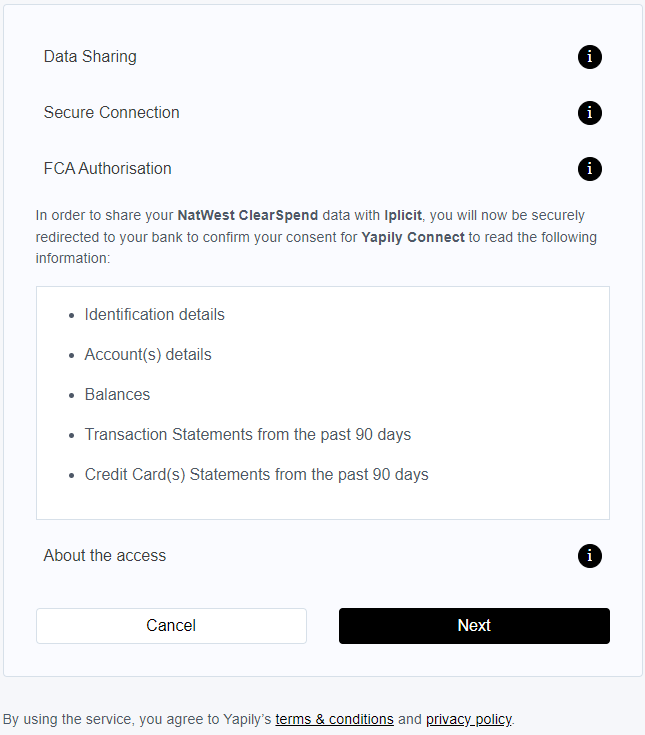
Depending on the bank selected will depend which screens will appear explaining which data will be shared with iplicit and confirming your consent.
e.g. The following screen shot is an example from a Yapily provider -
The following screen shot is an example from a Yodlee provider -

You will then be re-directed to your bank for you to enter your secure login details - the following is an example screen shot from the bank (all banks will differ).

Tip
The process of selecting the Bank account varies per Bank. NB. Ensure the user that you use to authenticate with the Bank, has the appropriate permissions to export bank transaction. This requirement will vary from Bank to Bank (NatWest for example, require Third Party provider consents).
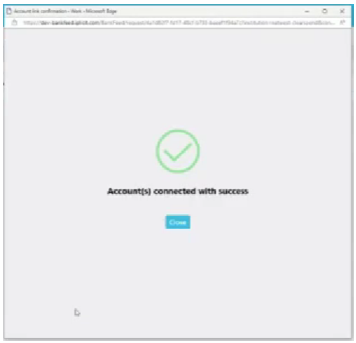
Once the bank account has successfully connected, you should see the following screen.
Tip
For each Bank login, you can connect multiple Bank Accounts.
If you now select Bank Feeds from the Side Menu (entering bf in the filter is a shortcut to find this option), you should see the Bank Account in the list.

Note
This should update automatically but can take a few seconds before this list updates. You can force an update by selecting the refresh button.
Tip
A useful tool in iplicit is the Event Log. Use this to check processes have run as expected, or if something isn't working correctly.
How to link to iplicit Bank Account
Link connected Bank Account to iplicit Bank Account
The connected Bank Account(s) and iplicit Bank Account(s) must be linked for the bank transactions to be imported and create bank statement(s).
Once you have connected the feed, press Amend account link.

This opens up the following screen.

Tip
Upon connection of the Bank Account(s), the default description is defaulted by the connection. We recommend you change this description to be the same as the iplicit Bank Account. This makes for easier identification in other areas.
iplicit bank account: Select the Bank account that you would like to link to the bank feed.
Description: Enter a meaningful description.
Statement frequency: Choose the frequency which will determine when dates that bank statement(s) will be created e.g. "1st day of the month" will create a bank statement for the selected Bank Account on this date.
Note
The next bank statement(s) will be created in advance.
Statement from date: Enter the statement from date.
Tip
iplicit Bank statement transactions will only be created for Bank feed transactions from this date forward.
This date could be important if you have been manually adding the bank feeds. Entering the date just after the last manual feed will ensure you don't transfer transactions that have already been entered.
Responsible user IDs: Enter the Responsible user IDs. Any number of IDs can be entered here.
Note
With Open Banking, the Responsible User IDs have a period of validity which varies with each bank. When that period is due to end, each user will receive an email reminding them to renew. Renewal is simply returning here to update.
Date adjustment:

Default is Not applicable.
Some banks don't adjust for UTC dates, so entering Convert from UTC to GMT will adjust the dates from UTC (Coordinated Universal Time) to GMT/BST (Greenwich Mean Time / British Summer Time) before extracting the date.
In future other time zones will be added.
Press Apply to save the changes.
How to populate bank statement manually
Manual bank statement population
In the Bank feeds menu, highlight the connected required Bank account row.
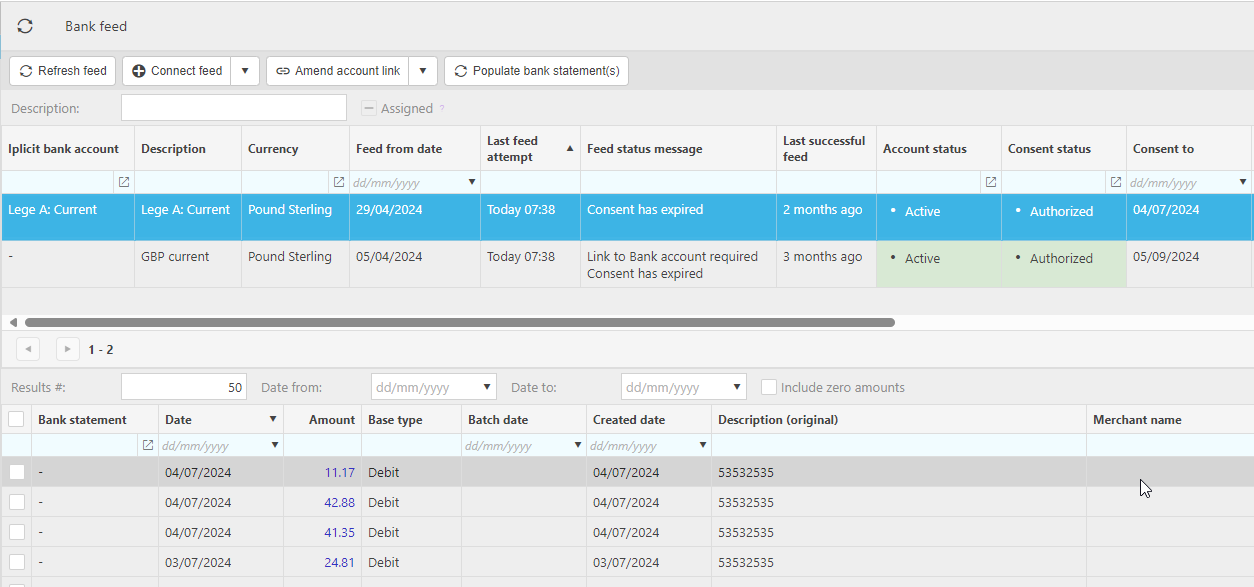
Note
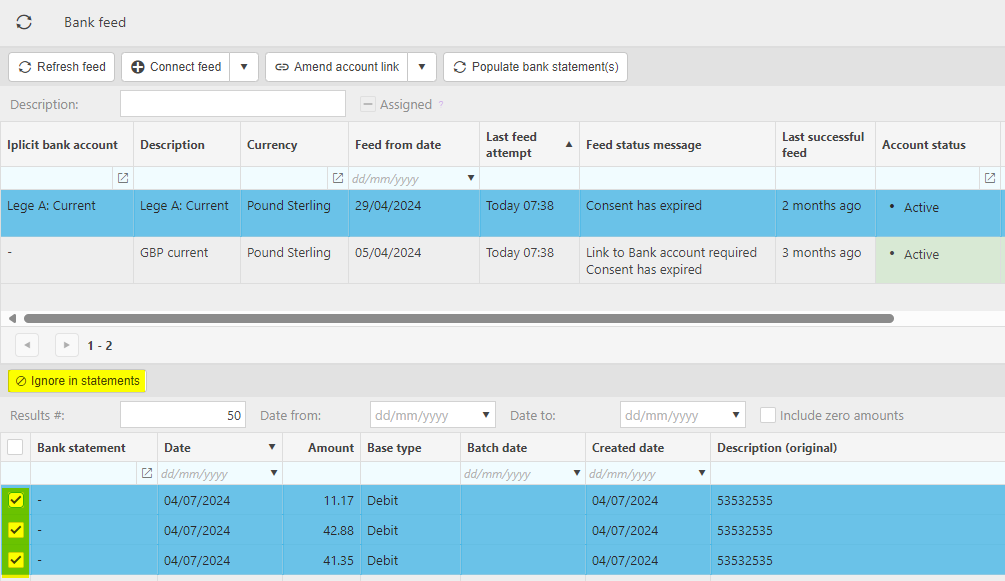
At this stage, if there are any transactions produced by the bank feed that you wish to omit from the statement, you can choose to omit them.
Select transaction/s by ticking box to the left, then select Ignore in statements
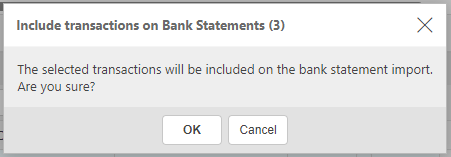
A warning screen will then ask you to confirm your selection.

To reverse this option, just select the ignored transaction/s and select Include in statement.

A warning screen will then ask you to confirm your selection.
Select Populate bank statement.

Select the Bank Account if you wish to run this process for an individual Bank Account
or
Select Legal Entity(s) to run this process for ALL Bank accounts for the selected Legal Entity(s)
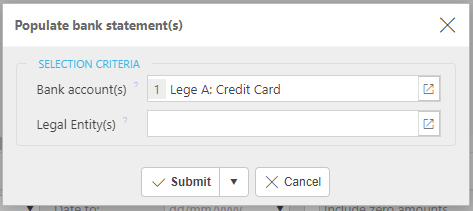
Press Submit.
How to schedule bank statements
Schedule bank statement population
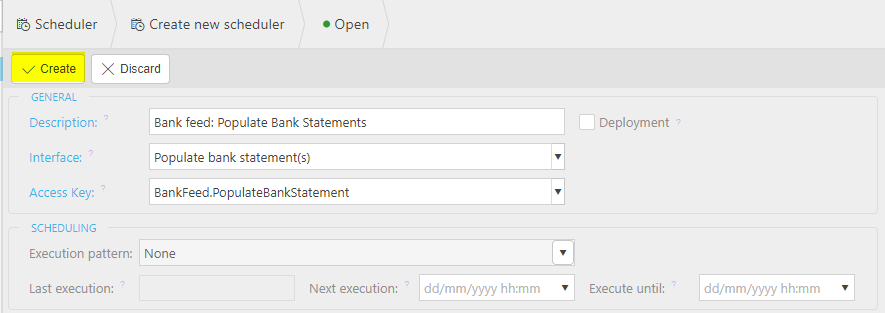
Creation of the bank statement can be done automatically. If NOT already created follow these steps.Select Scheduler from the Side Menu
Select New and enter the following fields -

Description: Enter a unique description for the scheduled task.
Interface: Select the interface that will be run by the scheduled task.
Access Key: A user must have this access permission to be able to view the scheduled task.
Identify when you want the scheduler to run.

To save the scheduler select the Create button.
If the Scheduler has already been created, you can edit the times etc. Select Scheduler on the Side Menu, find and select Bank Feed: Populate Bank Statements and then select the Edit option.

You can then make your changes and Save the scheduler.
How to unlink iplicit Bank Account
Unlink iplicit Bank Account
- Use this option if the bank feed is no longer required.
Select the bank account from the finder and then choose the Unlink account button.

How to disconnect Bank Account
Disconnect Bank Account
This unlinks and optionally removes all the previously imported bank transactions
Note
Disconnect only removes bank transactions from the Bank feed, NOT the Bank Statement.
Select the bank feed that you want to disconnect then press Disconnect feed then Disconnect.

You will then get a warning message before confirming disconnection.

How to automatically receive the bank transactions via the bank feed
Automatically receive the bank transactions via the bank feed
- If the Bank feed Bank account has been linked with an iplicit Bank Account and the bank feed consent is active, then the bank transactions will be pushed to your environment daily. If you do not wish to wait, you can manually refresh the bank feed.
How to manually refresh the bank feed
Manually refresh the bank feed
This is only required if you wish to manually force the bank feed to rerun. The typical behaviour is for the bank feed to be scheduled and import bank transactions automatically.
Press Refresh feed then Refresh.


How to re-connect bank feed
Re-connect bank feed
Customers will need to re-authenticate their consent for access with their bank, but this process is now processed via iplicit. Just before the re-authentication is due, a consent renewal email will be sent to user(s) who are designated as responsible on the bank feed.
To re-connect - on the Bank feed finder screen, highlight the Bank Account you wish to re-connect, select the black down arrow button on 'Connect feed' and then select 'Re-connect feed'.

Note
The consent dates are shown in the bank feed finder which shows when consent expires and when the alert message is sent. Consent renewal will vary according to the bank but a minimum of 90 days is required by Open Banking.

Updated September 2024