Scheduler
The Scheduler is used to run scheduled processes.
The processes available vary and may simply be a communication e.g. authorisation email reminder or may be a process e.g. Auto creation of Timesheet sale invoices.
You can elect which items you wish to automatically run (and when) but you may also simply wish to Run now for certain processes.
Scheduled events are linked to User access permissions, so users with scheduler menu access will only see events related to other menu access they have.
How to view Scheduler
Viewing Scheduler
Select Environment / Scheduler from the Settings section of the pulse menu -

Note
This is an example screen shot of the pulse menu.
Position of the menu items within pulse will vary according to available options and dependant on personal screen resolution.
or enter Scheduler in the Quick Launch Side Menu.

This will then show the Schedules on the system where normal customisation of Sets can be used.

Description: This will describe the scheduled process.
Last execution: The last date & time the scheduled task was run.
Next execution: The next date & time the scheduled task is due to run (UTC date). NB. Not all tasks will be scheduled and are simply available to Run now.
Execution pattern: The pattern of re-occurrence.
Tip
To modify the columns displayed, select
 on the top right of the page, then tick/untick the information you want to hide or display.
How to create a new scheduled task
Create a new scheduled task
Select Scheduler from one of the options as shown above in Viewing Scheduler.
Press New.

Enter a description.
Select an access key.
Fill out the remaining fields.

- Interface: Select the interface that will be run by the scheduled task.
- Execution pattern: This determines the timings of when the scheduled task will run automatically.
- Deployment tick box: When this is ticked the scheduled task will be deployed to customer environments.
- Last execution: This is the last date and time that the scheduled task was ran.
- Next execution: This is the next date and time that the scheduled task is due to will run.
- Execute until: This is the last date that the scheduled task will run.
When you are happy with the scheduled task, press Create.
The scheduled task will now be available to Run now.
How to edit a schedule
Edit a pre-existing scheduled process
Double click on the scheduled process that you would like to edit.
Press Edit.

You can now make changes to the fields. Once you are happy with your changes, press Save.
Tip
You can reset the next execution and the retry count when the edit button has been pressed.
How to find a scheduled process
Find a scheduled process
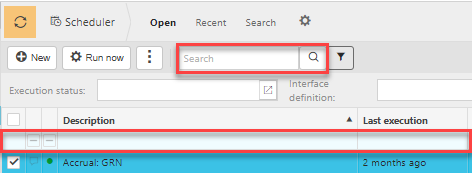
You can use the Sets along the top of the finder to narrow down your search.

You can also use the search bar or the blue cells to type in searches.

How to run a scheduled process
Run a scheduled process
Select the process that you would like to run, then press Run.

You can also Run by selecting and opening the schedule.
Updated November 2024