Resource
- A Resource can be a Customer, Supplier, Member of staff, lead or payment recipient. Resources are generally people or companies that are used in conjunction with multiple areas of the system containing a range of details about resources such as contact information to bank accounts. Each resource is restricted to one user.
Note
To view the legacy version, please select Legacy User Guide.
How to view a Resource
Viewing a Resource
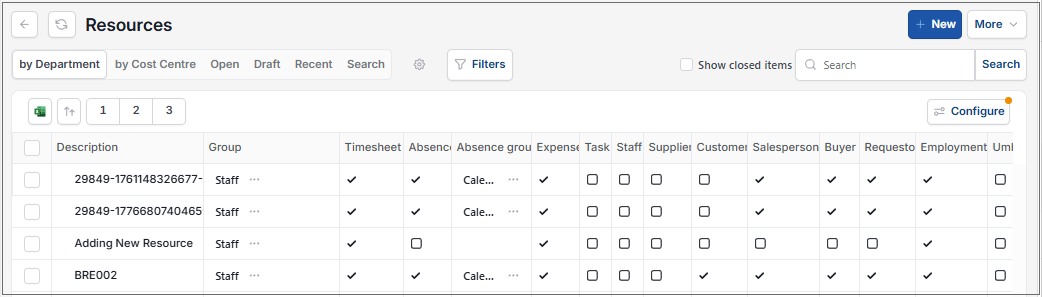
As per Generic Navigation options, either from left-hand navigation panel, select Resource from the HR folder or enter Resources in the Search option.
This will then show the Resources on the system where normal customisation of Sets can be used.
Tip
To modify the columns displayed, select  option on the right of the column display, then tick/untick the information you want to hide or display.
- Resource: This will be the resources code.
- Resource information: First name, last name, description and user account.
- Group: The group that the resource belongs to e.g. customer or supplier.
- Allow: these boxes will be ticked or unticked indicating the resources authorisation to different functions e.g. timesheet entry or tasks.
Note
If Enforce data access control is set on the Contact group, you will need the correct Data Access Control access on the Legal entity to see the correct records.
How to create a new Resource
Creating a Resource
Select Resource from one of the options as shown above in Viewing a Resource.
Select New.
Fill in the account name to identify the contact account.
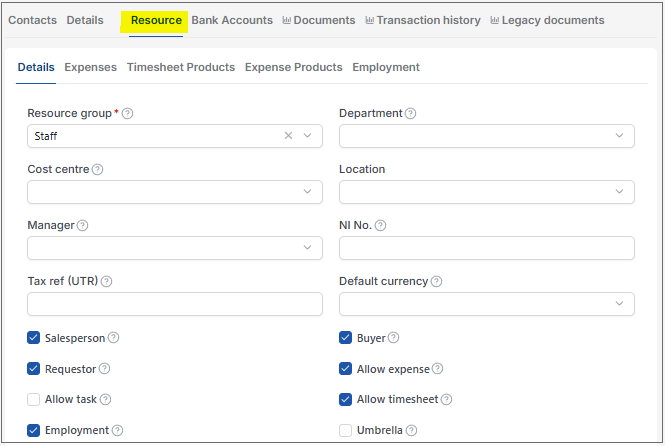
Tick one or more of these boxes to assign the resource to a Resource group
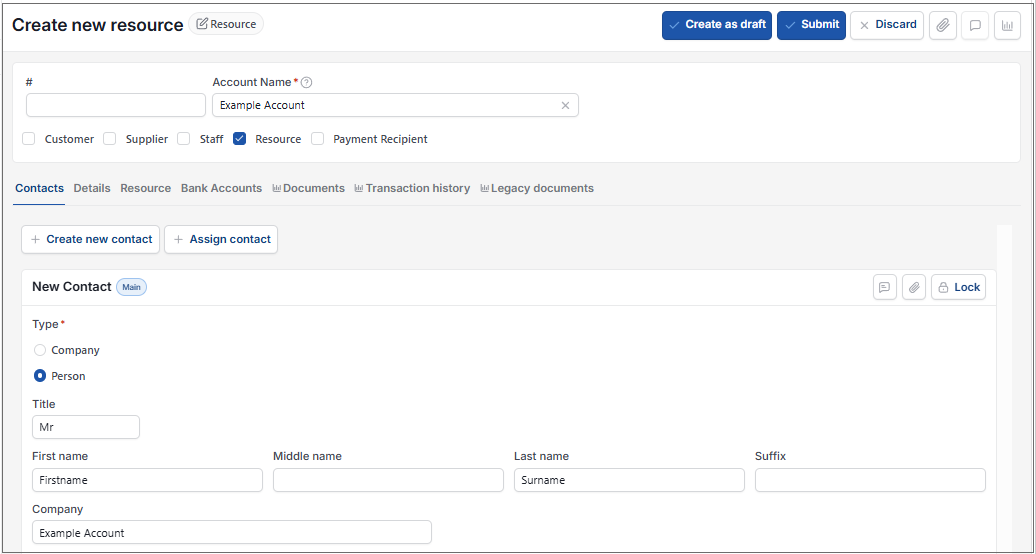
Fill out the rest of the tabs
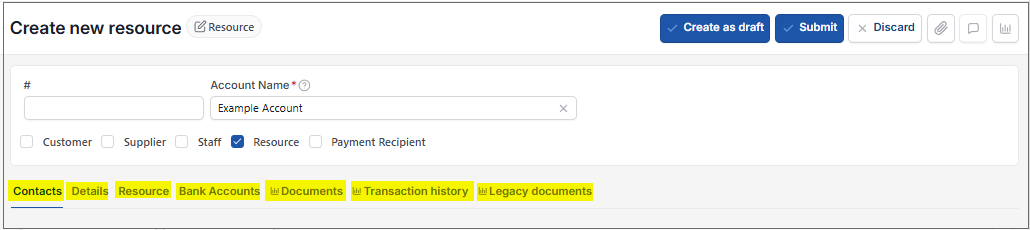
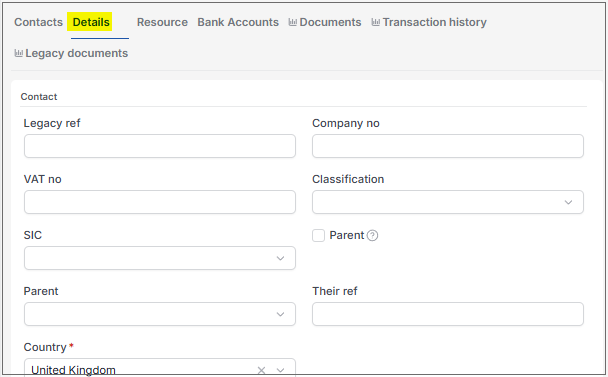
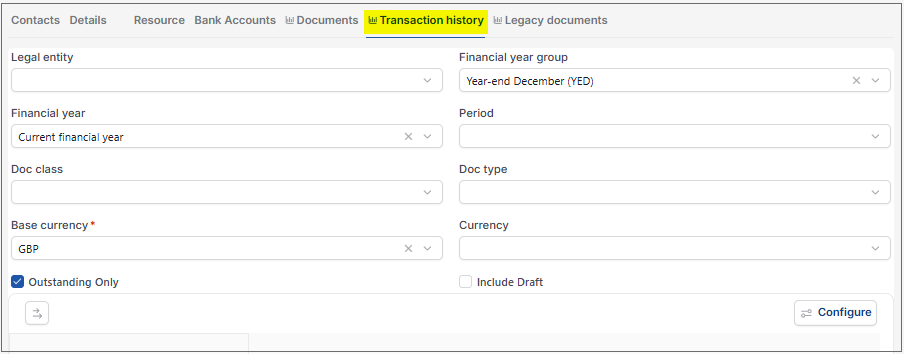
Depending on the type of accounts selected and the User roles, will depend on the Tabs that will be displayed.
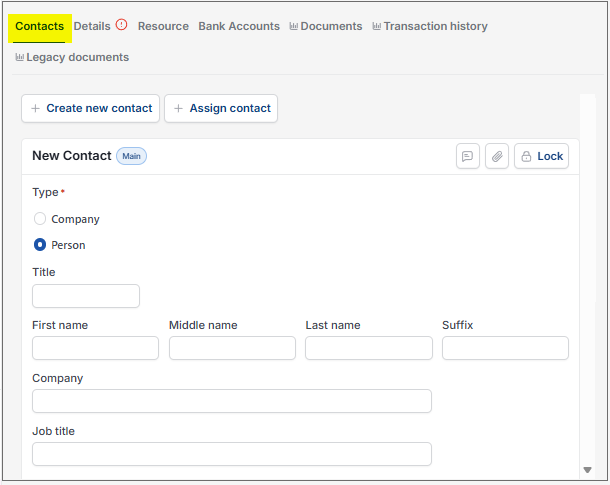
This section will present the contacts that you have listed for the resource. Select Edit then Add to list more contacts under the resource.
You can also Assign a contact to be the main account if there is more than one contact.


How to submit a draft Resource directly for finder menu
Submit draft Resource
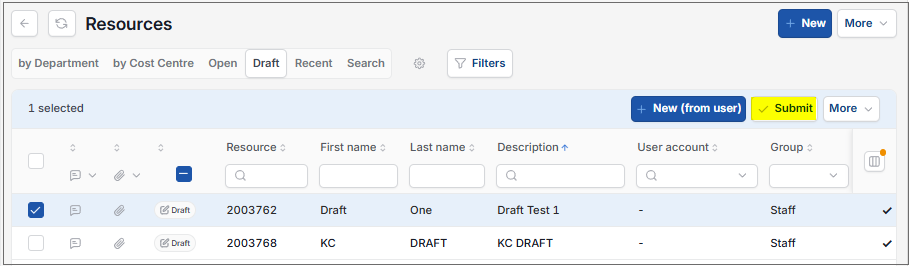
This allows Users to Submit draft Resource records directly from the finder view list instead of having to open each record individually to submit it.
The feature supports selecting multiple draft Resources.
Select Resources from one of the options as shown above in Viewing a Resource.
Select the draft Resource to Submit directly.
Select Submit on the Action Bar.
How to amend a Resource
Amend a Resource
Select Resource from one of the options as shown above in Viewing a Resource.
Select the Resource to amend.
From the
 option, select Amend.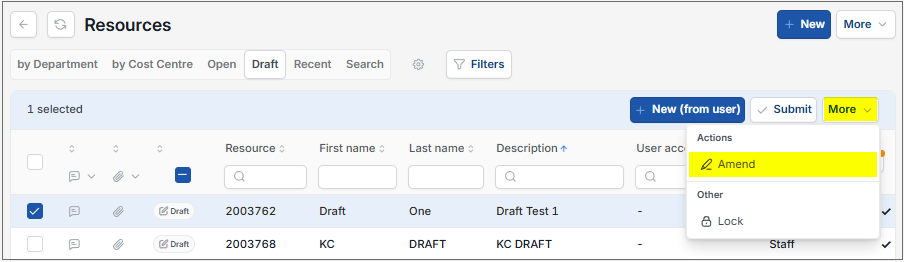
Amend the selection criteria then select Apply.
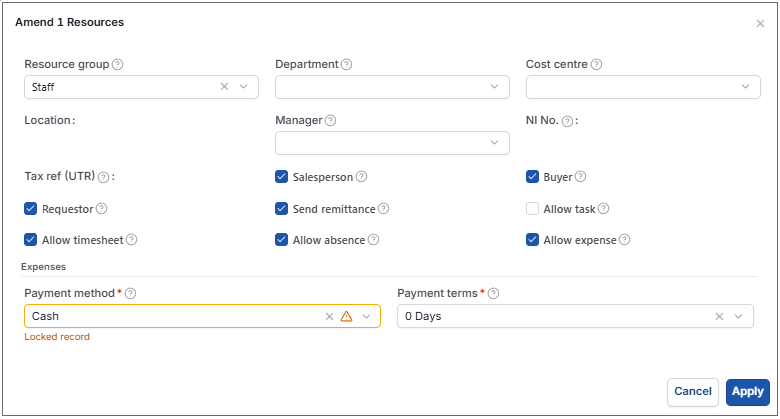
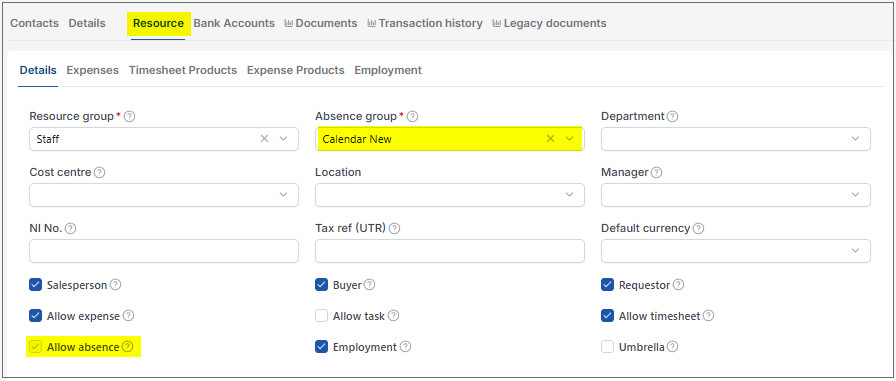
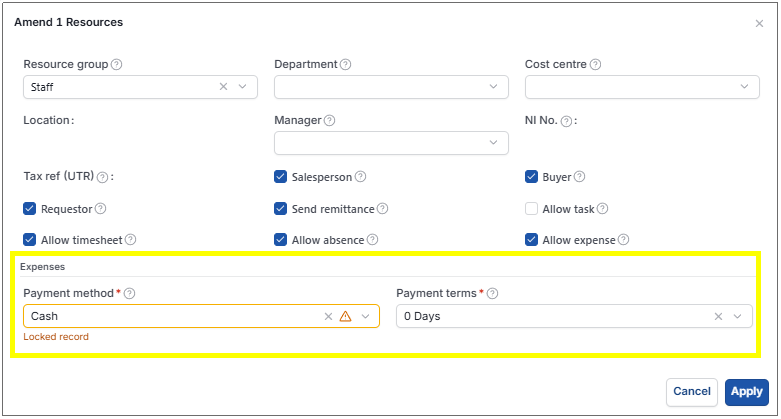
Salesperson: Tick for the Resource to be selectable as responsible on Sale documents.
Buyer: Tick for the Resource to be selectable as responsible on Purchase Orders.
Requester: Tick for the Resource to be selectable as responsible on Requisitions.
Send remittance: Tick to send remittance to the Resource upon payment of expenses.
Allow task: Tick to identify resource that will be allocated tasks. This is required to compliment user role access to enable the recording of tasks for resource that are not a user.
Allow timesheet: Tick to identify resource that will be able to record timesheets. This is required to compliment user role access to enable the recording of timesheets for resource that are not a user.
Allow absence: This checkbox is read only and will be automatically ticked if the Resource is related to an Absence Group.
Allow expense: Tick to identify resource that will record expenses. This is required to compliment user role access to enable the recording of expenses for resource that are not a user.
This option will present you with a new section for Expenses to allow input of Payment Method and Payment Terms.
How to Import Resources details
Importing Resources
Select Resources from one of the options as shown above in View a Resource.
Select Resource Import from the
option.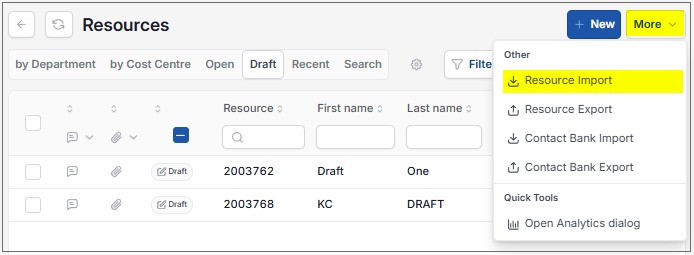
Enter options for Import.
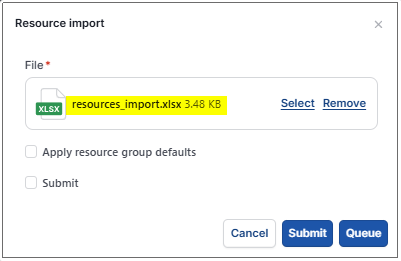
- File: The source file created and saved previously.
- Apply resource group defaults: Tick to apply defaults.
- Submit: Tick to import Resources as Submitted. Leaving blank will leave imported Resources in draft state.
Tip
To create an Import file with the correct formatting, Export a file first and save to your external source. Then use this file to add updated Resource details.
Select Submit.
Warning
iplicit allows a maximum of 5,000 rows in a single Import.
If your Import is too large, an error message will tell you that the Import cannot be processed and will advise you to create smaller Import files.
If the latter is not possible, please contact Customer support.
How to Export Resource details
Exporting Resource details
Select Resources from one of the options as shown above in View a Resource.
Select Resource Export from the
option.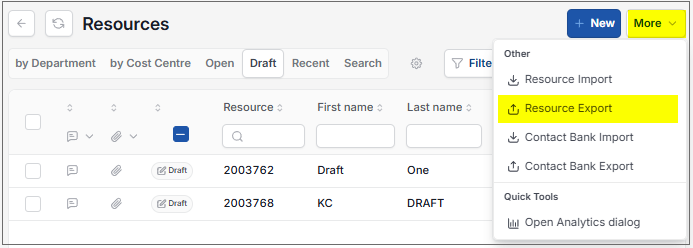
Enter options for Export.
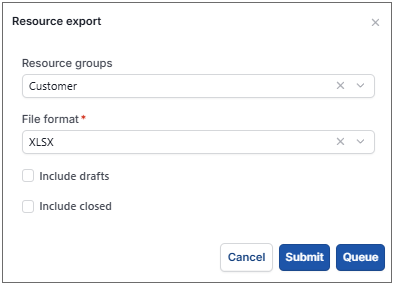
- Resource groups: Enter Resource groups to export from the dropdown list.
- File format: Select the format for the export file.
- Include drafts: Tick to include draft accounts.
- Include closed: Tick to include closed bank accounts.
Select Submit.
The Export file is created as an Excel spreadsheet.
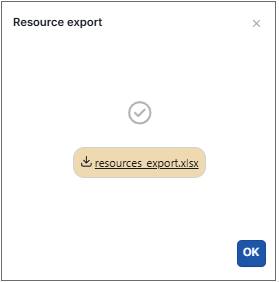
This file can now be opened in Excel to show the selected Resources' data.
Note
Many fields are exported including -
- URL
- Phone numbers
- Email addresses
- Address
- City
- Region
- Postcode
- Country code
- Description
- Default delivery address type
- Default invoice address type
- is_draft - true or false
- is_active - true or false
How to Import Bank details
Importing Bank details
Select Resources from one of the options as shown above in View a Resource.
Select Contact Bank Import from the
option.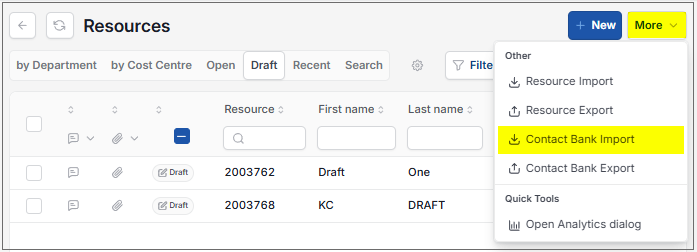
Enter options for Import.
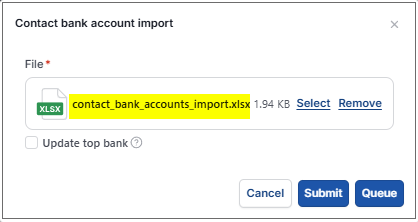
- File: The source file created and saved previously.
- Update top bank: If a bank already exists for the contact account and you've input new details, ticking this box will update the top bank account's details.
Tip
To create an Import file with the correct formatting, Export a file first and save to your external source. Then use this file to add updated bank details.
Select Submit.
Warning
iplicit allows a maximum of 5,000 rows in a single Import.
If your Import is too large, an error message will tell you that the Import cannot be processed and will advise you to create smaller Import files.
If the latter is not possible, please contact Customer support.
How to Export Bank details
Exporting Bank details
Select Resources from one of the options as shown above in View a Resource.
Select Contact Bank Export from the
option.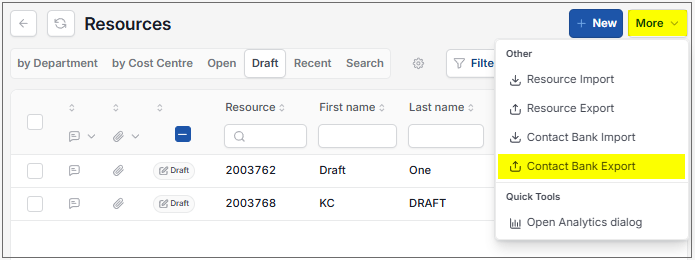
Enter options for Export.
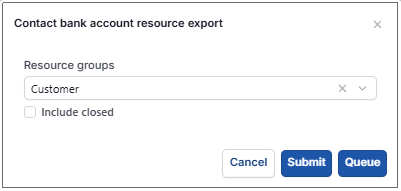
- Resource groups: Enter Resource groups to export from the dropdown list.
- Include closed: Tick to include closed bank accounts.
Select Submit.
The Export file is created as an Excel spreadsheet.
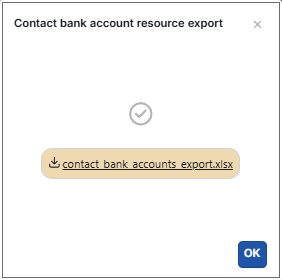
This file can now be opened in Excel to show the selected Bank details data.
How to lock a Resource
Lock a Resource
Locking a resource will disable it.
Select Resource from one of the options as shown above in Viewing a Resource.
Select the Resource to Lock.
Select Lock from the
option.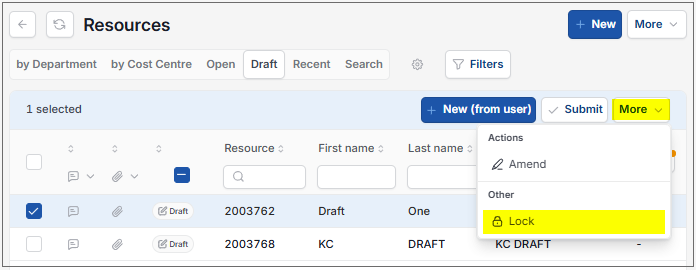
Updated September 2026