User Account
Note
To view the legacy version, please select Legacy User Guide.
A User account must be created for each person that needs to login to the system.
Included in the process of Creating a user, it is necessary to assign the [Access they are granted] (i.e. what they can see and do), the security that is applied (e.g. multi-factor authentication) and even the date range for when they can login.
The screenshot below shows a sample grid of users, which includes some key information.
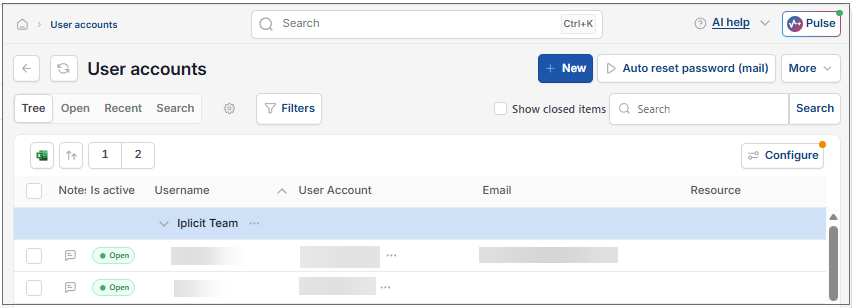
- User type: restricts the user roles available for selection.
- Username: This is used to login with (the email below can also be used to login).
- Name:
- Email: This can also be used to login and is used for e.g. password reset communication.
- Mobile number.
- Access locked status: This will only be ticked if the user account has been locked or they have not yet been granted access permission via password reset.
- Last login: This will show the UTC date and time for the last time the user logged in.
- Failed tries: Shows the number of times the user has failed to enter their password or username correctly (this can be reset).
- MFA enabled: Identifies whether or not the multi-factor authentication login process has been successfully setup for the user.
- MFA required: When ticked then multi-factor authentication has to be used. This can be defaulted for the environment within environment defaults.
How to view User Accounts
Viewing a User Account
As per Generic Navigation options, either from left-hand navigation panel, expand Settings and select User accounts from the User Access folder or enter User accounts in the Search option.
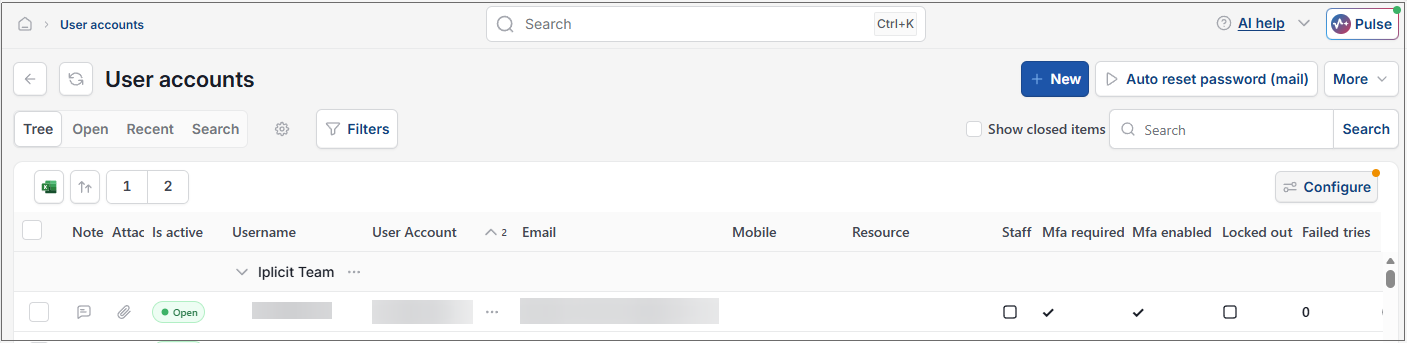
This will then show the User accounts on the system where normal customisation of Sets can be used.
Tip
To modify the columns displayed, select  option on the right of the column display, then tick/untick the information you want to hide or display.
How to create User Accounts
Create a User Account
Select User accounts from one of the options as shown above in Viewing a User Account.
Press New.
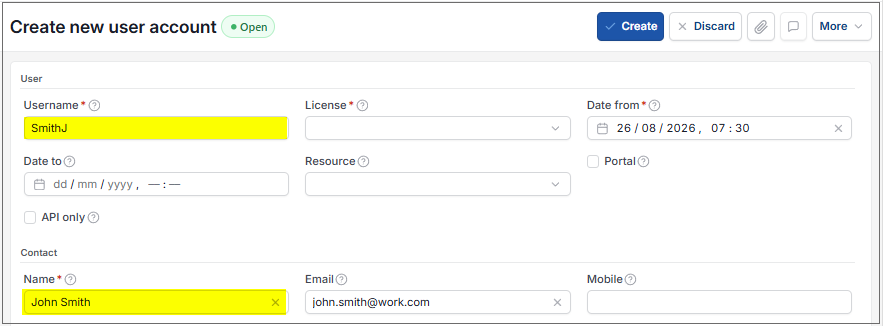
Enter a new Username - (unique username - recommended format = [last name]+[initial of first name]), Contact name - (users full name) and Contact email (used for password reset emails).
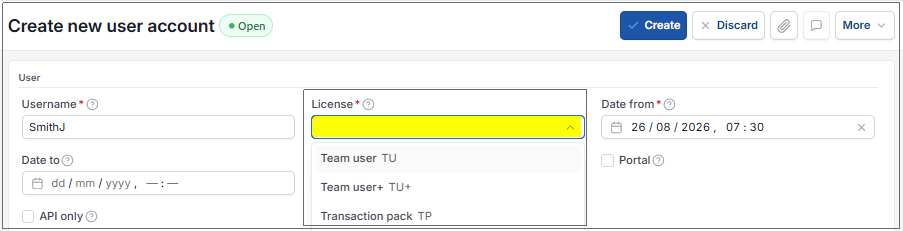
Assign the accounts Access license - the User License can restrict the related user roles - select via the dropdown menu.
Enter Multi-factor-authentication details under Multi-factor section.
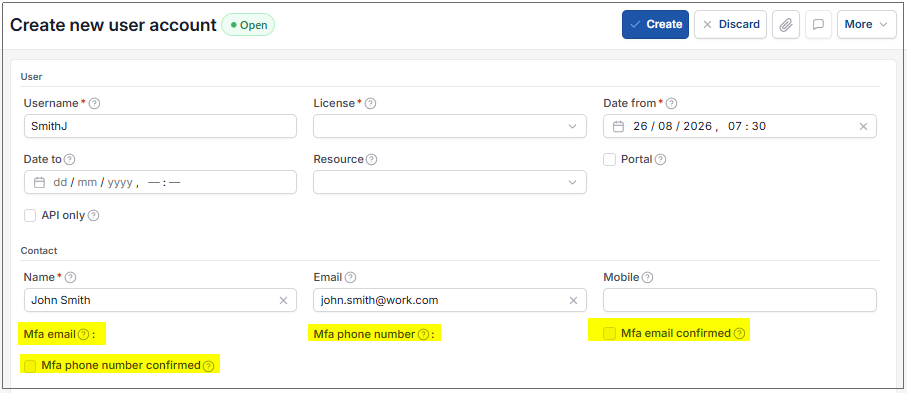
If you would like multi-factor authentication to be a default setting for users under your domain, go to Environment defaults to set this preference.
Status section.

Access locked: This will be ticked if the user does not have access to their account.
Locked date: This will show the UTC date and time the account was locked.
Locked Reason: This will display here why the account was locked.
Force change password on next login: This will enforce the user to change their password upon login.
Failed tries: Shows the number of times the user has entered an incorrect password.
Explanation of the tabs
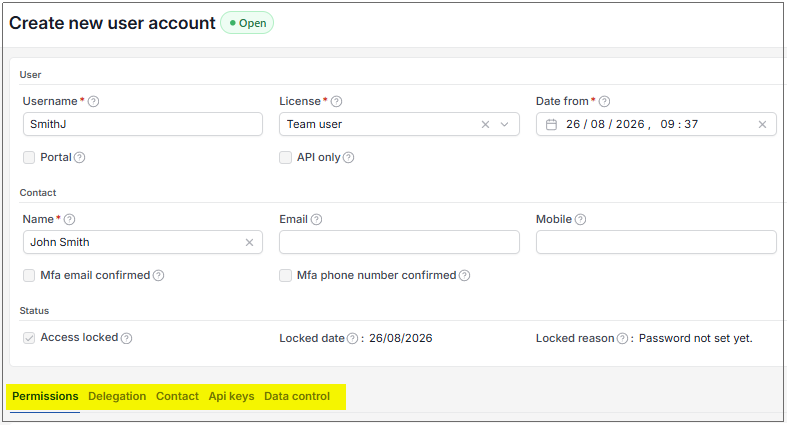
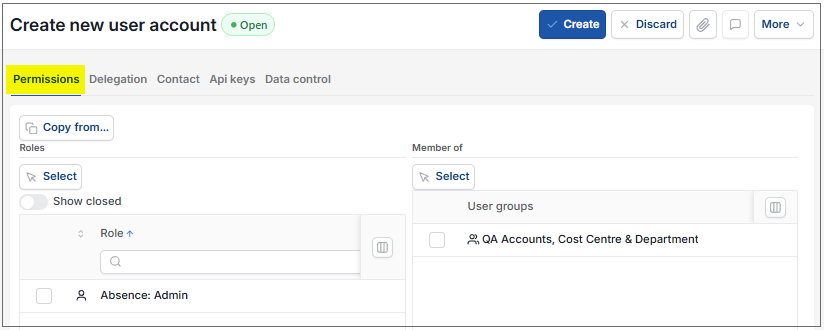
This tab will show the Users roles and Groups that need to be granted to the user.
Tip
You can copy access from another user. To do so, select Copy from then choose another user and press Apply. If you choose to copy access, you can ignore the following setup notes.
Note
Copying from another user will add their access permissions and can be done at any stage in addition to user access already granted.
Press Select under permissions and you will be presented with user roles to assign to the user.
Now, either select user roles individually or select user role groups.
Tip
It is advised to use groups for a more simplified setup.
Press Create.
Press Allow login access.
Following the creation of a user they still need to be granted login access from the
 option.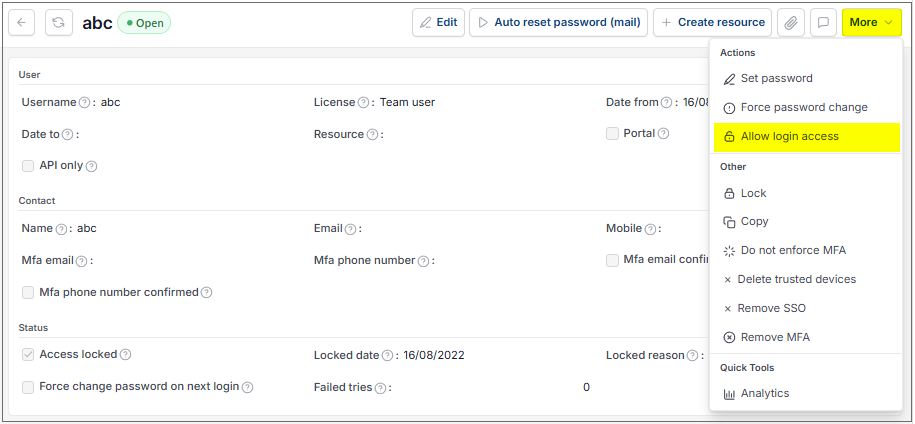
Tip
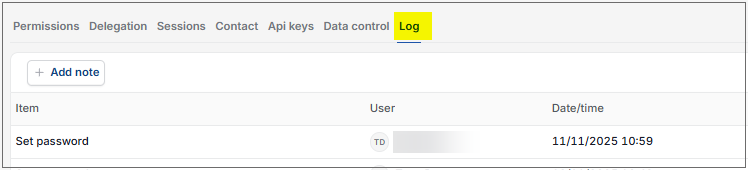
Typically, the use of Allow login access is following a user account being locked out (e.g. failed password). Upon Set password, Unlock user account has the same effect as Allow login access.
Press Set password from the
option.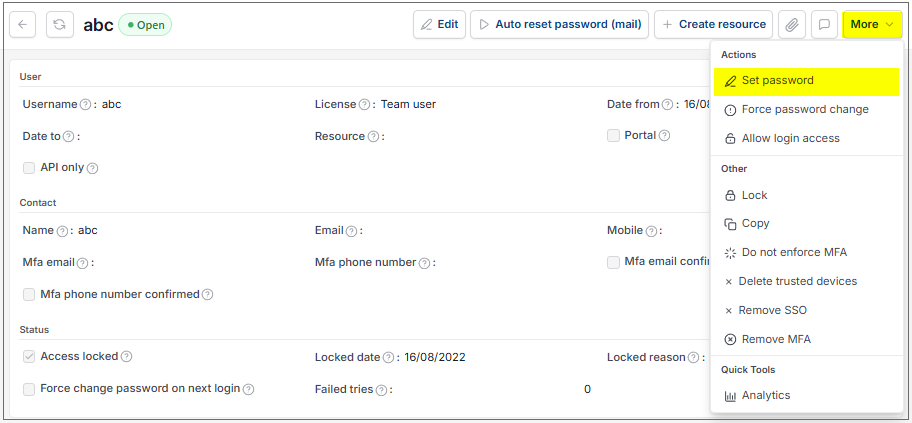
You will now be asked to set a new password.
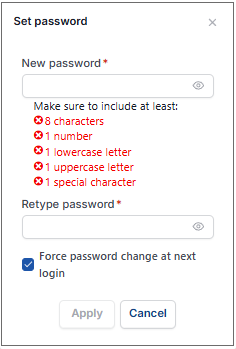
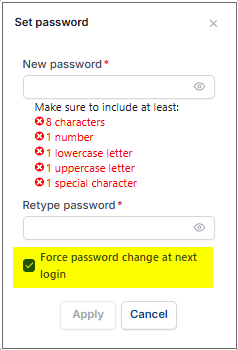
Tick Force password change at next logon to force the new user to create their own password when they first login. When this has been done, the previous password (initially set by you) will no longer work.
Tip
Password policy is defined within Environment defaults.
Press Apply.



How to Import/Export User Accounts
Import/Export User Accounts
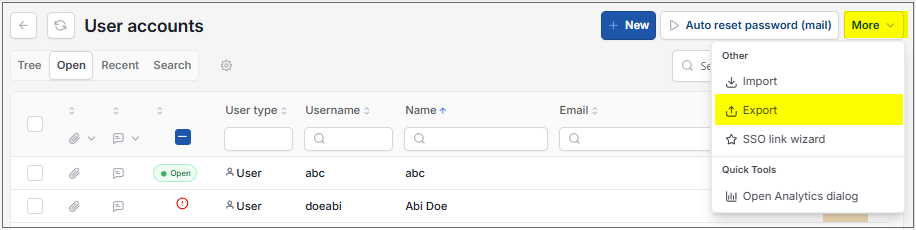
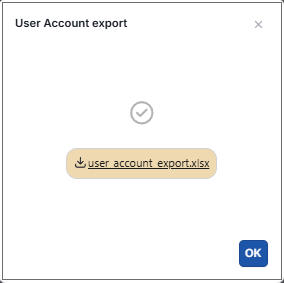
You can now export user accounts to Excel for editing. After exporting and making the changes you can upload the Excel file back to the system to populate the new user accounts.
Select User Accounts from one of the options as shown above in Viewing a User Account.
Select the
option and select Import.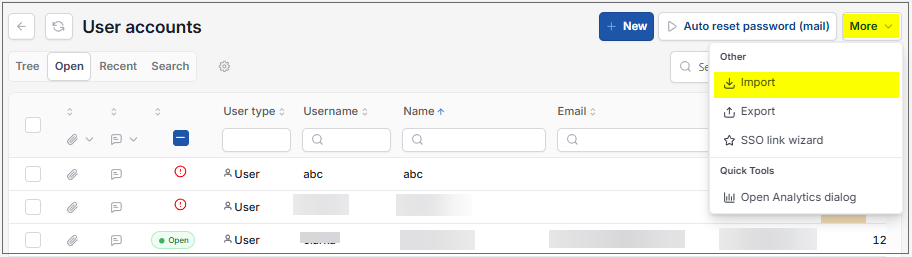
Enter the name of the Excel file, which is saved on an external source.
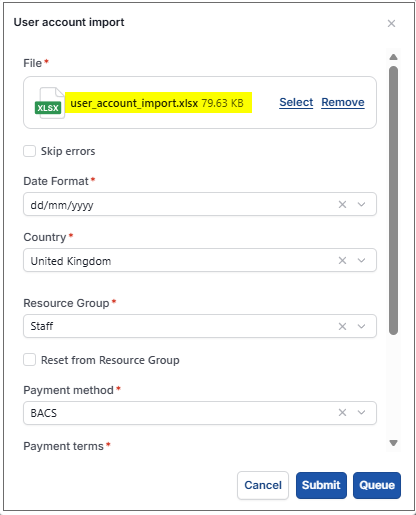
Skip errors: By ticking this, errors will be skipped and the correct user accounts will be imported e.g. if four user accounts have been made and one has an error, the three correct entries will be imported and the incorrect entry will not be. If this is not ticked and there is an error on the import, none of the entries will be imported.
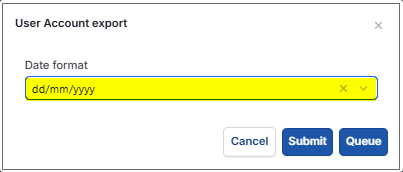
Date format: This allows you to select a date format depending on your setup needs e.g. British or European date format.
Reset from Resource group: Ticking this will reset the settings from the resource.
Copy user roles from user: The new users created in the exported file will adopt the selected users User roles.
Tip
To create an Import file with the correct field names and formatting, Export a file first and save to your external source. Then use this file to add details ready to import.
Fields to be included in the file are as follows:
Username: Typically, last name and initials e.g. doej for John Doe.
First name: Only appropriate when a Resource is to be created.
Middle name: Only appropriate when a Resource is to be created.
Last name: Only appropriate when a Resource is to be created.
Job title: Only appropriate when a Resource is to be created.
Company: Only appropriate when a Resource is to be created.
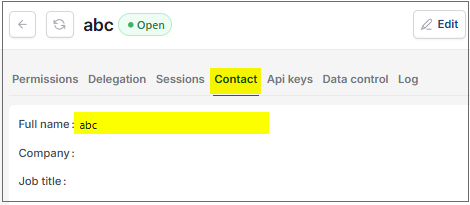
Description: e.g. John Doe, used for both user and resource.
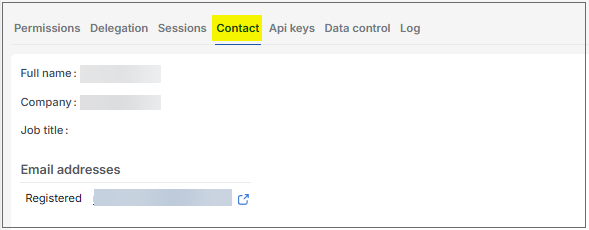
This will populate the Full name field in the Contact section in User Accounts.
User licenses: To see different licenses please see User license.
User license description: For reference only, included on Export, not necessary on Import.
Date from: Date from which the user can login.
Date to: Date which the user login will expire (optional).
Email: User email, used for e.g password reset prior to MFA usage.
- This will populate the Email address field in the Contact section in User Accounts.
Mobile: User mobile phone number used for e.g. password reset prior to MFA usage.
MFA requires: This dictates whether or not the user has to use Multi factor authentication when logging in.
All the following can be used TRUE/FALSE; Y/N; 1/0
Create Resource: Value must be True for a resource to be created. This dictates whether or not the user account will be created as a Resource as well.
Resource: If the user is being created as a resource this is typically the initials e.g. JD for John Doe. If no value is assigned, a number will be automatically assigned.
Legacy ref: Reference only.
Resource description: Reference only, description above will be used.
Country code: A resource must have a country. The ISO country list is used. If no country is specified, a default will be assigned (e.g. GB (Great Britain)).
Resource group: Only required if resource to be created. If not specified then value will be defaulted from the resource group specified at run time. Refer to Resource groups to get list of resource group codes. This should be filled out with the code for the desired Resource group.
Resource group description: Reference only, need not be completed.
Currency: Only required if resource to be created. ISO Currency code to be used e.g. GBP.
Department: Only appropriate if resource to be created. If not specified then value will be defaulted from the resource group specified at run time. Refer to departments to get list of department codes.
Department description: Reference only.
Manager: Only appropriate if resource to be created. Refer to resource to get list of resource codes. If no Manager specified on the resource, Manager from the Department could be used for e.g. Workflow authorisation distribution.
Manager description: Reference only.
Cost centre: Only appropriate if resource to be created. If not specified then value will be defaulted from the resource group specified at run time. Refer to Cost Centres to get list of Cost Centre codes.
Cost centre description: Reference only.
Staff: Only appropriate if resource to be created. Select True if resource is also a member of staff.
Title: e.g. DR. This is not validated and is optional.
Suffix: e.g. OBE. This is not validated and is optional.
Payment method: Only appropriate if resource to be created. Used for the payment of e.g. Staff Expenses. See Payment methods for list of valid codes e.g FP = Faster payment.
Payment terms: Only appropriate if resource to be created. Used for the payment of e.g. Staff Expenses. See Payment terms for list of valid codes e.g 1 = 1 day payment terms.
DAC groups: Applies to the user. Only required if Data access control (DAC) is enabled. See DAC for valid list of DAC codes. If the user is in more than one DAC group then separate with semi colons (e.g. DAC1; DAC2).
User roles: Specify the code(s) from the user role(s) that you want the user to be in. The User roles selected in this section will dictate what feature the user can use. If the user is in more than one user role then separate with semi colons (e.g. ROLE1; ROLE2).
User groups: Specify the code(s) from the user group(s) that you want the user to be in. The User groups selected in this section will dictate what feature the user can use.
Select Submit.
Selecting Queue from the dropdown option will queue the import process until other actions in iplicit are completed.
Warning
iplicit allows a maximum of 5,000 rows in a single Import.
If your Import is too large, an error message will tell you that the Import cannot be processed and will advise you to create smaller Import files.
If the latter is not possible, please contact Customer support.
How to edit User Accounts
Edit a user
Select User accounts from one of the options as shown above in Viewing a User Account.
Select and open the User Account to Edit.
Select Edit.
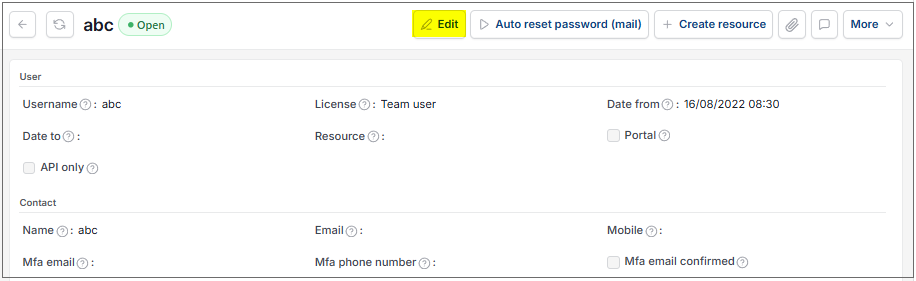
Edit/update information in the editable boxes.
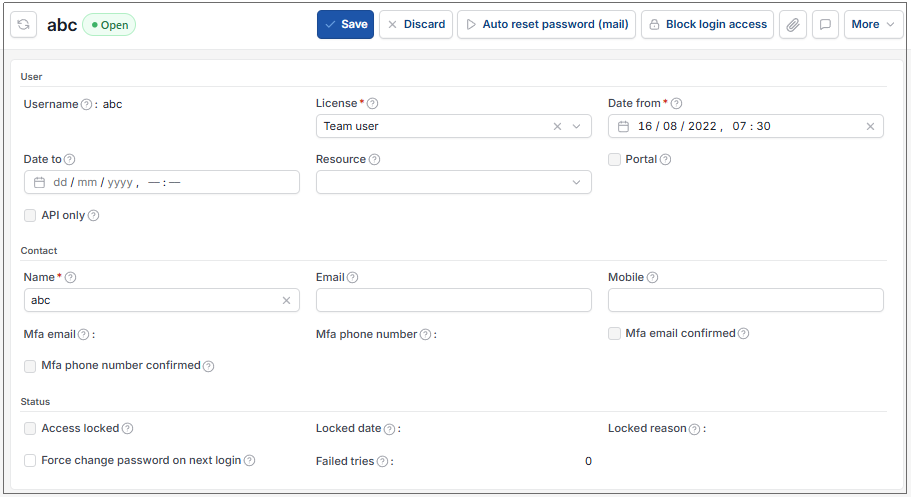
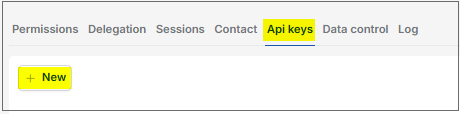
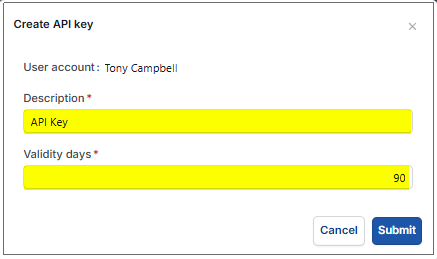
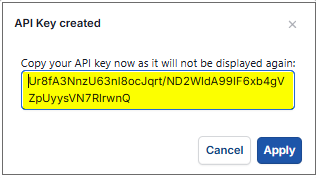
You can also change data in the Permissions, Delegations, Sessions or API keys tabs.
Select Save
How to auto set a User password
Auto reset a user's password
Select User accounts from one of the options as shown above in Viewing a User Account.
Highlight the User Account or select and open.
Select Auto reset password.
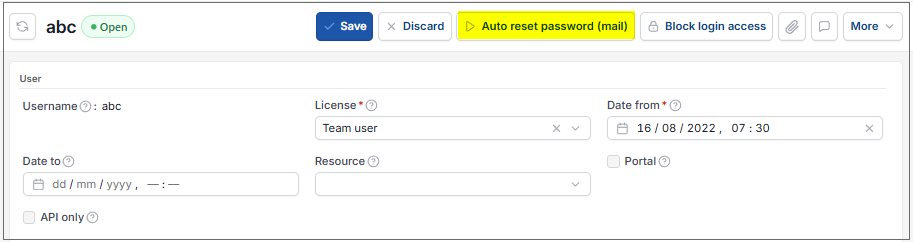
Enter User Account if not auto populated, the select Submit.
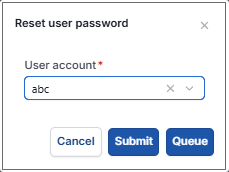
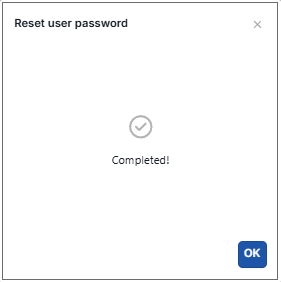
A message will confirm that a new password will be created and sent to the User's email.
Note
If Reset password confirmation is set in Environment defaults ...
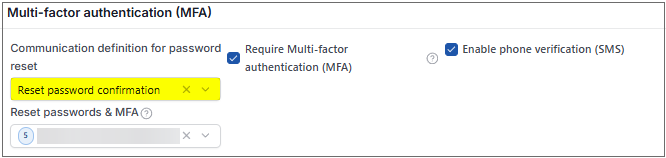
... then confirmation will show in the Communication log that an email has been sent.
If Reset password confirmation is left blank, then no confirmation will show.
How to create a resource
Create a resource
Select User accounts from one of the options as shown above in Viewing a User Account.
Select and open the User Account to Edit.
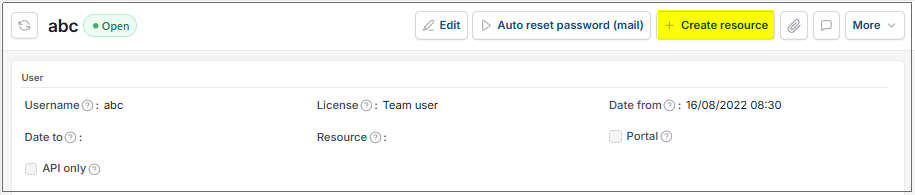
Select Create resource.
Select the Resource tab and edit the user resources.
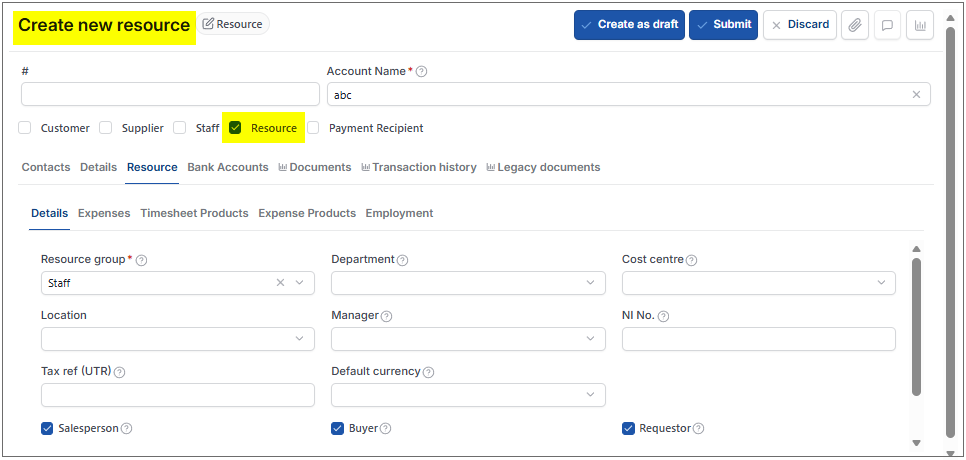
Select Submit or Create as draft.
How to set a User's password
Set a password for a user
Select User accounts from one of the options as shown above in Viewing a User Account.
Select and open the User Account to set password.
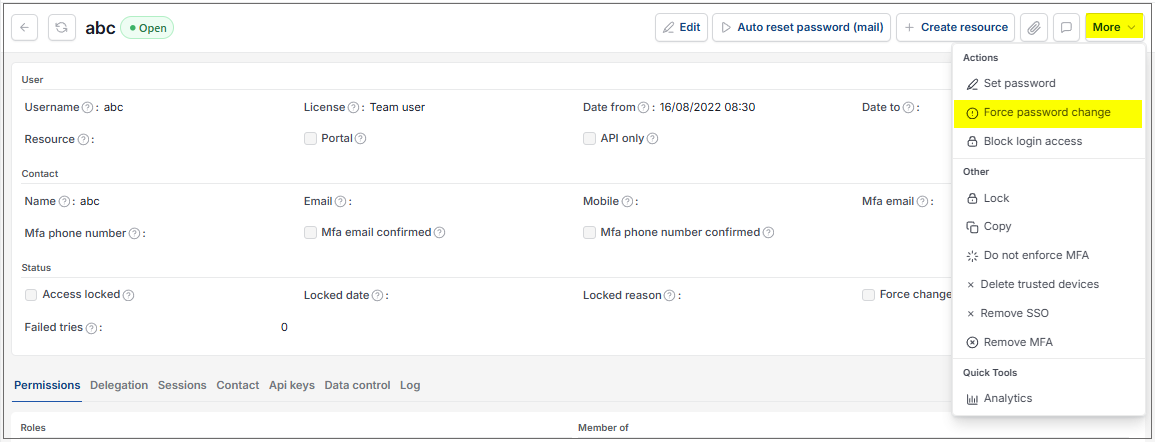
Select Set password from the
option.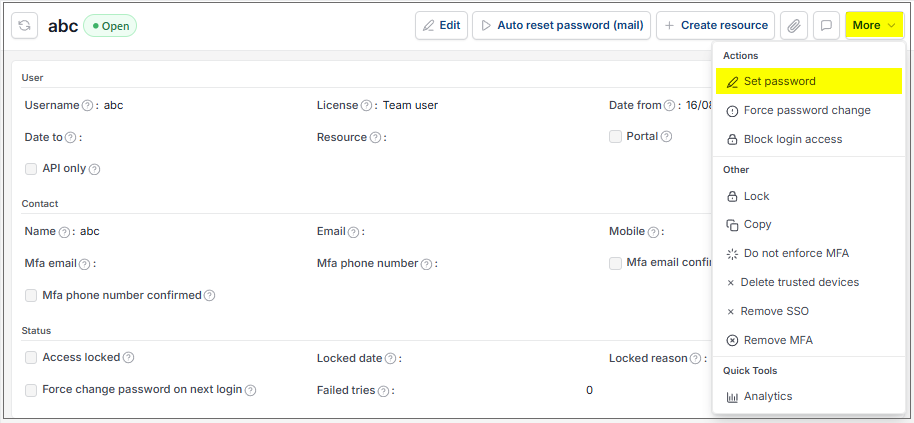
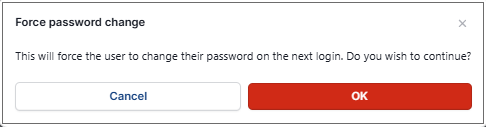
Enter a new password then re-type it below.
Tip
Press Force password change to make the user set their own password when they sign in. Once they enter their own password, the old one (set by you) will no longer work.
Select Apply.
How to block User access
Block login access
Select User accounts from one of the options as shown above in Viewing a User Account.
Select and open the User Account to block login.
Select Block login access from the
option.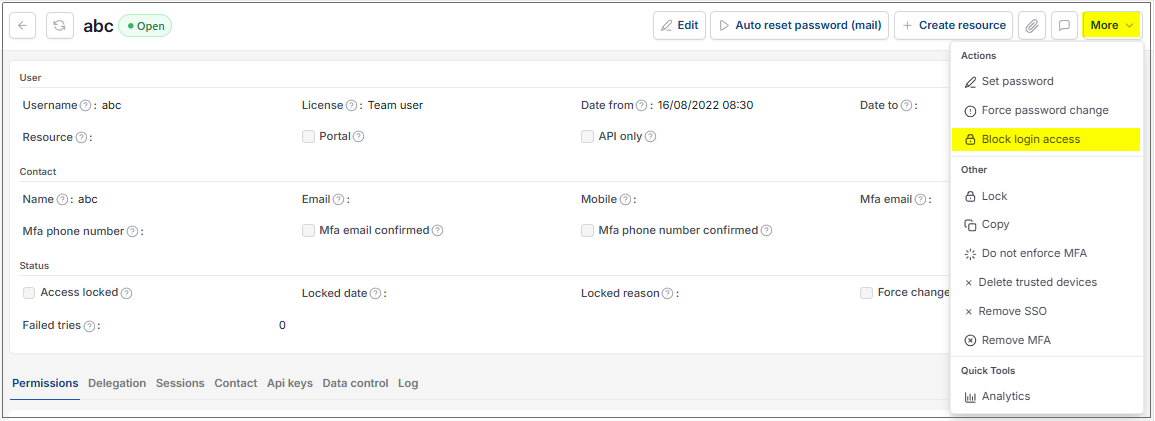
Enter a reason for blocking the user.
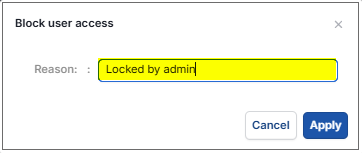
Select Apply.
How to reset a User's access limit
Reset password Tries
If the user has exceeded the limit of tries by entering the wrong login too many times, you can reset the tries and allow them to start again.
- To do so, select Reset try count.
How to lock User Accounts
Lock a user account
Select User accounts from one of the options as shown above in Viewing a User Account.
Select and open the User Account to lock.
Select Lock from the
option.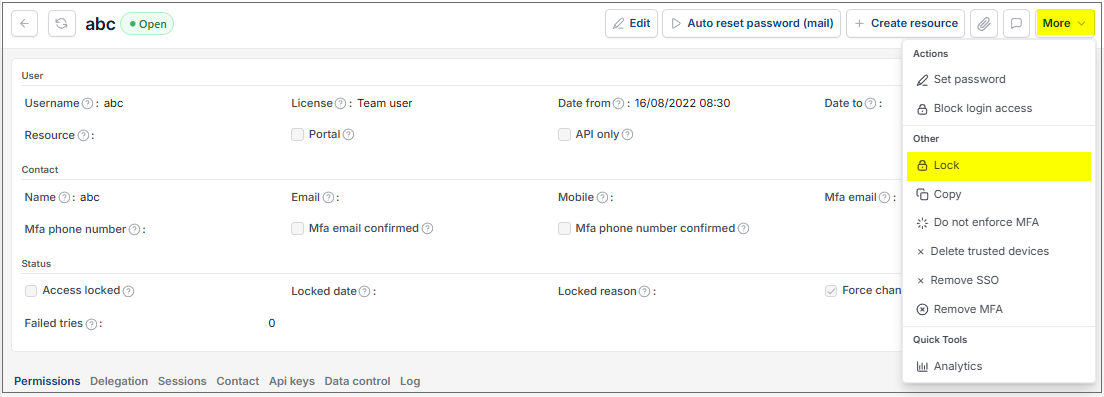
Tip
In order to unlock their account again, follow the same steps, however this time Unlock will be presented instead of Lock.
How to manage MFA
Manage MFA
Select User accounts from one of the options as shown above in Viewing a User Account.
Select and open the User Account to manage MFA.
Select Enforce MFA, Do not enforce or Remove MFA from the
option.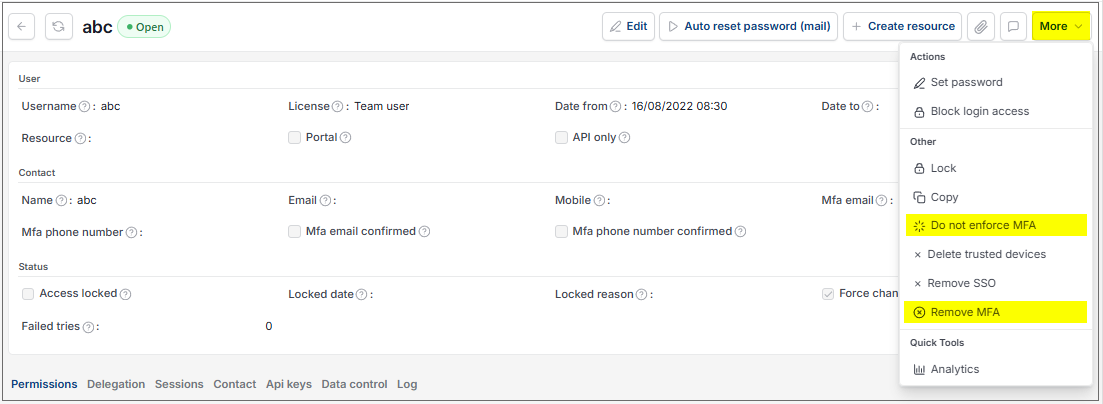
How to delete trusted devices
Delete trusted devices
Select User accounts from one of the options as shown above in Viewing a User Account.
Select and open the User Account to delete trusted devices.
Select Delete trusted devices from the
option.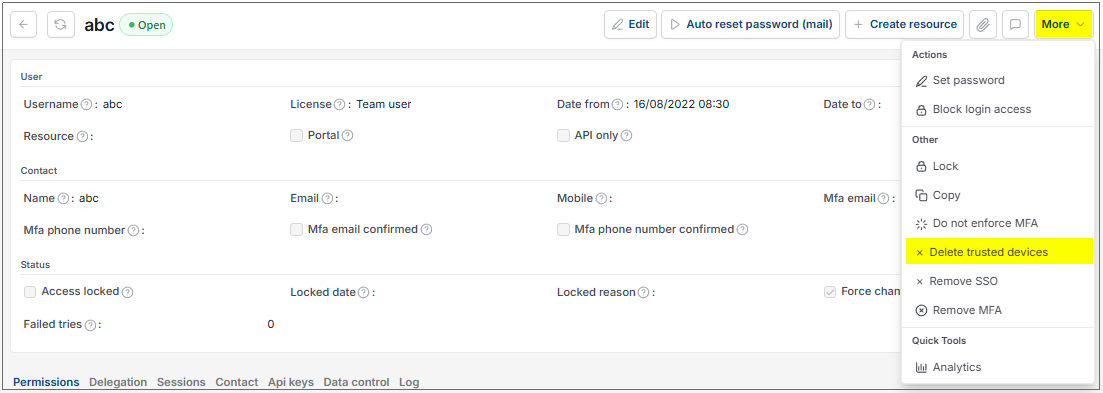
How to use the SSO wizard
SSO Link wizard
This option is used to quickly link users to the respective SSO provider(s).
There are separate options for Azure, and also, ways to link users e.g. OneLogin users to iplicit users.
On the main User account finder (i.e. do not select an individual User account), select SSO link wizard from the
option.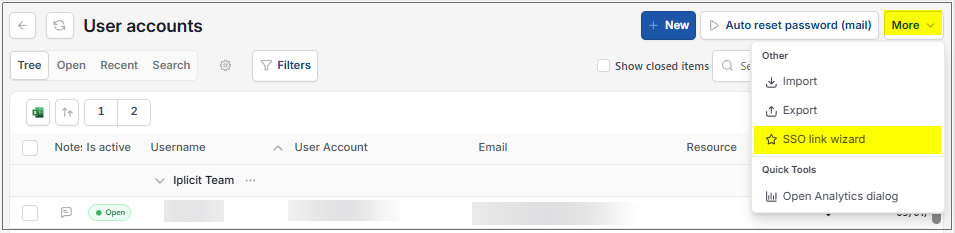
Azure AD users
Click on Login AzureAD to login to Azure.
Select Continue.
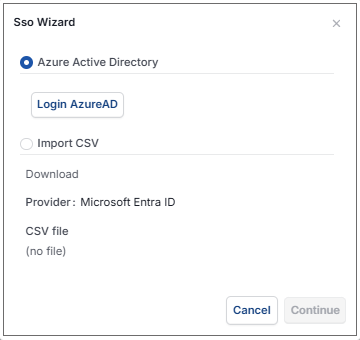
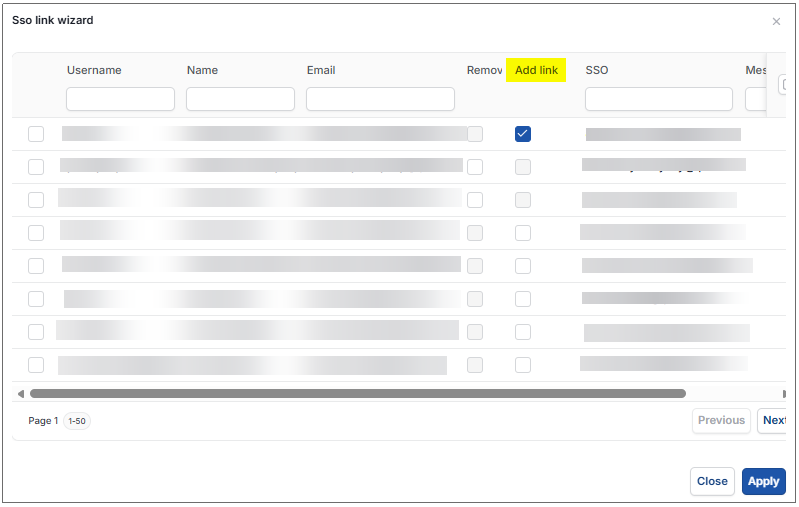
You will be presented with a list of users from Azure where a match will be attempted between the user email and the Azure email.
Note
If the users are already linked, you can select Remove Link to remove the connection.
Tick the Add link checkbox for each user you wish to link.
SSO users
Select SSO Link Wizard from the User account finder
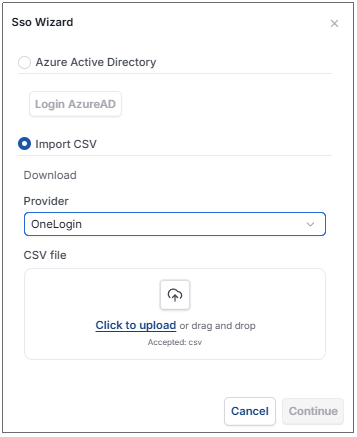
Select Import CSV
Select the Provider
Select the CSV file of the SSO users
Tip
The columns required on the file to be uploaded must have the emails matching the emails on the users, and the object_id is that provided by the SSO software (e.g. OneLogin)
Select Continue
Updated August 2026