Penny Correction Automation
Note
To view the legacy version, please select Legacy User Guide.
The Penny Correction Automation is used to process a correcting journal for Purchase or Sales documents where the Payment or the Receipt is different to the original invoice but only by pennies.
Without this automatic correction, the debt will remain, albeit only pennies, and a correcting journal will have to be manually created to clear the balance.
The Penny Difference tolerance is setup in the General section in the Environment defaults - enter Environment defaults in either the Pulse menu or the Side menu.
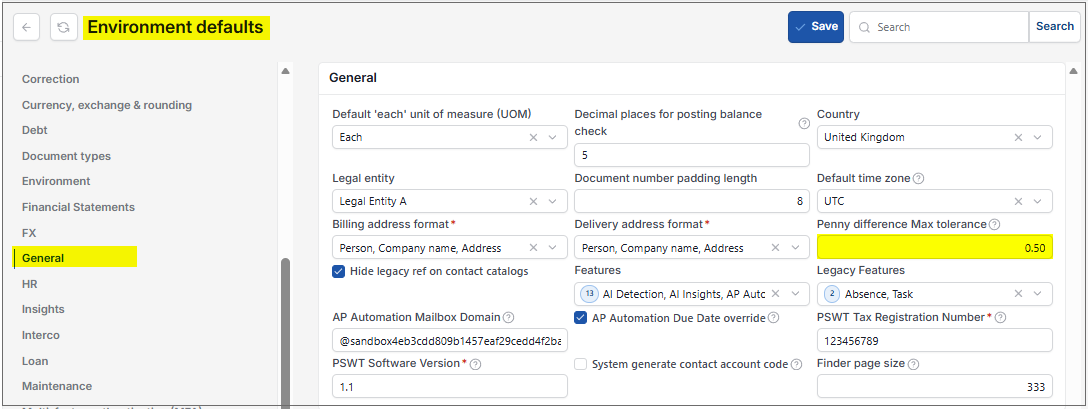
There are two Penny Correction types: Purchase and Sale. Both types have the same process to run and share identical parameters.
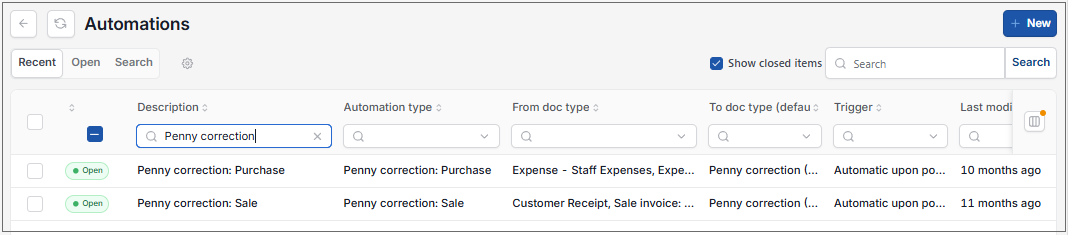
How to view Penny Correction Automation
Viewing Penny Correction Automation
As per Generic Navigation options, either from left-hand navigation panel, expand Settings and select Automations from the Document folder or enter Automations in the Search option.
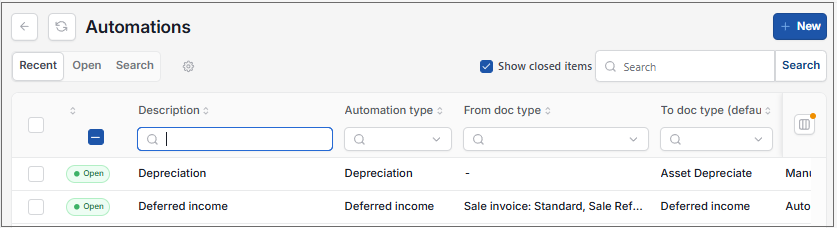
This will then show the Automations on the system where normal customisation of Sets can be used.
Tip
To modify the columns displayed, select  option on the right of the column display, then tick/untick the information you want to hide or display.
Filter the Automations to show only the Penny Correction automation, enter Penny Correction in the description filter tab.
How to edit Penny Correction Automation
Edit Penny Correction Automation
Open the Penny Correction Automation that you need to edit as per View Penny Correction above.
select Edit -

Make changes as required.
One of the reasons to edit the Penny Correction Automation is if you want to change the Trigger setting (when you want the Penny Correction to take place) -
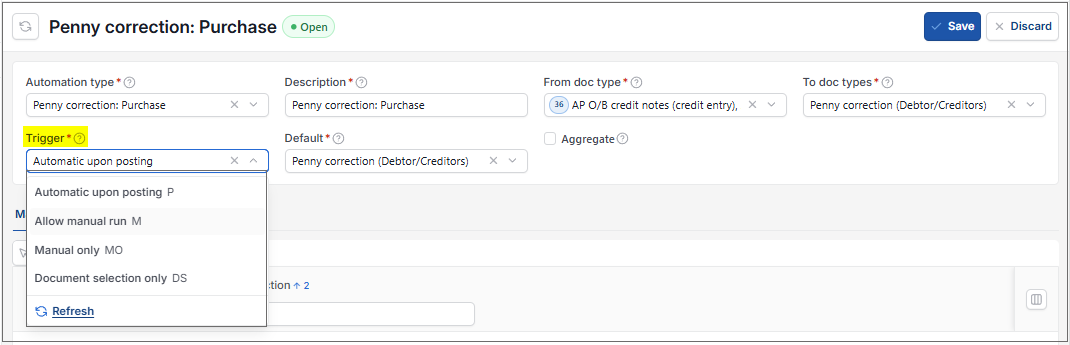
Setting this to Manual only would stop the Penny Correction processing until it is run manually (see Manually run Penny Correction) below.
Another reason to edit the Automation would be to make changes to the From doc type.
If any Document type is created or unlocked after the Penny Correction Automation has been setup, then this document needs to be added to the From doc type field.
Open the From doc type field. Expand view and select the document type(s), then select Confirm.
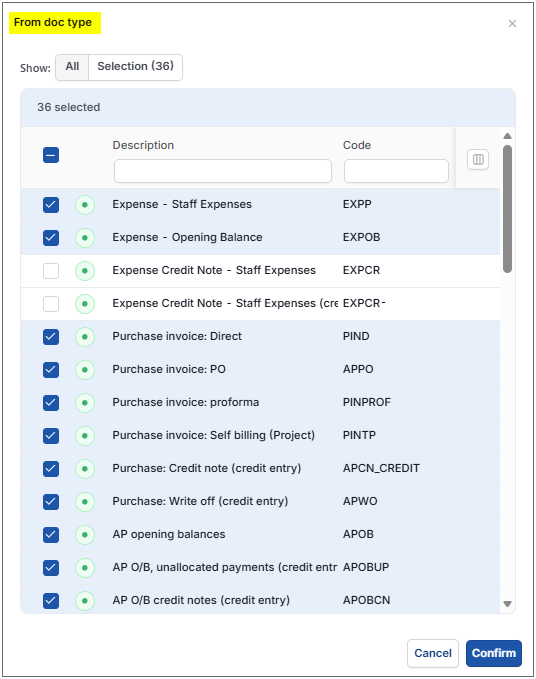
Select Save to complete the process.
How to create Penny Correction Automation
Create a Penny Correction Automation
If there is no default Penny Correction Automation already set up, you can create your own.
Open the Automation as detailed above.
Select New.
Enter appropriate values in the first section.
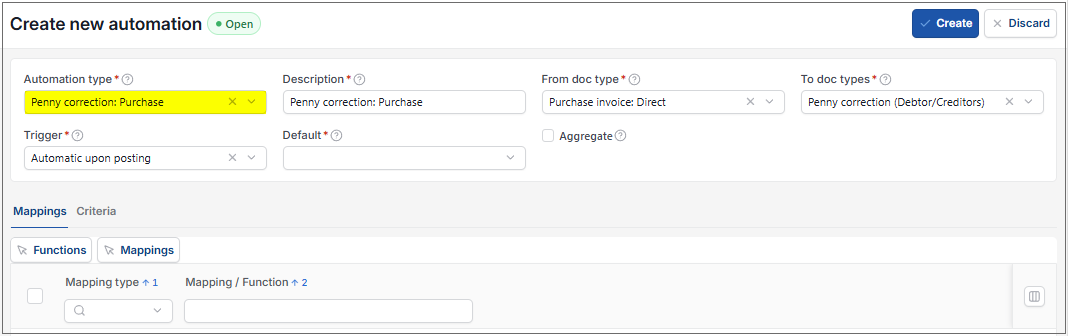
Under the Criteria tab you can set parameters such as the Date from and Date to which is the date the automation will run from and till and the Tolerance max which is the maximum tolerance for amount e.g. 0.05.
Note
The Tolerance max can also be setup in the General section in the Environment defaults.
Select Create on completion.
How to manually run Penny Correction Automations
Manually run Penny Correction
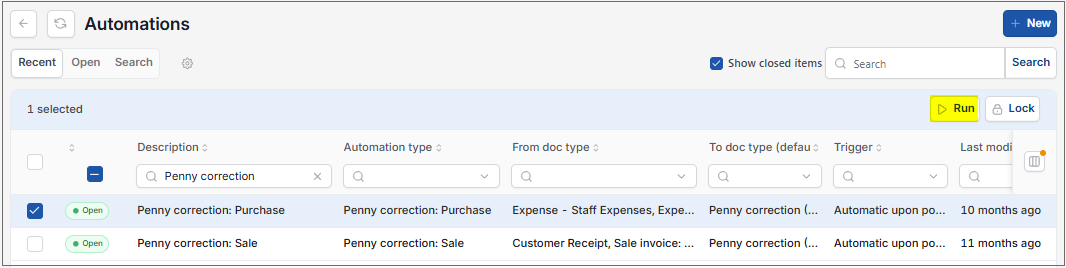
Open the Penny Correction Automation that you need to run as per View Penny Correction above.
Select the automation then select Run.
Enter the automation criteria.
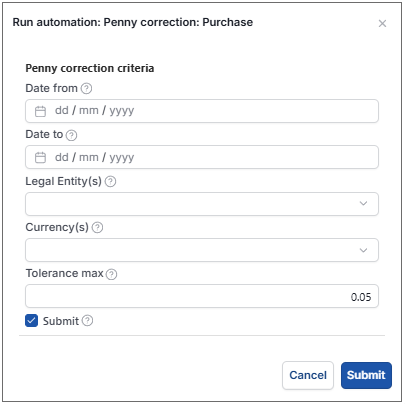
Date from: Select the earliest Document date that you wish to include.
Date to: Select the latest Document date that you wish to include.
Legal Entities: By filling this out the document automation will process the correct Document for the correct Legal Entity.
Currency: Select the correct Currency.
Tolerance max: Enter the value of the max Penny correction.
The 'Submit' tick box: If this is ticked the automation will create the Penny correction and allocate the difference to the correct documents.
Tip
If needed, multiple document automations can be made.
When you are happy with the selected criteria and setup, select Submit.
Note
The penny correction document(s) created can now be viewed in the Penny correction finder.
Select OK to continue working. Automation progress will show on the bottom left of the screen showing either In progress or Complete - see details in step 5 of How to run Automations.
How to schedule Penny Correction Automations
Schedule a Penny Correction Automation
Open the Scheduler menu by entering Scheduler in the Search option.
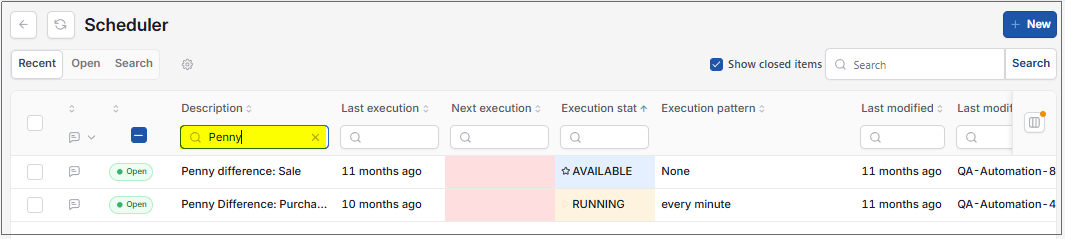
Filter the Scheduler to show only the Penny Difference options - enter Penny in the description filter tab -
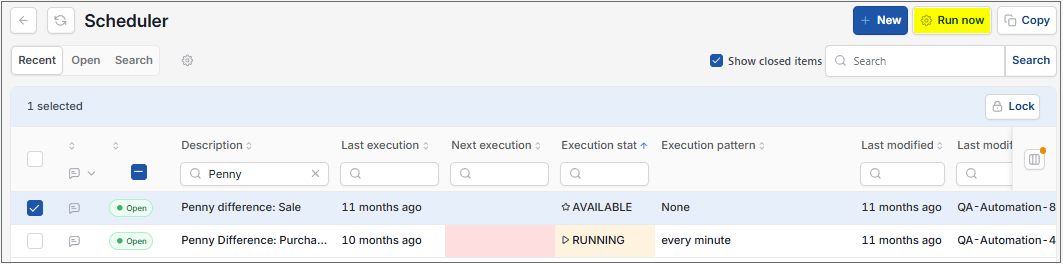
Select the process you wish to run and then select Run now.
Note
Further Scheduler options can be found in Scheduler User Guide.
How to view Penny Correction Documents
View created Penny Correction documents
To see all pre-existing penny correction journals, see User Guides for Penny Correction Documents in the Penny Correction Finder.
Updated September 2026