General Ledger Reconciliation
GL reconciliations can be used to manually review a subset of Chart of Accounts for later verification and reconciliation based on rules, examples of accounts include PAYE, suspense accounts, penny differences, accruals and pre-payments.
As with all reconciliations, the aim is to reconcile transactions involving accounts flagged for suspense/reconciliation to justify whether they have been cleared, checked or reported as outstanding.
GL Reconciliations rely upon the setup of Reconciliation Rules.
How to view General Ledger Reconciliation
Viewing GL Reconciliation
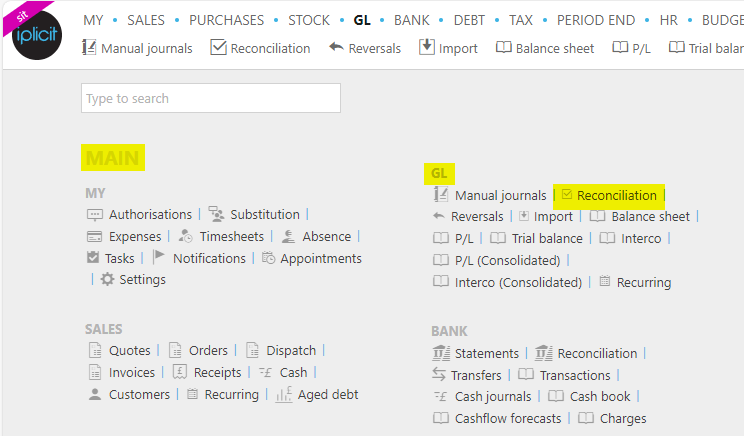
Select GL / GL reconciliation from the Main section of the pulse menu -
Note
This is an example screen shot of the pulse menu.
Position of the menu items within pulse will vary according to available options and dependant on personal screen resolution.
or from the Main Menu select GL then Reconciliation -

or enter GL reconciliation in the Quick Launch Side Menu.

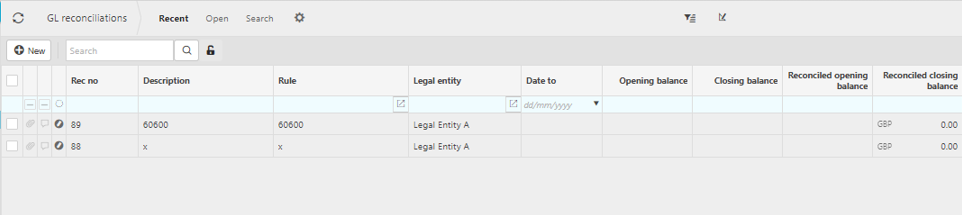
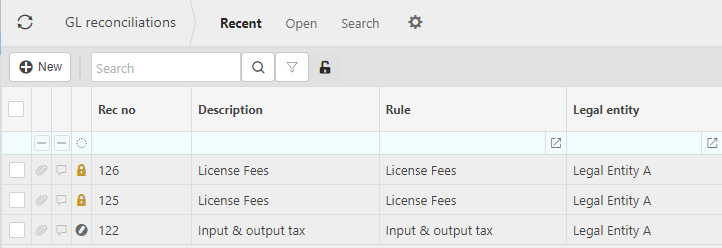
This will then show the GL reconciliations on the system where normal customisation of Sets can be used.
Tip
To modify the columns displayed, select  on the top right of the page, then tick/untick the information you want to see or not.
Adding a General Ledger Reconciliation
Adding GL Reconciliations
Select GL reconciliation from one of the options as shown above in Viewing GL reconciliations.
Select New.
This will display a list of the Reconciliation Rules available for selection.
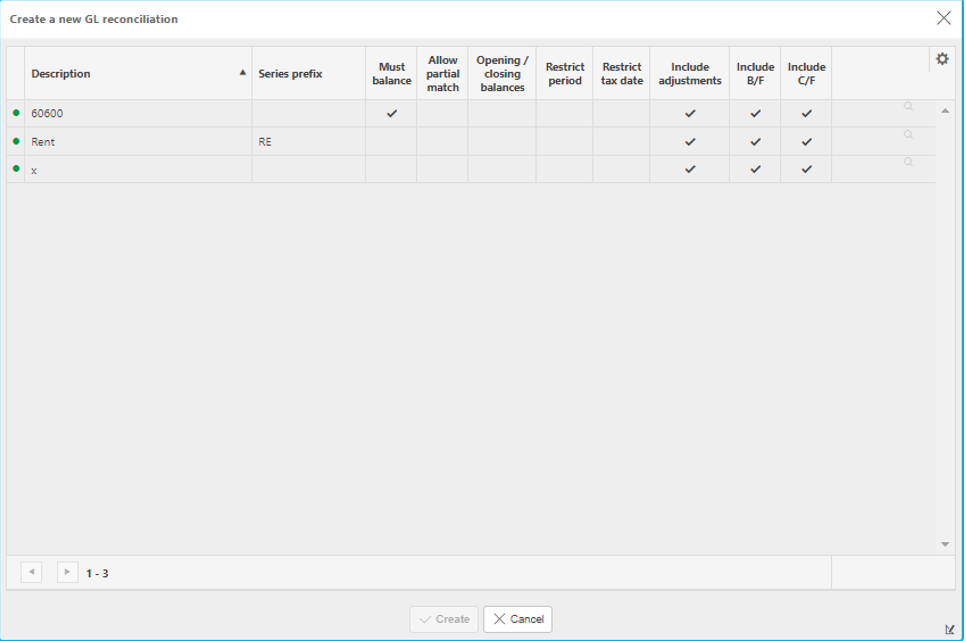
Select the Reconciliation Rule required then click Create.
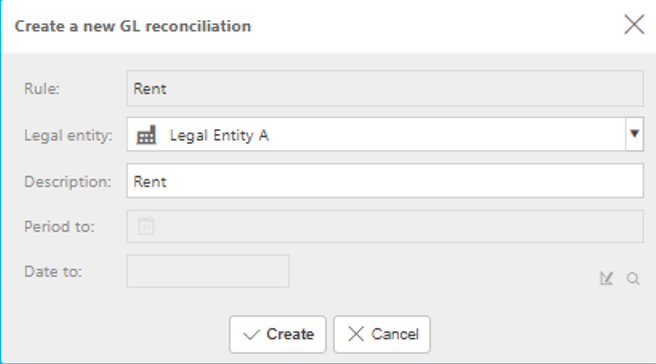
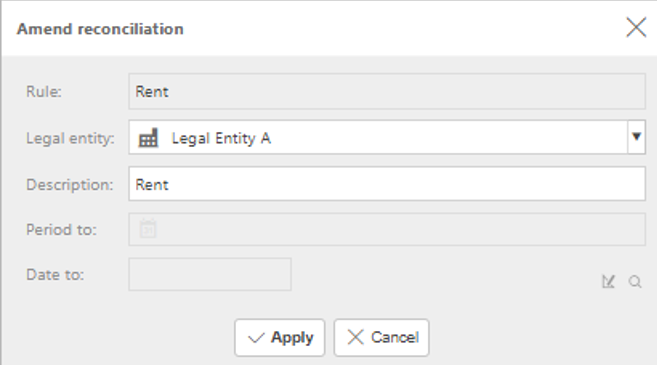
Select the Legal entity required for the reconciliation and amend the description if required then press Create.
Note
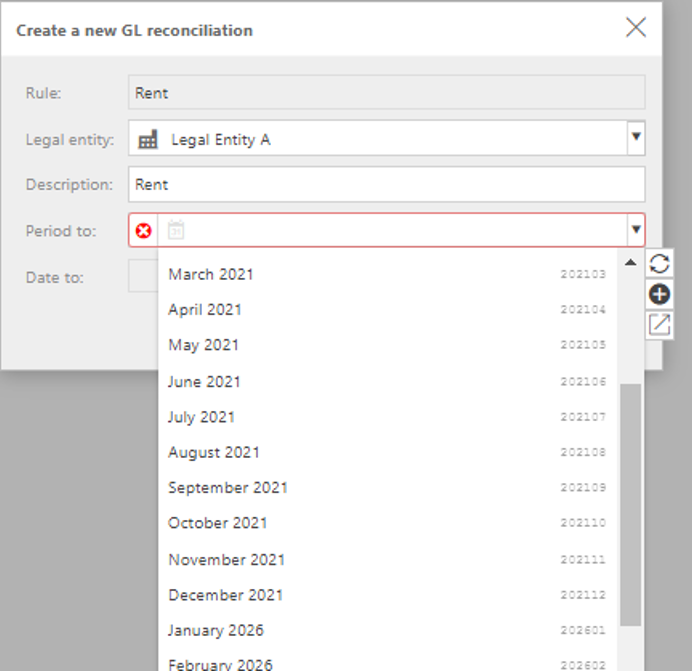
If the Reconciliation Rule has been set-up to allow reconciliation up to a period or date then the Period to and Date To fields will be available for entry of a period or date respectively.
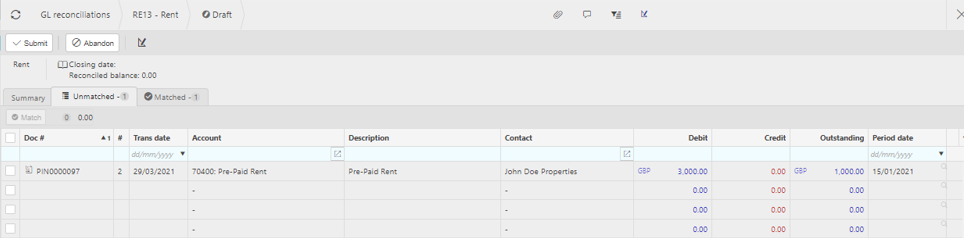
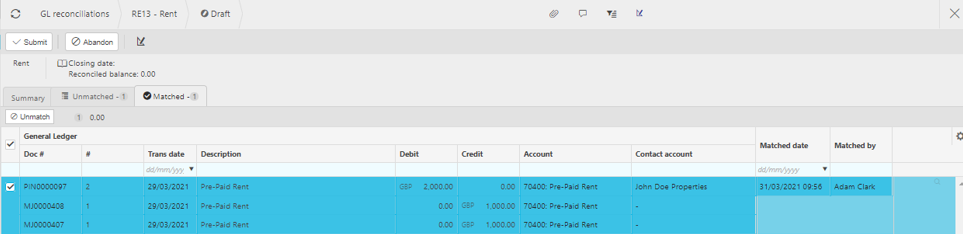
You will then be presented with the following screen to complete the matching.
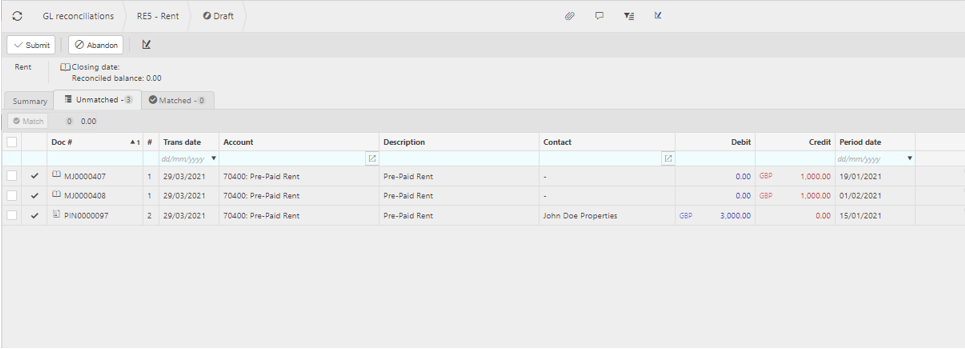
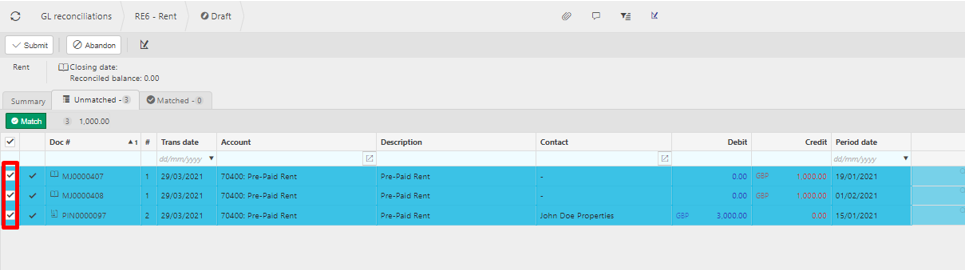
Select the transactions to be matched by clicking on the tick box next to the transactions.
Tip
If all transactions need to be selected the tick box at the top of the column can be selected to automatically tick all transactions.
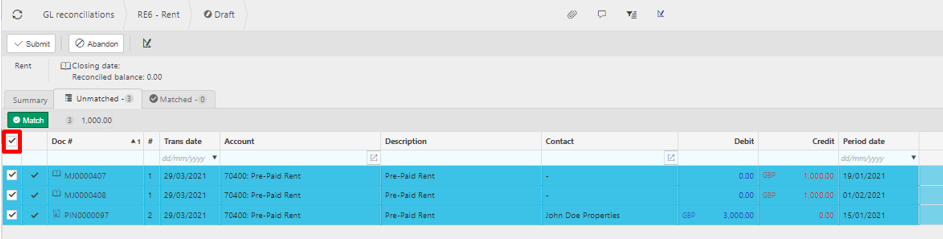
Click on the Match button to confirm the transactions as being matched.
Note
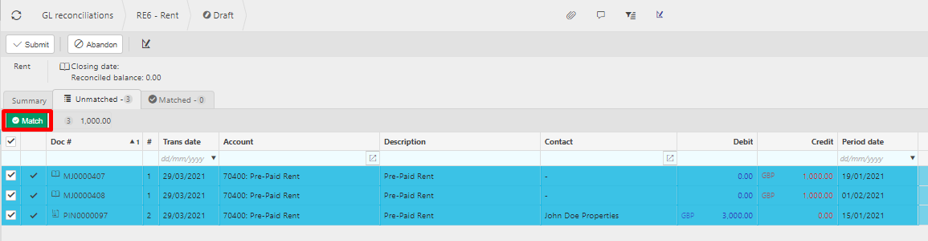
Note that the match button will appear differently depending on the matching rule applicable to the reconciliation rule selected. These are as follows:

The matching mode on the reconciliation rule has been set-up as “match any”. Match any will allow you to simply mark any GL line (or lines) as matched without a corresponding credit or debit entry in the GL.

The matching mode on the reconciliation rule has been set-up as “Must Balance (allow partial)” or “Must balance (complete)” and the debit and credit entries for the selected transactions sum to zero
The matching mode on the reconciliation rule has been set-up as “Must Balance (allow partial)” and the debit and credit entries for the selected transactions do not sum to zero. In this instance, the match button can still be selected, and the transactions matched, but it is shown in red as a warning that the debits do not match to the credits.

The match button will be greyed out under any of the matching mode rule if the above criteria is not met. Under this status the match button cannot be selected.
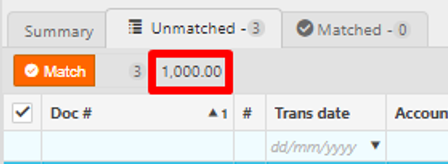
The total next to the match button will show the total of the transactions matched which will help indicate if the matching can be accepted. For example, under the “Must Balance (Complete)” this total must show as zero before the matching can be accepted.
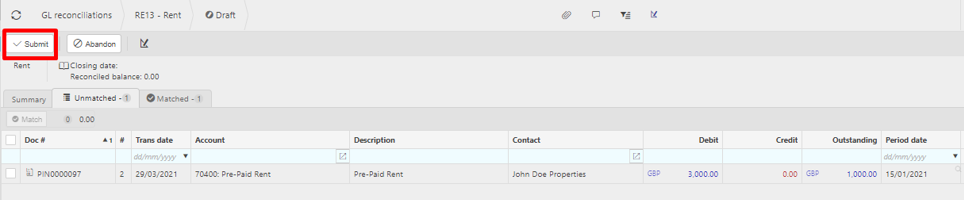
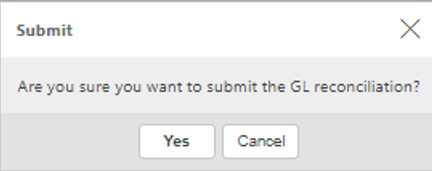
Press Submit to finalise the reconciliation.
Note
The reconciliation can also be abandoned by clicking on the Abandon button. This will bring up a screen asking for a reason for abandoning the reconciliation.
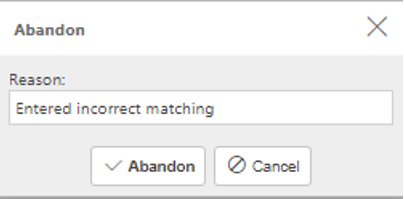
Once this is entered and the abandon button is clicked the reconciliation will be deleted.
Click on Yes to confirm the reconciliation is to be submitted or click on cancel if you wish to not submit the reconciliation at this stage.
Once submitted the reconciliation will now show a lock symbol against it and is now closed.
How to Navigate the tabs
Navigating the tabs
This will show the reconciliation number and rule set for the reconciliation, followed by the Legal entity of the account you’re reconciling. The date to or period to in which the reconciliation is taking place can also be found here.

More importantly, the summary tab shows the reconciled debits and credits and reconciled balance as well as showing the unreconciled debits and credits.
This tab is useful to refer to as an overview and a reminder of what needs to be reconciled. You can amend information by clicking the amend button where you will have the option to amend the description as well as the date/period to (if the reconciliation rule is set-up to allow for the Period to and Date to fields to be amended) and the legal entity.
Updated April 2025