General Ledger Reconciliation Rules
A General ledger reconciliation rule is a named rule describing the purpose, process and accounts involved in the reconciliation.

How to view General Ledger Reconciliation Rules
Viewing GL Reconciliation Rules
Select GL / GL reconciliation rules from the Settings section of the pulse menu -

Note
This is an example screen shot of the pulse menu.
Position of the menu items within pulse will vary according to available options and dependant on personal screen resolution.
or enter GL reconciliation rules in the Quick Launch Side Menu.

This will then show the GL reconciliation rules on the system where normal customisation of Sets can be used.

Tip
To modify the columns displayed, select  on the top right of the page, then tick/untick the information you want to see or not.
Adding a General Ledger Reconciliation Rule
Adding GL Reconciliation Rules
Select GL reconciliation rules from one of the options as shown above in Viewing GL reconciliation rules.
Select New.

This will display a screen for entry of the information required for GL Reconciliation Rules.

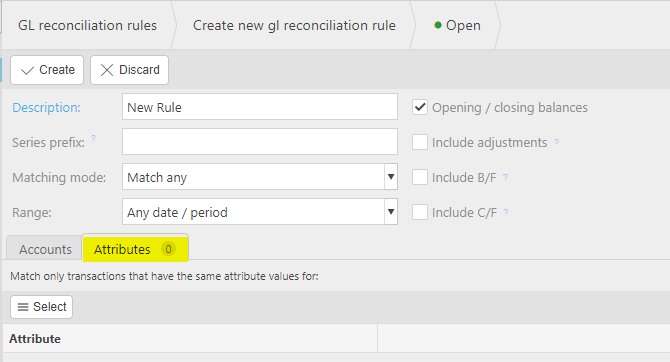
Description: This is the description for the reconciliation rule which is a mandatory field.
Series Prefix: Reconciliations will use this as a prefix for the sequence of reconciliation created using this rule. This can be useful to use in order to differentiate reconciliations performed using this rule from reconciliations using other rules, although it is not mandatory to enter a series prefix and so this field can be left blank.
Matching Mode: The matching mode defines how matches can be performed within the reconciliation

Note
Match any: This option will allow you to simply mark any GL line (or lines) as matched without a corresponding credit or debit entry in the GL. This mode is typically used for reconciling to data that is outside of iplicit - for example reconciling to a paper bank statement.
Must balance (allow partial): This option will allow you to make partial matches within the reconciliation. A debit must be matched with a credit in order to reconcile; however, if the matched items do not net to zero, you will be presented with the outstanding balance on the GL line in the unmatched tab. Further matches can be made against the remaining outstanding balance until it is cleared to zero.
Must balance (complete): This option will ensure that the full amount of the combined GL lines selected must balance to zero. This match can be: one to one, one to many and many to many; you can only complete a match when the debits and credits balance to zero.
Range: The Range setting defines whether the reconciliations performed using the rule will limit the transactions included up to a certain Financial period, tax date or from/to specified period of your choosing, including closed periods.

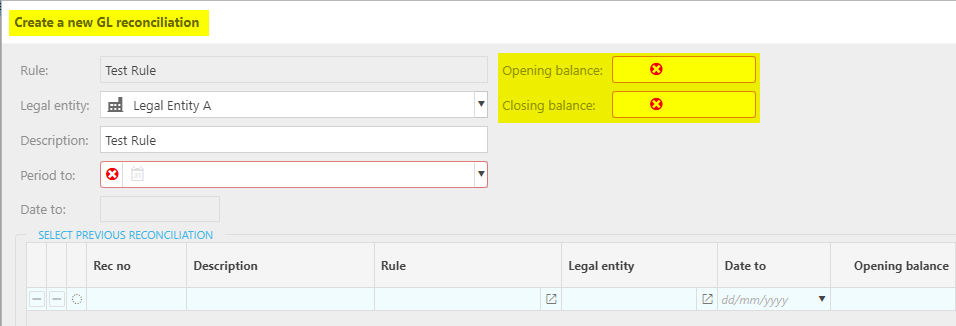
Opening / closing balances: Ticking this option on a GL reconciliation rule will allow the user to input an opening and closing balance when creating a new GL reconciliation.

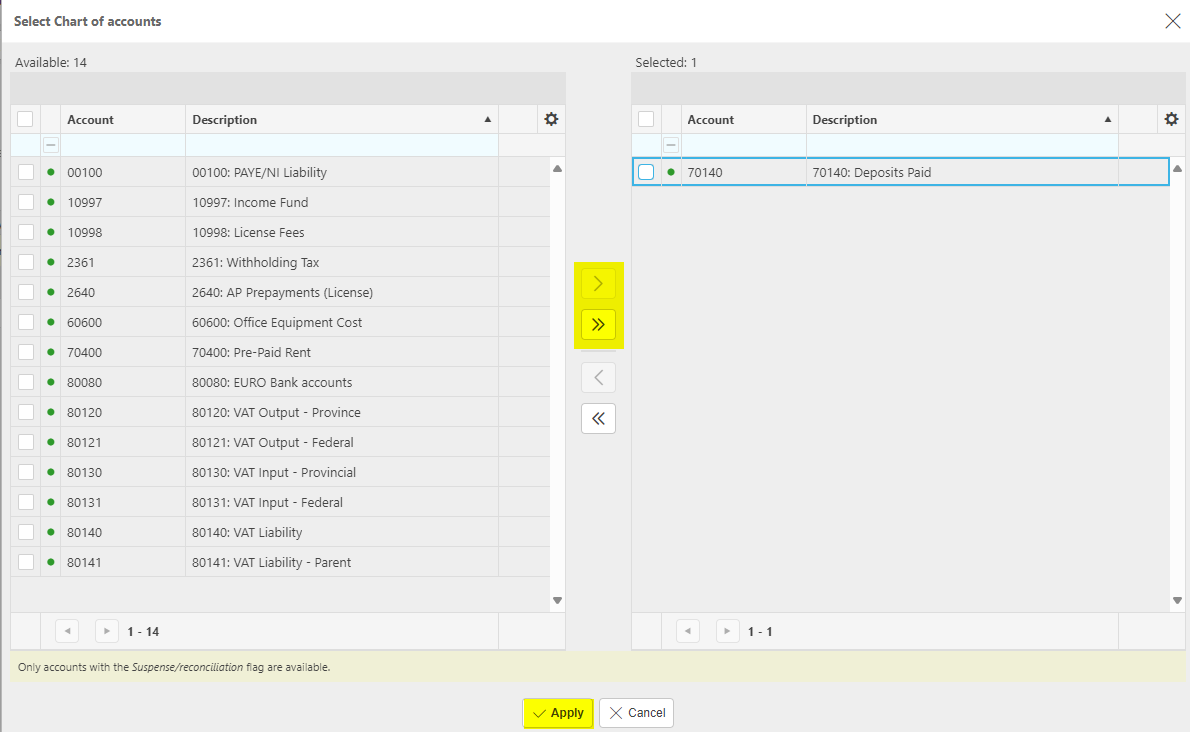
Click on the select button to select the Chart of Accounts that the reconciliation rule needs to be applied to.

Note
At least one account is required to enable the reconciliation rule
Tip
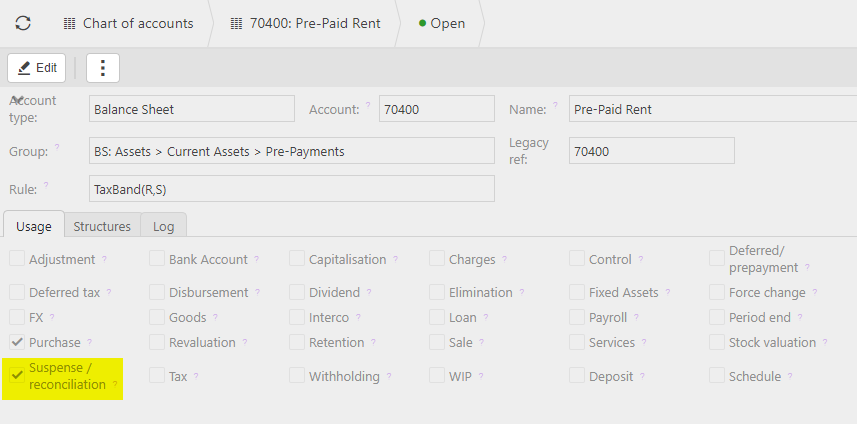
Only the Accounts with the suspense/reconciliation flag are available for selection and so make sure any Accounts that need to be selected have this box ticked on the Chart of accounts record.

Click on the arrows to select the Chart of Accounts to be included within the rule and click on the Apply button to save these changes.

Note
Everything that is required for the reconciliation rule should now be set-up.
Add Attributes
In addition the Attributes tab can be set-up to restrict available matches that can be made by ensuring that only transactions that have the same Attributes values can match.
Clicking select will show you all the available attributes. If required, choose the ones you would like to restrict the transaction matching by and click apply.


Finally click on Create to add the reconciliation rule

Updated July 2025