Prepayment automation
The Prepayment automation can be found and run by selecting the Automations menu from either the Pulse menu or the Side menu.
Note
To view the legacy version, please select Legacy User Guide.
How to view Prepayment automation
Viewing Prepayment automation
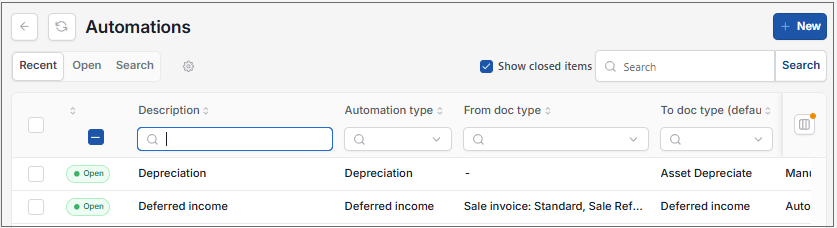
As per Generic Navigation options, either from left-hand navigation panel, expand Settings and select Automations from the Document folder or enter Automations in the Search option.
This will then show the Automations on the system where normal customisation of Sets can be used.
Tip
To modify the columns displayed, select  option on the right of the column display, then tick/untick the information you want to hide or display.
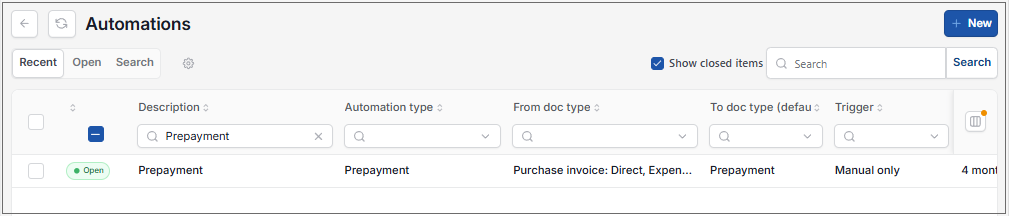
Filter the Automations to show only the Prepayment automation, enter Prepayment in the description filter tab.
How to manually run the prepayment automation
Manually run Prepayment automation
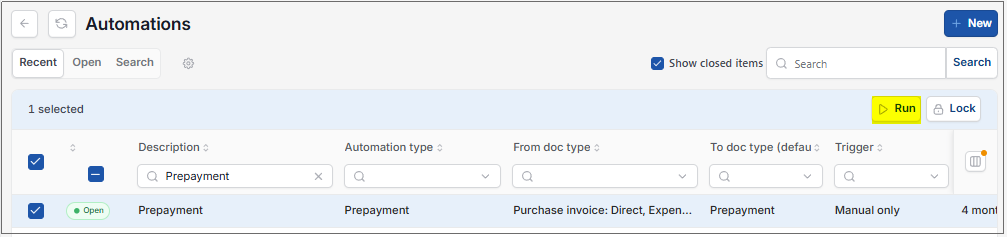
Select, or Select and open, Prepayment from Viewing Prepayment automation above.
Select Run.
Enter the automation criteria.
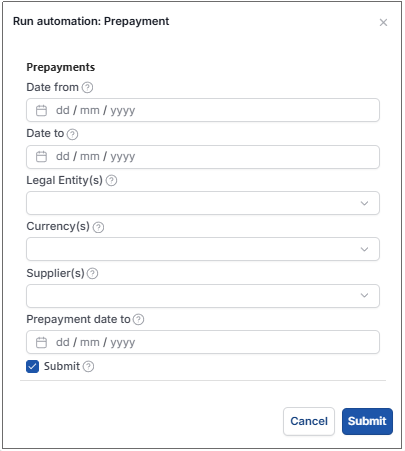
Date from: Leave this date blank if you want to select all available documents or enter a date to restrict documents to be greater than or equal to this date.
Date to: Leave this date blank to use the current date, or enter the latest Document date that you wish to include.
Legal Entities: Leave parameter blank to select all Legal Entities or select Legal Entity(s) to restrict the automation.
Currency: Leave parameter blank to select all or select Currency(s) to restrict the automation.
Suppliers: leave blank to select all or select Customer(s) to restrict the automation.
'Submit': If this checkbox is ticked, the document will be automatically submitted for authorisation. If unticked, the documents will be created in a draft state.
Select Submit.
Select OK to continue working. Automation progress will show on the bottom left of the screen showing either In progress or Complete - see details in step 5 of How to run Automations.
Updated September 2026