AP Automation Mailboxes
Customers will need to set up at least one AP Automation Mailbox in iplicit. Multiple mailboxes allow different default behaviours to be configured on per mailbox basis.
Current mailboxes can be viewed in AP Automation mailboxes.
How to view AP Automation Mailboxes
Viewing AP Automation Mailboxes
Either select Mailboxes from AP Automation in the Settings section in the pulse menu -

Note
This is an example screen shot of the pulse menu.
Position of the menu items within pulse will vary according to available options and dependant on personal screen resolution.
or enter AP Automation mailboxes in the Quick Launch Side Menu.

You will then have a list of any AP automation mailboxes that have been set up.

Attributes explained -
Description - user friendly description for the Mailbox.
Processing model - process used to scan the incoming documents.
Address - unique address for the Mailbox.
Note
Each mailbox has a unique mailbox address. This address has a unique prefix followed by the iplicit AP automation domain -
e.g. bcf6ab35-73bb-4044-b72f-74aa1c8c9be4ake@ap-automation.iplicit.com72f
Tip
To modify the columns displayed, select
 in the top right of the page, then tick/untick the information you want to see or not.
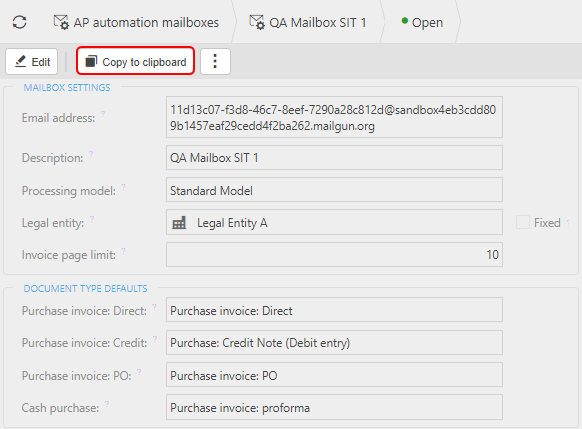
Highlighting one of the Mailboxes will show Copy to clipboard as an additional menu item - you will NOT be able to Copy a mailbox that is Locked and, if selected, the option Copy to clipboard will not show.
Selecting Copy to clipboard will copy the AP mailbox Email Address to the clipboard. This will add clarity to the copying of APA mailbox and will reduce likely errors if left to highlight and copy from the mailbox cell.

Note
If more than one mailbox is selected, then the Copy to clipboard option will not be available. This is because only one unique mailbox address can be copied to the clipboard at one time.
Opening the selected Mailbox will then show further details, allowing you to Edit the details, copy the Mailbox Email Address via the Copy to clipboard option or to Lock the Mailbox via the
 icon - see Deleting Mailbox notes below.
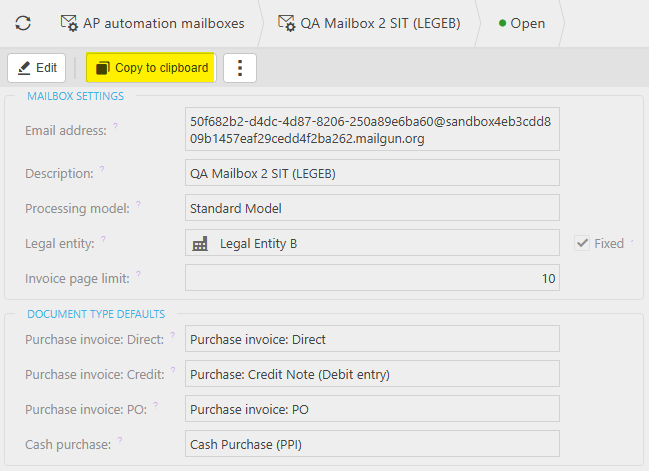
How to change default Invoice page limit
Changing default Invoice page limit
Select AP automation mailboxes from one of the options as shown in Viewing Mailboxes above.
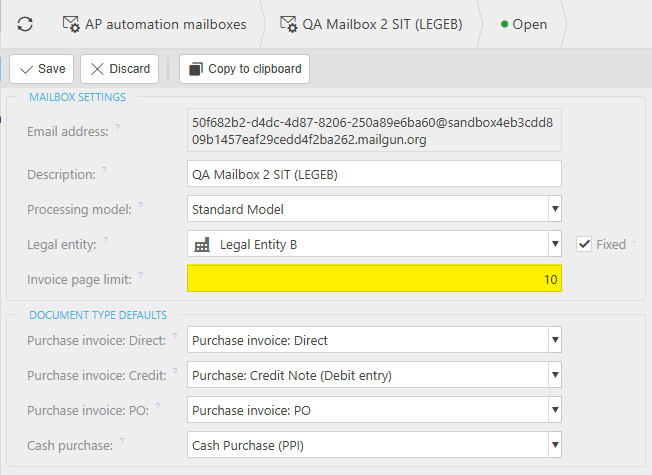
Select and open the Mailbox to change, then select Edit.
Invoice page limit - the default value is 10. Change to required limit.
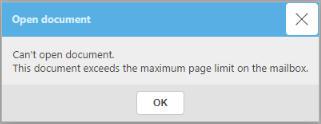
Note
If a document has more pages than the Invoice page limit then an error will be returned, and no pages will be scanned.
Select Save to update mailbox.

How to add additional AP Automation Mailboxes
Adding additional AP Automation Mailboxes
The Customer can add Additional mailboxes as required.
Select AP automation mailboxes from one of the options as shown in Viewing Mailboxes above.
Press New.

This will then open the Create new ap automation mailbox screen.

Email address - this will automatically create an address.
Other fields to fill in -
Description - text describing the mailbox.
Processing model - standard (only model currently available)
Note
If this is the first Mailbox on your system, then there will be no available Processing models, and one will need to be created.

Select the
 icon and enter the following -
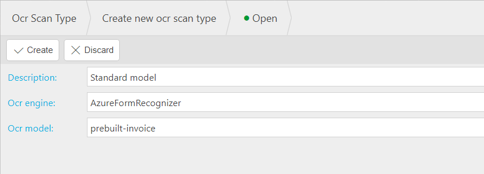
Press Create once completed.
Legal entity - the default Legal entity for documents received in this mailbox.
- Fixed -
 when ticked, all documents entered via this mailbox will be set to the Legal entity defined here and the AP Automation will not try and resolve the Legal entity from the attached invoice.
- Fixed -
Invoice page limit - the default value is 10 but it can be overwritten.
Note
If a document has more pages than the Invoice page limit then an error will be returned, and no pages will be scanned.

In the Document Types tab -
Purchase invoice: Direct - the type of document to create when the invoice is not recognised as a credit note or matches a Purchase Order.
Purchase invoice: Credit - the type of document to create when an invoice is recognised as a credit note.
Purchase invoice: PO - the type of document to create when a purchase order is supplied and matched against an existing PO in iplicit.
Cash purchase - default document type for Cash Purchases.
Select Create to complete process.
Note
You also have the option to discard the changes made on the template by selecting Discard.
You will then get a message to confirm this action.
How to initiate AP Automation Mailboxes
Initiating the AP Automation process
To initiate the AP Automation process the user should attach digital documents or scanned images to an email and send to an AP Automation mailbox configured in iplicit - see AP Automation.
Key considerations:
Multiple attachments on a single email are supported.
Multiple document formats supported (".pdf", ".png", ".jpeg", ".jpg", ".tiff", ".tif", ".bmp").
Important
Rich Text Format (".rtf") emails are not supported.
Documents must be < 500MB in size.
Image dimensions must be between 50 x 50 and 10,000 x 10,000 pixels.
PDF dimensions must be less than 17 x 17 inches.
PDF passwords must be removed prior to submission.
Minimum of 8-point font size.
Multiple languages supported - further information on supported languages can be found in this Document.
Note
For best results use PDF file format.
How to delete Mailboxes
Deleting Mailboxes
Note
You can only delete a Mailbox if there is nothing in it.
Select AP automation mailboxes from one of the options as shown above.
Select the Mailbox you wish to delete.
Select the three-dot button
 and select Lock.
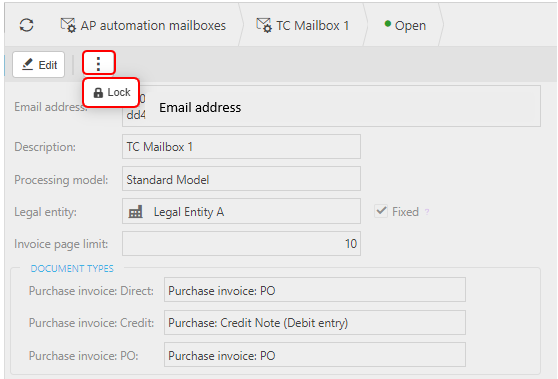
The Mailbox will now be locked (a black box with Locked text will briefly display) and will now show as
 .
.Select the three-dot button
 again and select Delete.
You will get a confirmation message to complete this action.
The Mailbox will now be deleted.
Note
You also have the option to unlock at this point to return the Mailbox to its normal state.
(A black box with Unlocked text will briefly display)
Updated May 2025