Mobile App
How do I install the Mobile App?
Installing the Mobile App
The iplicit Mobile app is available for any Apple (IOS) or Android device and can be found in both Apple’s and Google Play app stores. The app should only be installed from your device’s official app store.
Go to the appropriate App store and search for the name iplicit.
Alternatively, the iplicit Mobile app can be downloaded from https://apps.iplicit.com/ by selecting the appropriate option for your device.

Apple App store -
Google Play App store -
Follow the instructions for your download option to load and install the Mobile app.
Once installed you can then sign into iplicit and use the system in the same way you can through a web browser.
How to authorise the Mobile App?
Authorise the Mobile App
Before you can sign in to the Mobile app, you will need to get the following information from your iplicit administrator -
- iplicit Domain
- Username
- Password
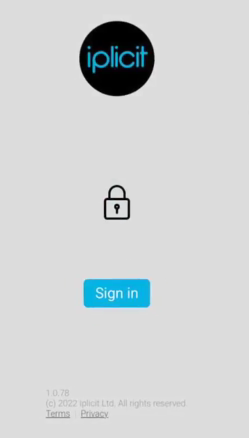
Once you have these details, launch the App and select the Sign in button.
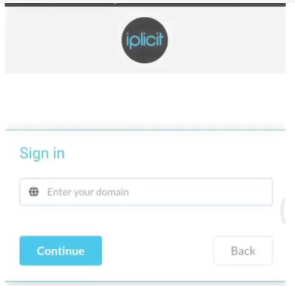
Enter your Domain, then select continue.
You will then be prompted to enter your Username and Password, then select Login.
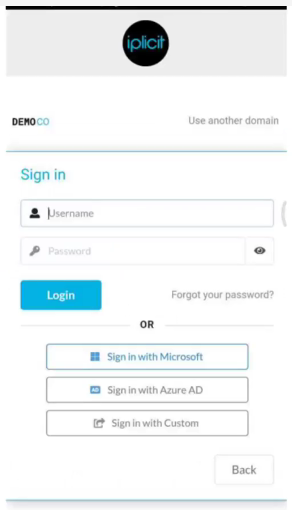
If your organisation allows, you can login using an alternative method.
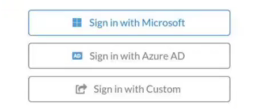
The Mobile app also allows signing in using Biometrics - fingerprint or facial recognition.

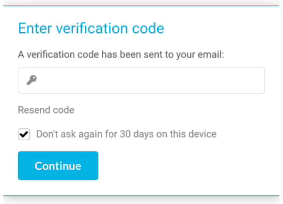
Your device will now be verified ready for use.

Signing into iplicit for the first time on a device will require verification. An email with a verification code will be sent to your email account.
Tip
Tick the box so you don't get asked again for 30 days.
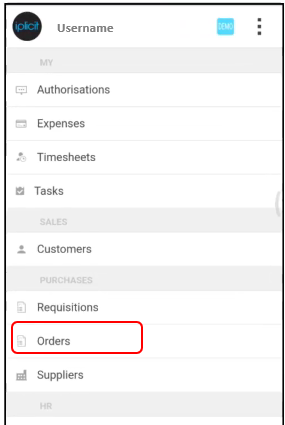
You will now have the iplicit App. Options available will depend on your user access assigned to you by your administrator.
How to enter a Purchase Order on the Mobile App?
Enter a Purchase Order
Purchase Orders are accessed from the main Mobile App screen.
Once opened, the most recent orders will be displayed.
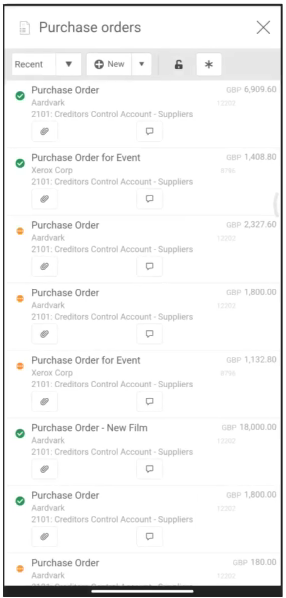
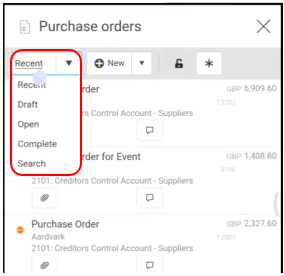
Use the Filter dropdown to see Recent, Draft, Open or Complete Orders. Or Search for a particular Order.
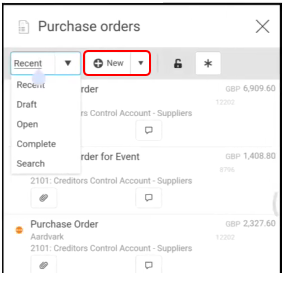
To create a new Purchase Order, select New - or select New (from template) from the drop-down button.
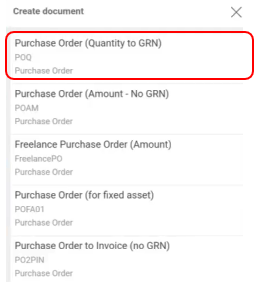
Select the Purchase Order document you require.
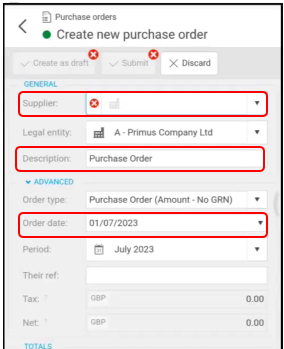
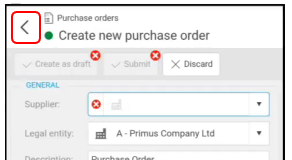
Enter Order header information - Supplier, Description and change or alter other fields such as Order Date.
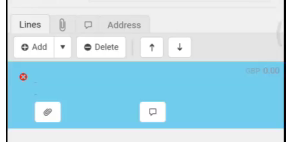
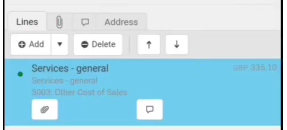
Enter Order line details in the lower half of the screen.
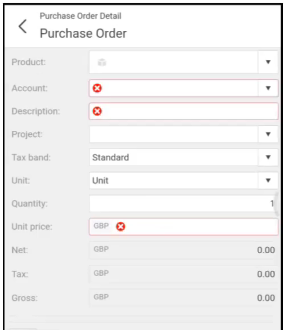
Press the highlighted line to open up the Line to enter Products, Description, Quantity and Unit price plus any other information such as change in VAT rate.
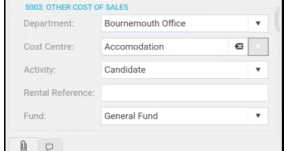
Enter any analysis information required e.g. Department, Cost centre.
Once the Line data is complete, select the back arrow to return to the Purchase Order.
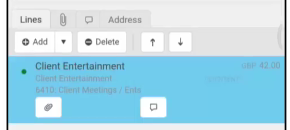
Use the Add, Copy or Delete options to add or remove more Lines. Use the Attach icon to add any Attachments or Photos (from your Mobile device). Also, using the bubble icon, you can add any notes or comments to the Order.
Once all data has been entered, use the buttons at the top of the Purchase Order to -
- Create as draft.
- Submit to send the Order for approval.
- Discard or Delete the Order.
How to enter Expenses on the Mobile App?
Enter Expenses
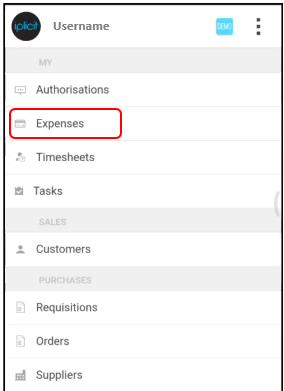
Expenses are accessed from the main Mobile App screen.
Once opened, the most recent Expenses will be displayed.
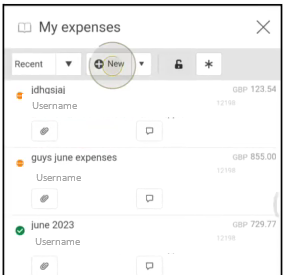
Use the Filter dropdown to see Recent, Draft, Open or Complete Expenses. Or Search for a particular Expense.
To create a new Cash Expense or Credit Card Expense, select New.
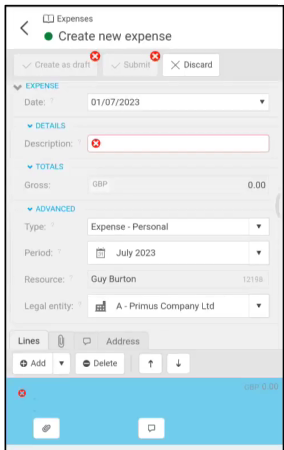
Enter Expense information - Description, Period (if different from default) and Company (if you can claim against more than one Company).
Tip
Header Sections can be minimised by selecting the 'chevron' when not required to save on screen space.

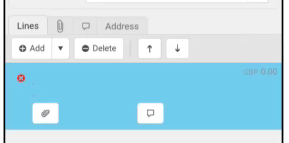
The first Expense line is entered by default in the lower half of the screen.
Press the highlighted line to open up the Line to enter Date of Expense, Product, Description, Quantity (default is 1) and Unit price. You also have the option to add or take a photo of the receipt.
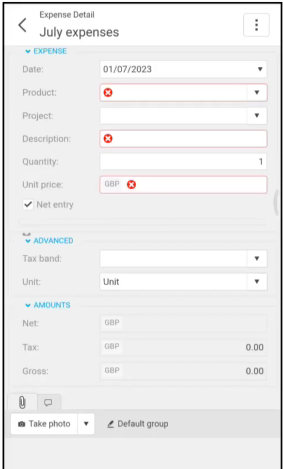
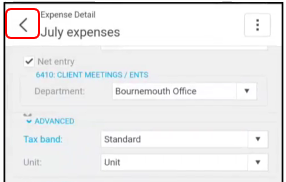
Enter any analysis information required e.g. Department, Cost centre.

Once Line data is complete, select the back arrow to return to the main Expense Claim form.
Use the Add, Copy or Delete options to add or remove more Lines. Use the Attach icon to add any Attachments or Photos (from your Mobile device). Also, using the bubble icon, you can add any notes or comments to the Expense Claim.
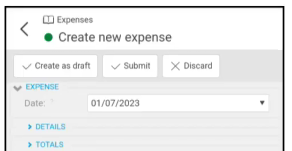
Once all data has been entered, use the buttons at the top of the Expense Claim to -
- Create as draft - to allow addition Expenses to be added later. e.g. Adding Expenses for a month's Claim Form.
- Submit - to send the Expense Claim for approval once all entries and attachments have been added.
- Discard or Delete the Expense Claim.
Approval status will be displayed by the coloured icons on the left-hand side of the main Expenses screen.
Approvers will be notified through the App or via an email.
All Expenses can be viewed via the App or via the main iplicit site.
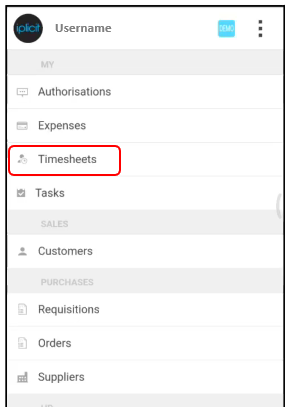
How to enter Timesheets on the Mobile App?
Enter Timesheets
Timesheets are accessed from the main Mobile App screen.
Once opened, a list of Timesheets will be displayed.
- Use the Filter drop-down to see Timesheets by Week, Recent, Items or Draft. Or Search for a particular Timesheet.
To create a new Timesheet, select New.
Your Username will be entered into Resource.
Enter the Week from date.
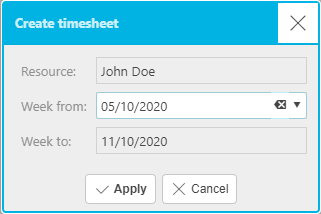
Note
Timesheets are always weekly, starting Monday.
Press Apply.
Select Add to create new timesheet line(s).
Select a timesheet product then press Create timesheet line.
Tip
- The same timesheet product can be entered multiple times in the same week.
Check the posting attributes are correct such as the customer, legal entity and project, if incorrect, make changes.
How to make changes to the posting attributes
The Default attributes are inherited from the timesheet product.
Press Edit then make changes to the available fields before pressing Apply.
Now enter the timesheet values.
Once you are happy with your timesheet select Submit.