Data Entry Control (DEC)
DEC is available to restrict catalogue values to e.g. Cost Centres for a Legal Entity.
Note
When in force, these restrictions apply to the entry of documents (e.g. Purchase Invoice) as well as any reporting & enquiries.
A User may be in multiple DAC Groups and when this is the case, will inherit the aggregate access.
How to view Data Entry Control
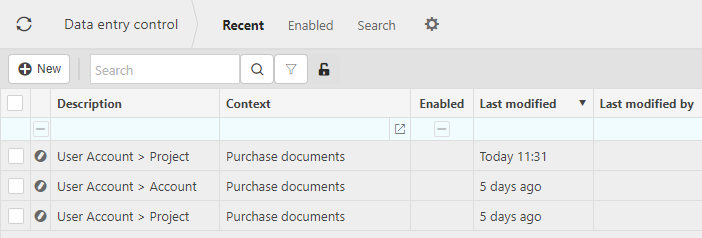
Viewing Data Entry Control
Select User Access / Data entry control from the Settings section of the pulse menu -

Note
This is an example screen shot of the pulse menu.
Position of the menu items within pulse will vary according to available options and dependant on personal screen resolution.
or enter Data entry control or DEC in the Quick Launch Side Menu.

This will then show the Data entry controls on the system where normal customisation of Sets can be used. There are also columns showing those DACs that are linked to a CDAC and those that are Enabled or not.
Tip
To modify the columns displayed, select  on the top right of the page, then tick/untick the information you want to hide or display.
How to create Data Entry Control
Creating Data Entry Control
Select Data entry control from one of the options as shown above in Viewing Data Entry Control.
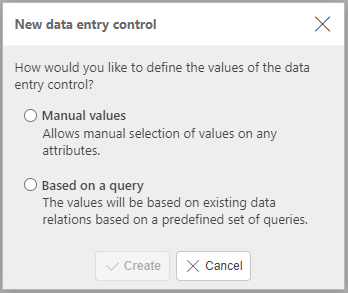
Select New to create a new DEC.
Select how you want to define the values of the Data entry control and then select Create.
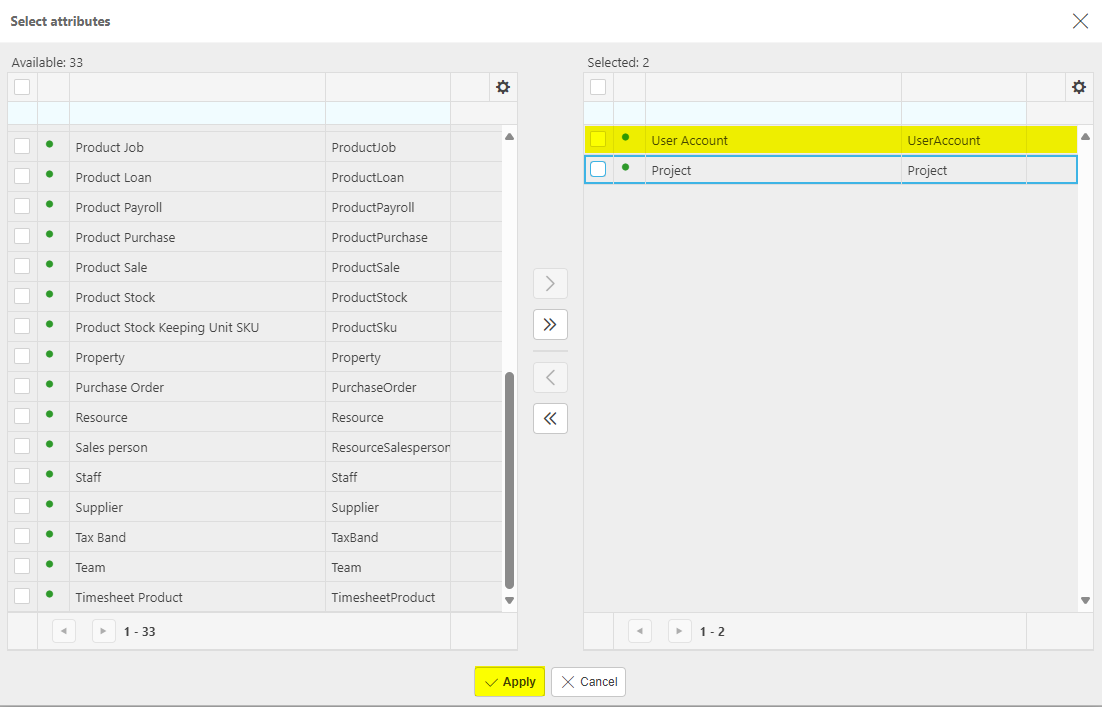
Select the Attributes you wish to use followed by Apply.

Tip
You must have a minimum of 2 attributes, but you may have 3 or more if you wish.
Select the Context from dropdown list or via the
 icon.
icon.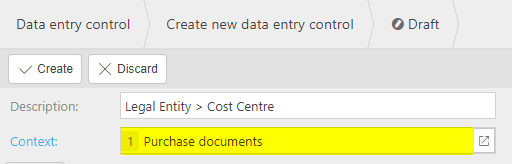
Tip
You can apply the DEC to selected document contexts e.g. Purchase documents or even all document contexts.
If, as in the example given here, you only choose Purchase Documents then the DEC will apply to all Purchase documents.
You can change the context later.
Select the primary attribute values that you want to apply the DEC.
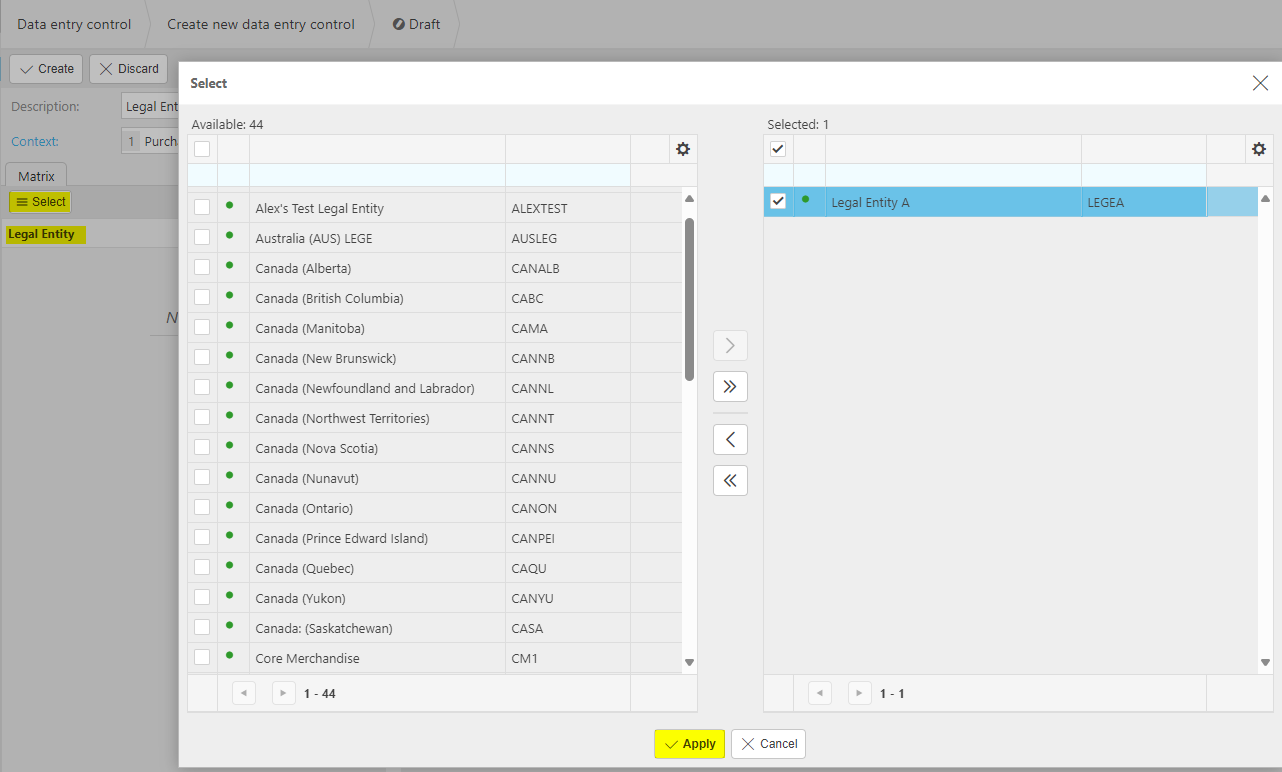
Select each Legal Entity in turn and then press Select for the secondary attribute and choose the Cost Centres you wish to use for the Legal Entity followed by Apply.
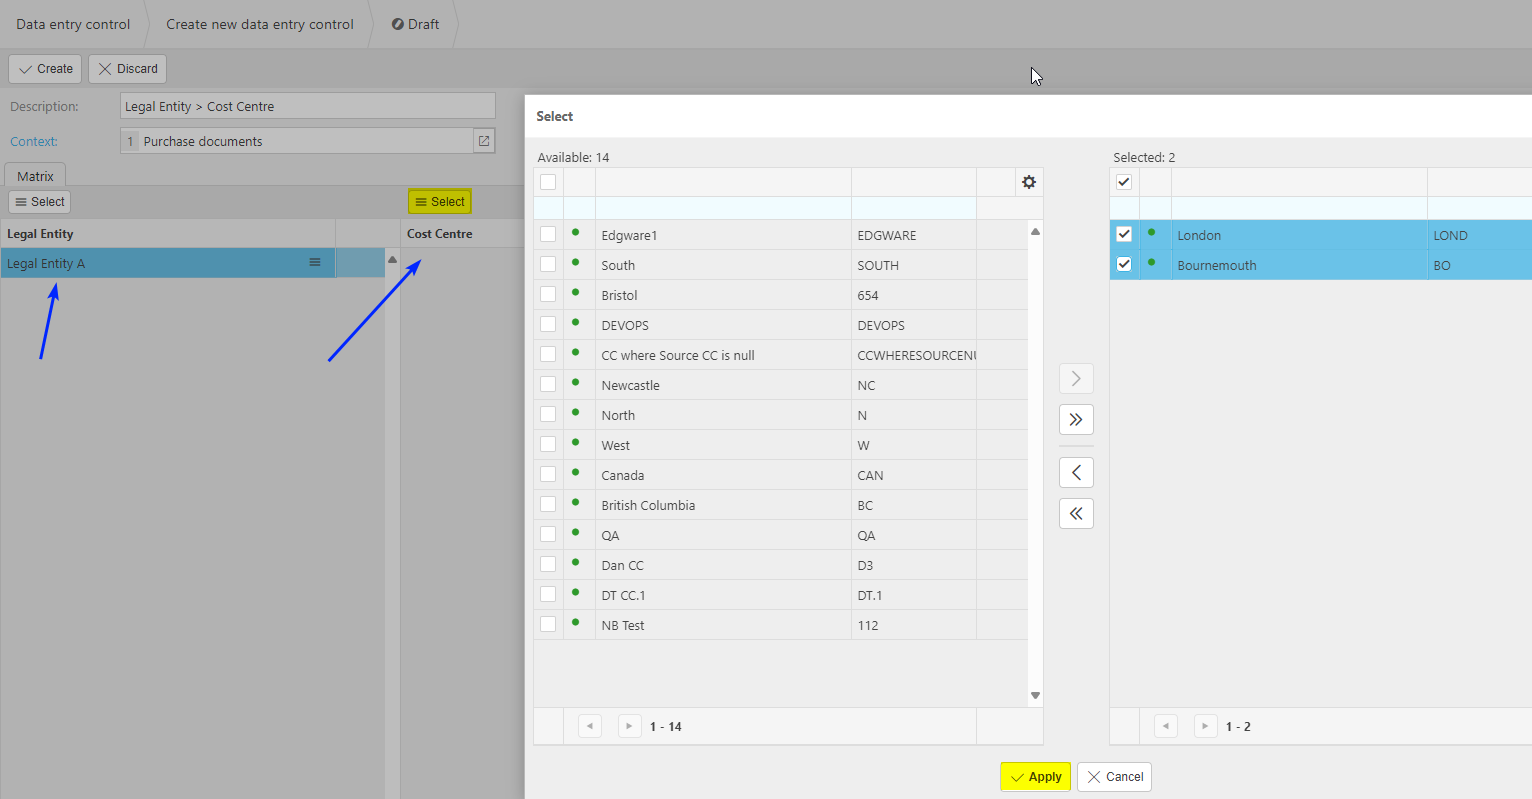
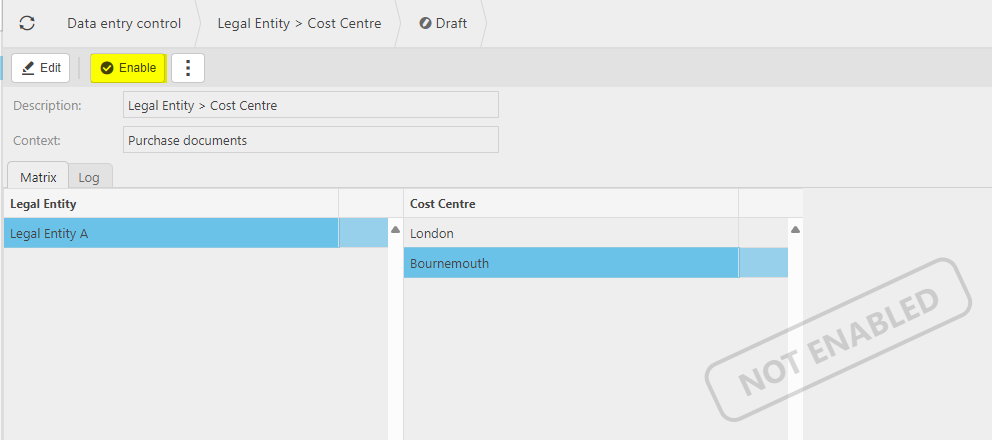
When you have finished, press Create to create the DEC in draft.
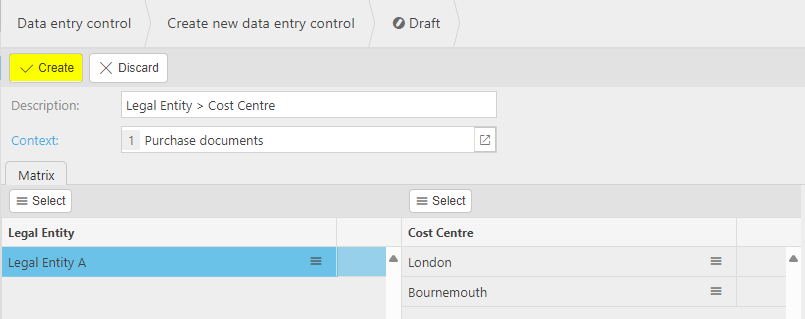
The new Data Entry Control will be created but not yet Enabled.
How to restrict users with Data Entry Control
Restricting users with Data Entry Control
Select Data entry control from one of the options as shown above in Viewing Data Entry Control.
Select New to create a new DEC.
Select how you want to define the values of the Data entry control and then select Create.
Select User Account plus other attributes you wish to use followed by Apply.
Tip
You must have a minimum of 2 attributes, but you may have more 3 or more if you wish.
Select the Context from dropdown list or via the
icon.Select the User Account in the Matrix, then select the Users for this DEC, followed by Apply.
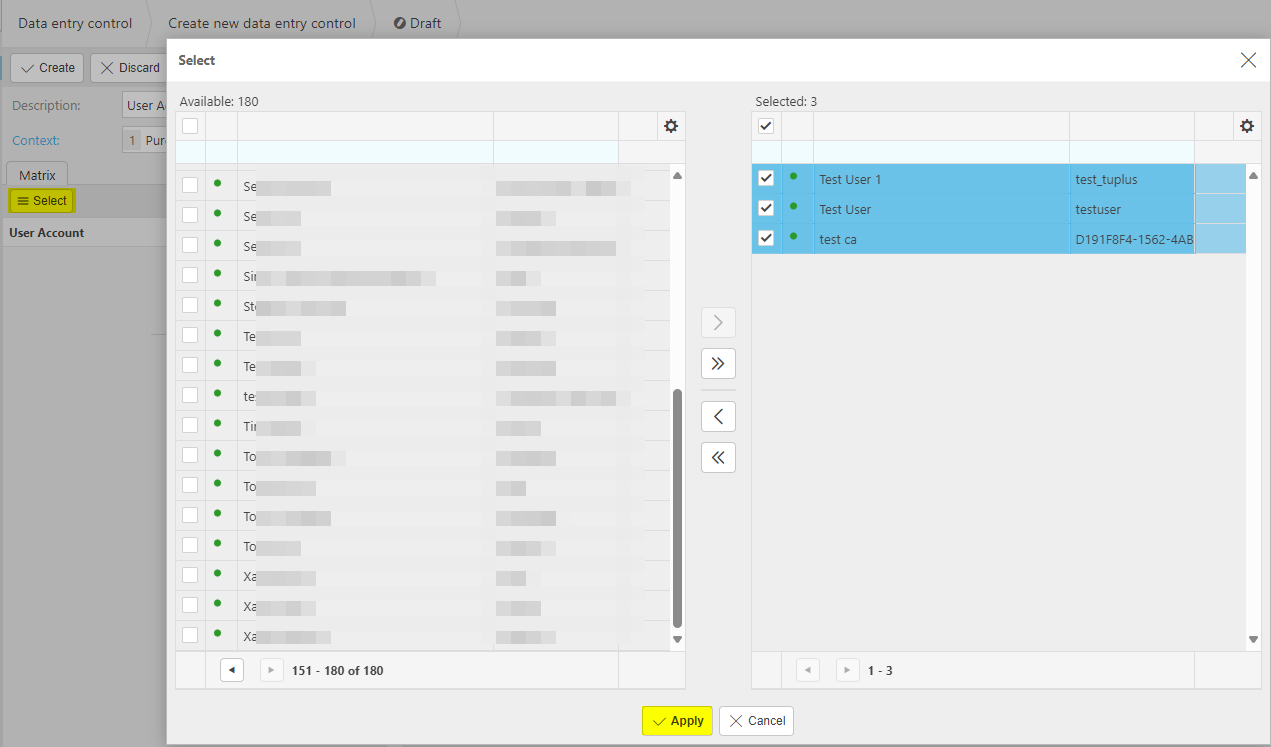
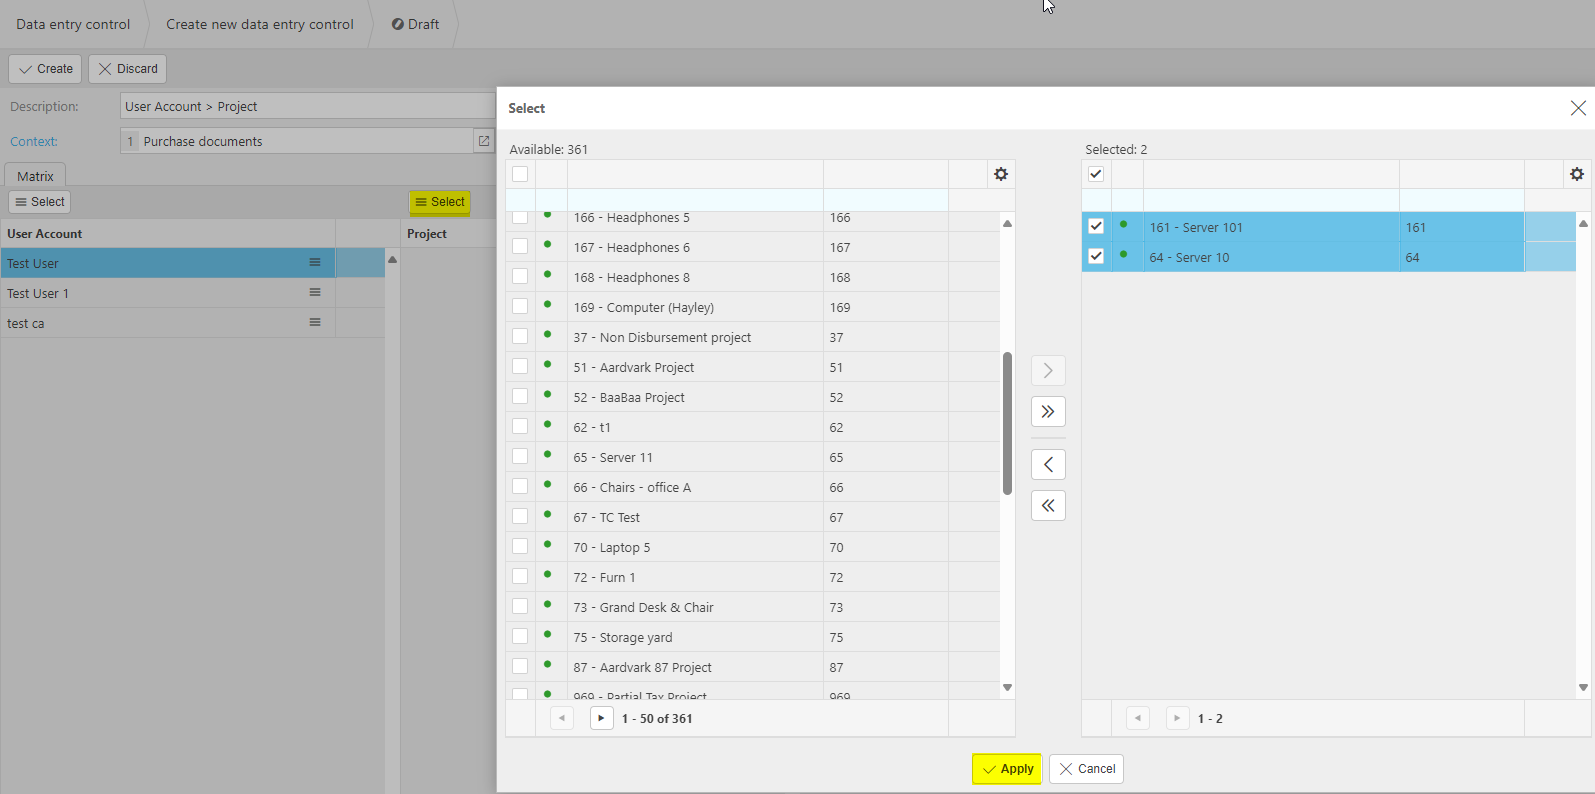
Select each User in turn and then press Select for the secondary attribute and choose the values you wish to use for the User followed by Apply.
When you have finished, press Create to create the DEC in draft.
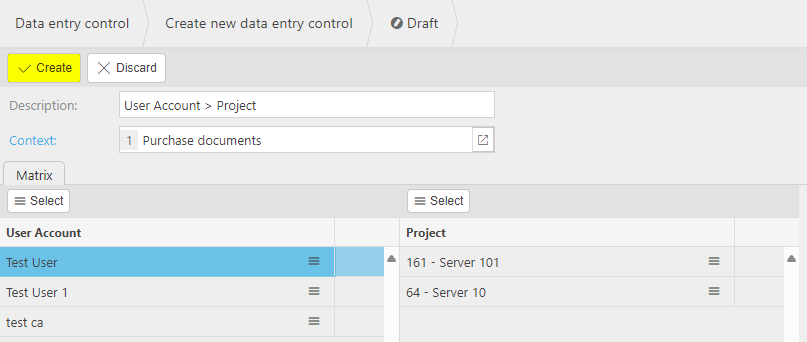
The new Data Entry Control will be created but not yet Enabled.
How to enable Data Entry Control
Creating Data Entry Control
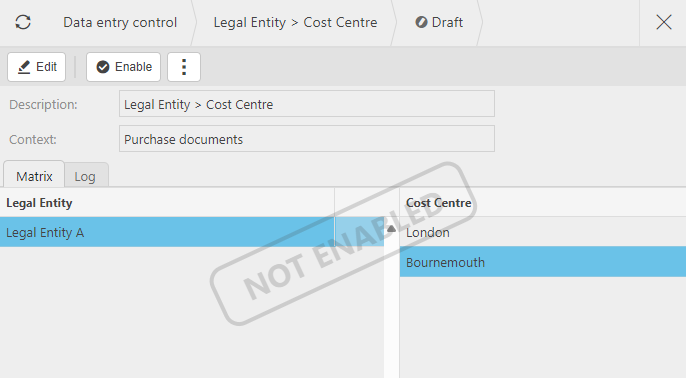
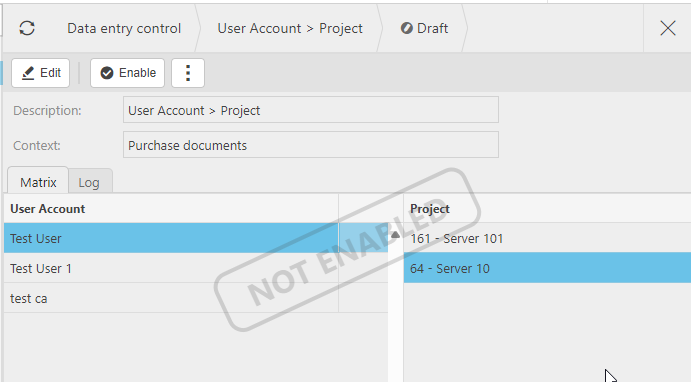
Once the Data Entry Control has been created, it then needs to be Enabled.
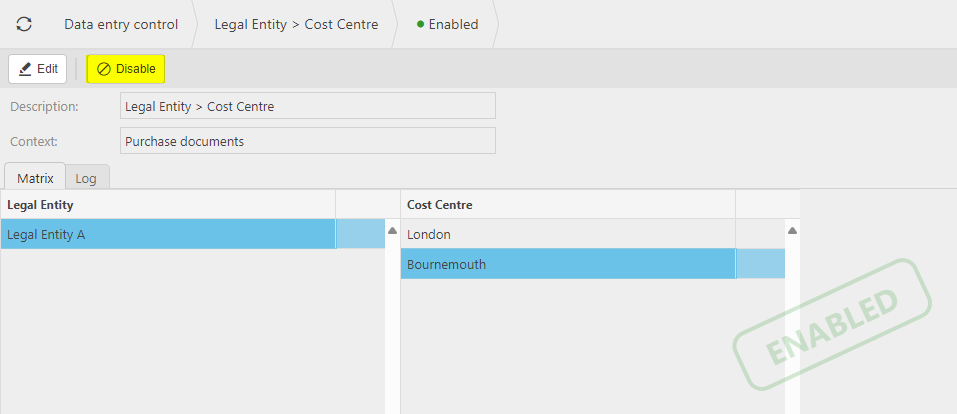
Select Data Entry Control to Enable.
Select Enable option.
Note
The DEC will not work until you have Enabled it. You may wish to defer enabling until you have completed the DEC setup.
Once Enabled, the Date Entry Control will show with a green Enabled watermark.
How to disable Data Entry Control
Disable Data Entry Control
Select Disable to stop the DEC working.
How to Import/Export Data Entry Control
Import/Export Data Entry Control
Adds the ability to create Data entry control combinations.
Select Data Entry Control from one of the options as shown above in Viewing Data Entry Control.
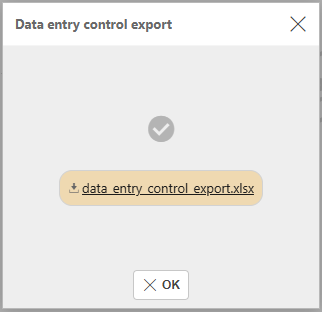
Open the Data Entry Control to import.
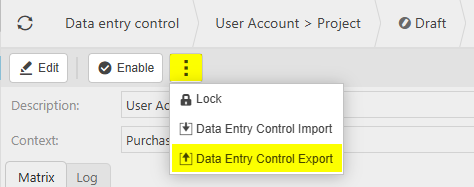
Select the
 icon and select Data Entry Control Import.
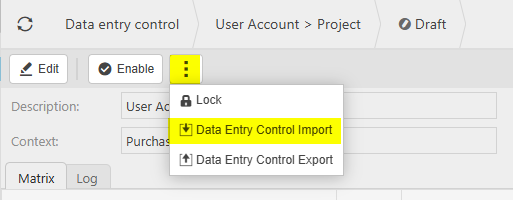
Note
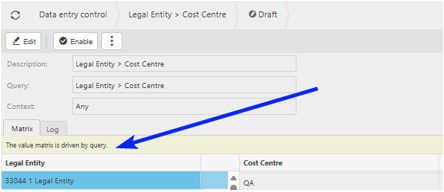
Import is not available on query based DECs as the matrix for these is driven by the query not user input.
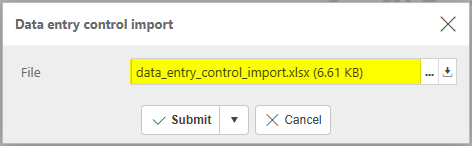
Enter the name of the Excel file to import, which is saved on an external source.
Tip
To create an Import file with the correct field names and formatting, Export a file first and save to your external source. Then use this file to add details ready to import.
Fields to be included will depend on the data entry combination being exported/imported.
It is suggested that the fields are shown in the file in the same order as they are required in the Data entry control. So, if the data entry control is Account > Department, column 'A' would be Account and column 'B' would be Department.
The number of columns will depend on the number of attributes in the data entry control.
Each field can be a multi-select field and so it is suggested that a semi-colon is used to differentiate different values within a field.
The import will follow the same rules as are applied when adding the data entry combinations manually. Each combination of values for attributes must be unique and cannot be repeated.
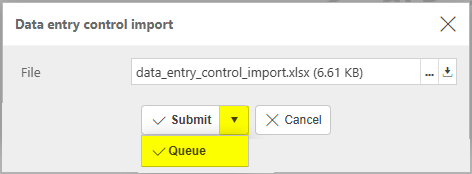
Select Submit.

Selecting Queue from the dropdown option will queue the import process until other actions in iplicit are completed.
Warning
iplicit allows a maximum of 5,000 rows in a single Import.
If your Import is too large, an error message will tell you that the Import cannot be processed and will advise you to create smaller Import files.
If the latter is not possible, please contact Customer support.
Updated February 2026