Logging in
- The system is available for use across any Browser (e.g. Chrome, Edge), our Electron App, Excel add-in and mobile devices.
- The following instructions are common across all platforms, but where any variation occurs, these will be specifically highlighted.
Browser Login
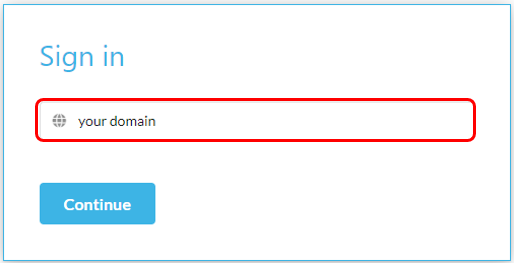
Browser Login
Select https://login.iplicit.com/
Enter your domain followed by Continue.
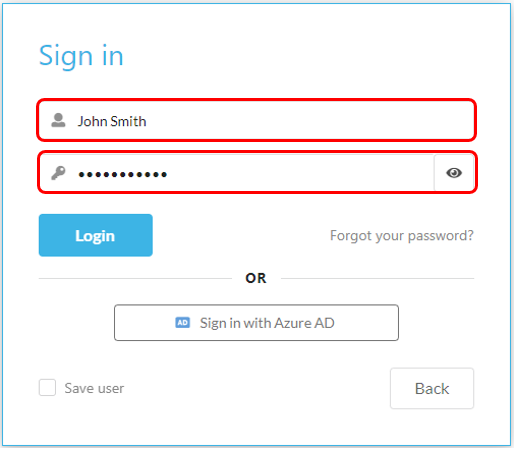
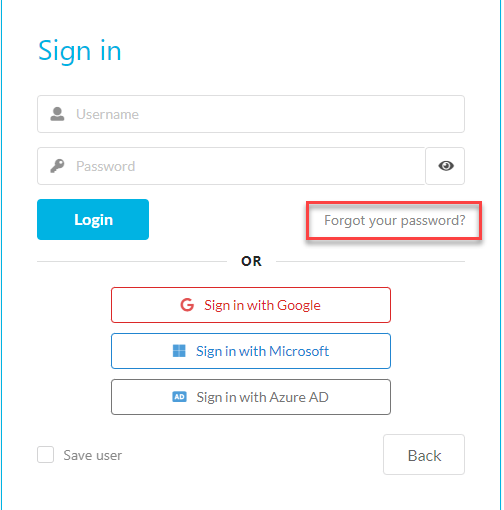
Enter your username and password then press Login.
In this section you can:
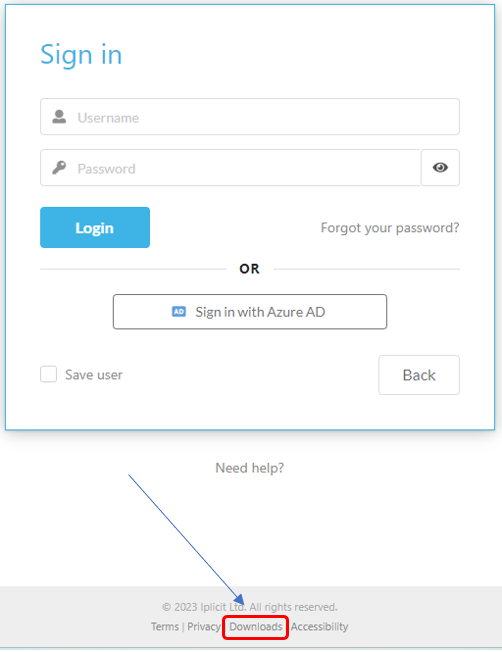
Download the electron app
The system can be downloaded as an electron app.
To do so, press Downloads at the login page.
Select the version you would like to download.
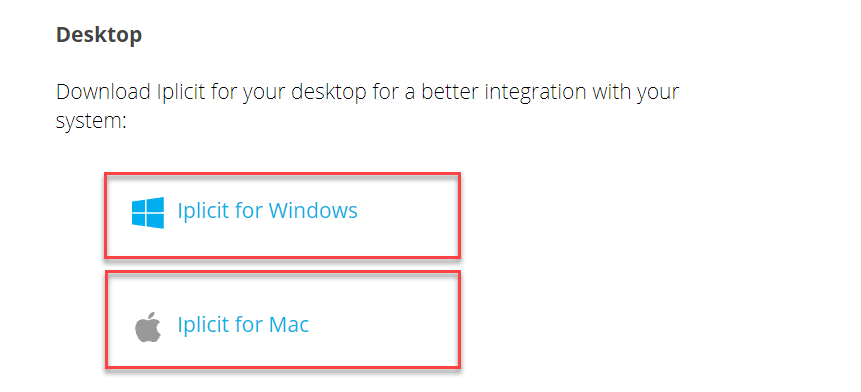
Open the file.
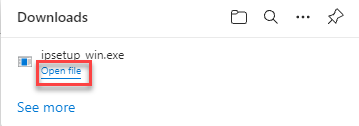
Login.
Unlock your account after too many failed login attempts
If you enter an incorrect username or password, you will have to correct and press Login again.
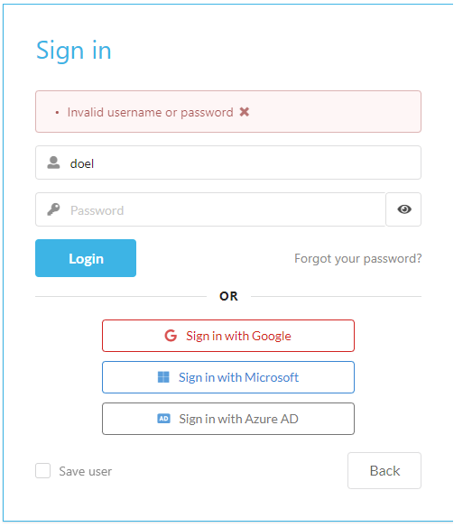
If you enter the wrong password too many times, you will be locked out and will need to contact the User Administrator to reset your password and enable you to login again.
View your password
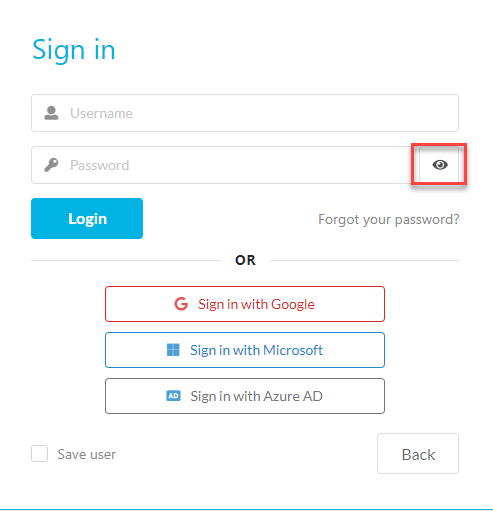
- Press the
 button to view your password.
Tip
Tick Save user which will result in your domain and username being remembered for future logins.
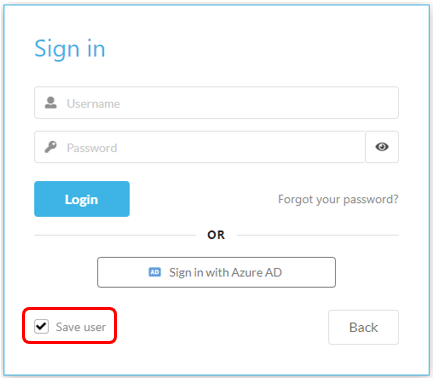
Note
Each browser is considered a different device so you would need to tick (save user) for each separate browser that you use to login.
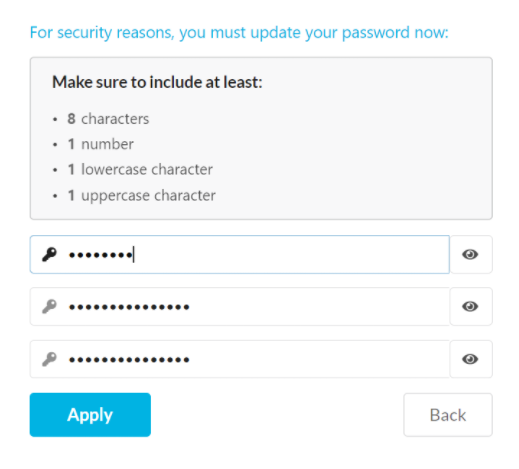
Force a password change
Upon the creation of a new account, the administrator can force a new user to change their password when logging in for the first time. When this action is required, the new user must enter:
Their current password along the top line.
Their chosen new password on the second line.
Confirmation of this new password on the bottom line.
Note
Your domain determines the password policy, e.g., must include 8 characters, 1 number, 1 lowercase character, 1 uppercase character and 1 special character.
Graphical user interface, text, application.
Description automatically generated.
Gain access after forgetting your password.
Below the password box you will find Forgot your password? box.
Upon selecting this link, you will be requested to enter your domain name along with your username.
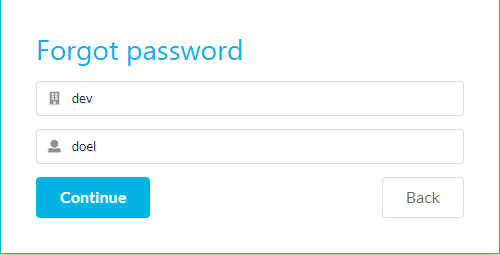
Once you have entered these details and pressed Continue, an email with instructions for resetting your password will be sent to the email linked with your account.
Go to your email and follow the instructions to reset your password.
Now head back to iplicit and enter your new password.
Set login defaults
In Environment defaults you can set MFA and login defaults.
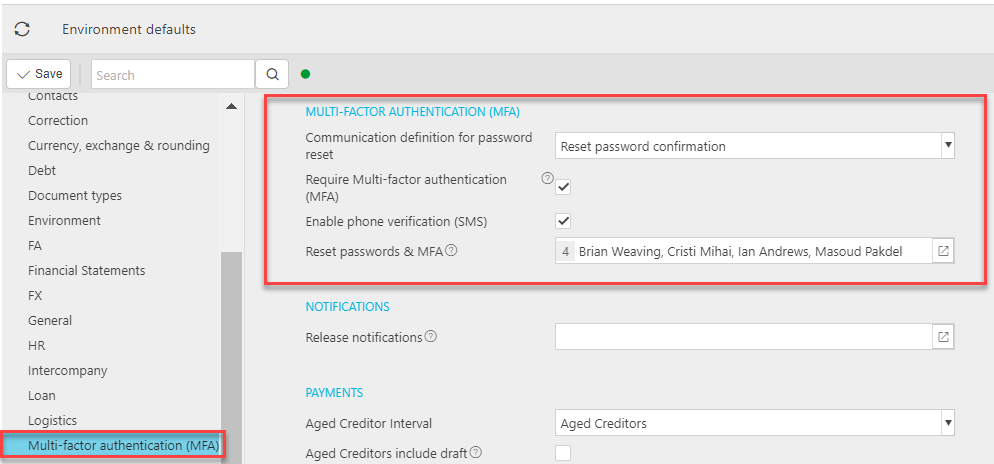
Reset passwords & MFA lists the users that will receive requests to reset multi-factor and password requests.
Multi-factor Authentication
Multi-factor Authentication
To login in, you are required to enter your password.
If your organisation requires additional security, the system offers multi-factor authentication (MFA).
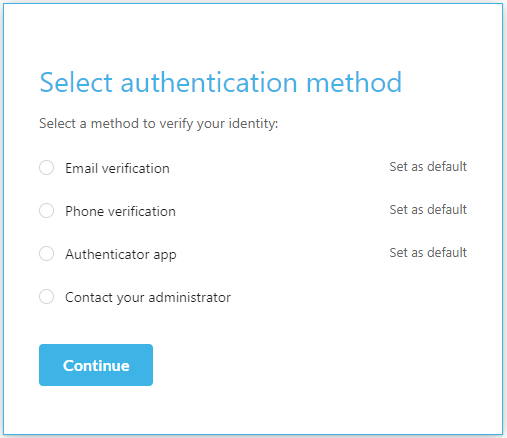
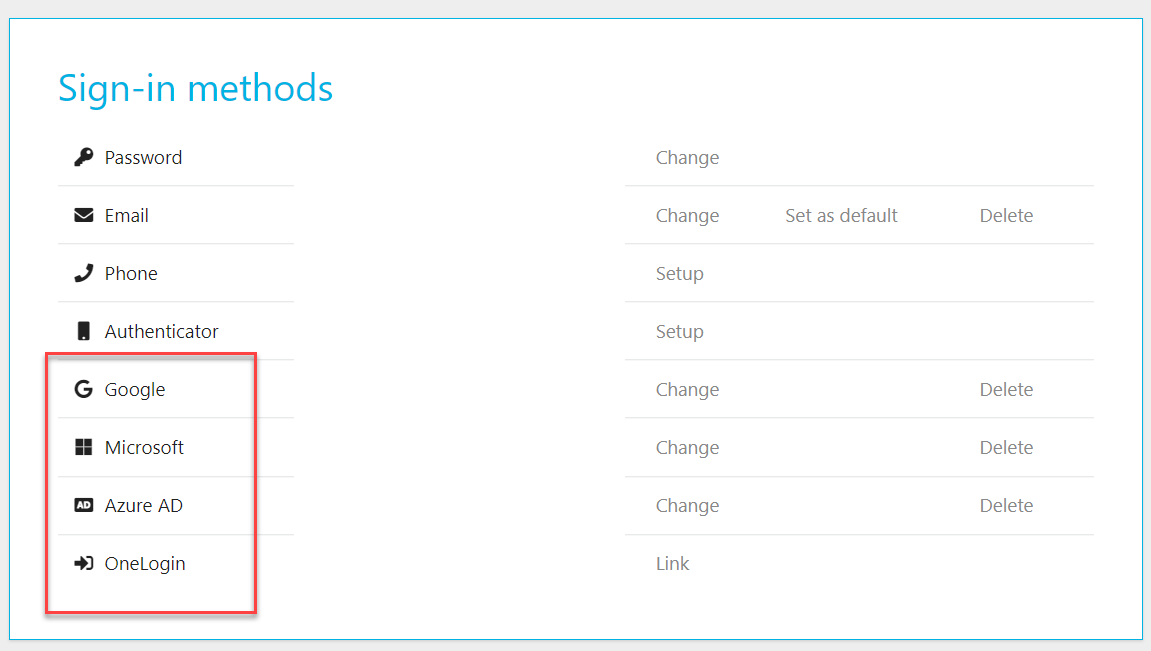
MFA requires users to provide secondary authentication separate from your password. The following options are supported in this process and need to be setup in My Security for them to show as an option -
- Email.
- Phone verification.
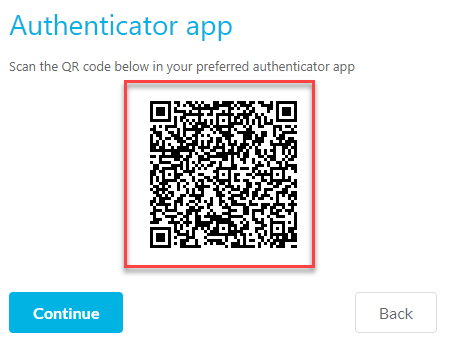
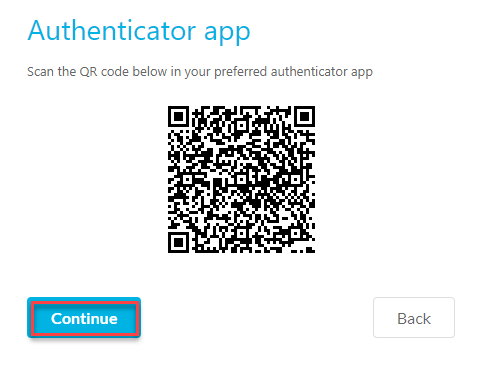
- Authenticator app.
To begin this process, you must first choose your authentication method and press Continue - if a default method has previously been selected, then this option will be selected.
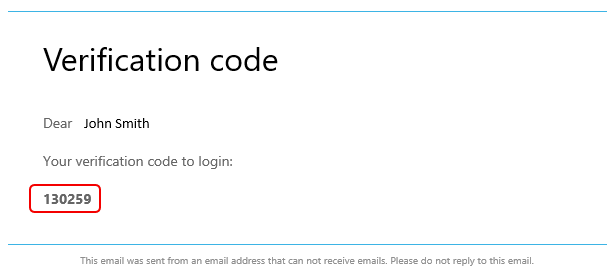
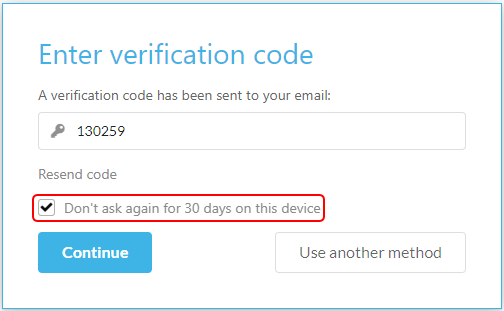
An email will be sent automatically to the email address setup in My Security
Open your emails to find the verification code.
Tip
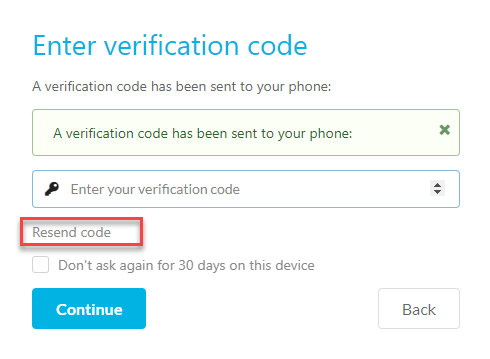
If you have had an issue receiving the verification code press ‘resend code’ to receive another code.
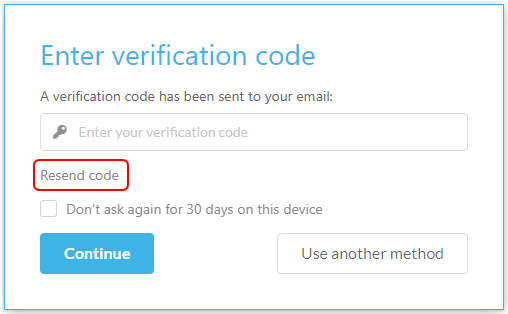
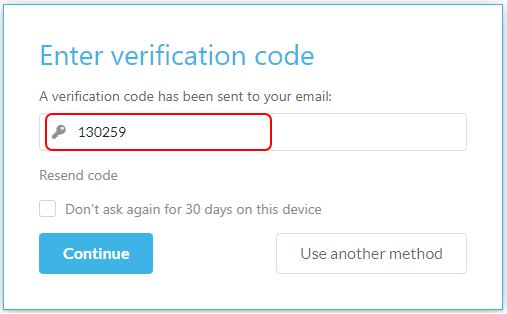
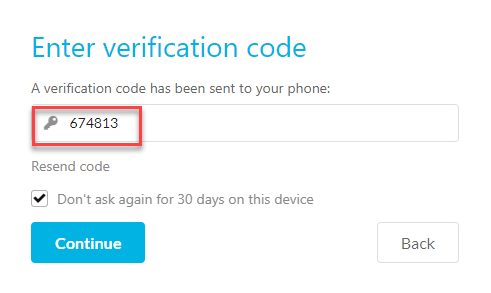
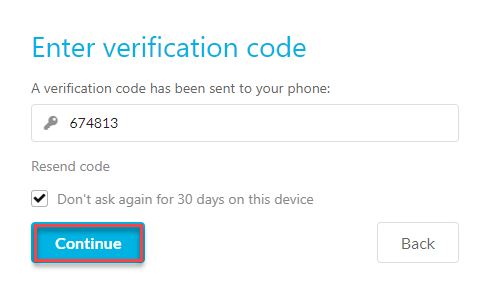
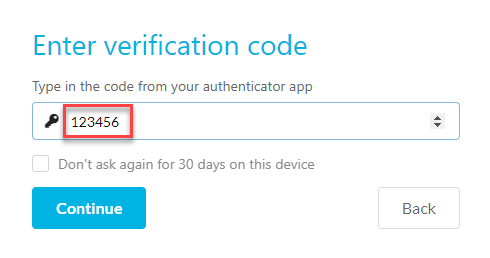
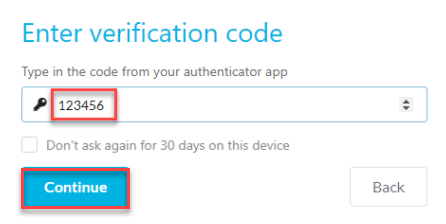
Type or copy the six-digit verification code in and press Continue.
Tip
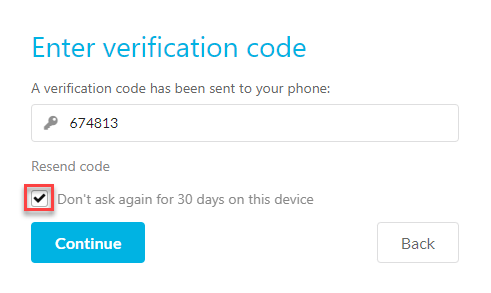
Tick ‘don’t ask again for 30 days’ to remember this MFA login as a Trusted device for 30 days.

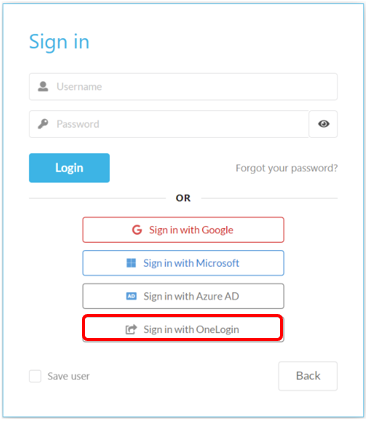
Single Sign On (SSO)
Single Sign On (SSO) & SAML login
The system now supports Single Sign On (aka SSO) and SAML. To use SSO or SAML login, you must first ensure that SSO is properly configured for your SSO provider - see Single sign-on (SSO) section in Environment defaults.
Account security
To use SSO or SAML login you must first link the login method in account security.
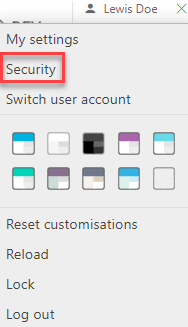
Once you have logged in, in app security options are available to manage your sign in methods, Trusted devices, and sign-in history.
To open Security, select your name in the top right-hand corner.

Click on your account name to activate the drop-down bar. This is where you will find the Security link.
Link your SSO and SAML logins in this section by pressing Link alongside the SSO or SAML option.
Once this is complete you will be able to login using SSO or SAML at the login page.
Updated June 2026