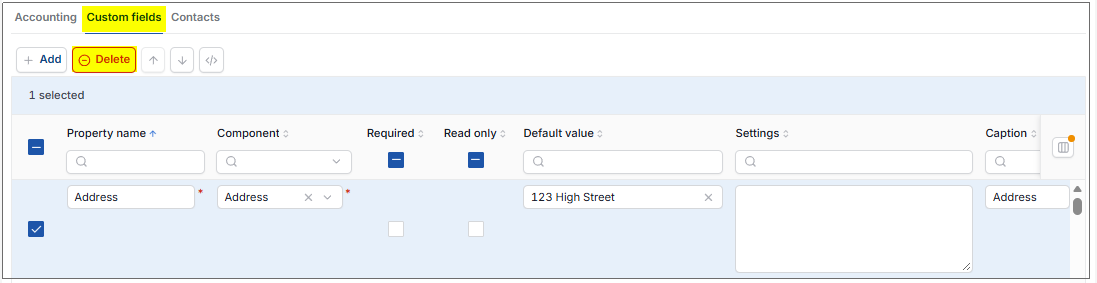
Custom fields
Custom fields is an option within iplicit Groups where Users are able to create their own fields/attributes.
Examples are -
- Contact Groups - Customers, Suppliers, Resources
- Project Groups
- Product Groups
- Document Types
- Asset Groups
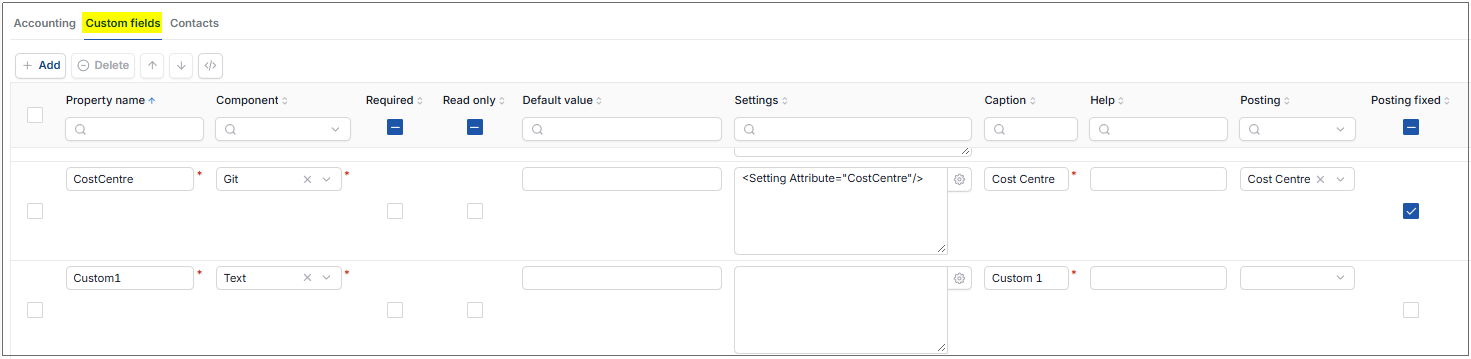
Appropriate name for the Custom Field without spaces.
Any named with a space will prevent the item from being Saved.
The general recommendation for Customers creating their own Custom fields is to prefix the Code with X_ - e.g. X_Region.
This will differentiate Custom fields from all the normal attributes.
This will describe what the Custom Field does. Select the dropdown option to select an option.
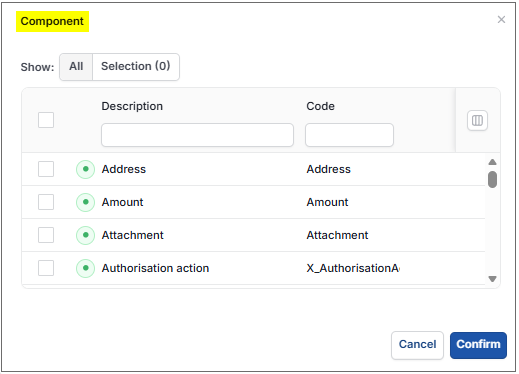
Address: Field is in an address format.
Amount: Field is amount.
Authorisation action: Allows selection of an Authorisation workflow action.
Bit: Check box
Code: Text field (alpha/numeric) but special characters allowed.
Color Picker: Allows to pick a colour.
Date: Field is in a date format.
DateTime: Field is in a date/time format.
Decimal: Allows for decimal amount.
File: Allows to attach files or documents.
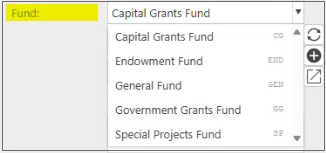
Git: Set the field to enter a single option selected from a dropdown list set in Settings, either as an Attribute list for authored fields or a Catalog list set by the User. e.g. For a Custom Field named Fund -
Hyper Link: Allows to attach a hyperlink.
Image: Allows to attach an image.
Int: Field restricted to number only.
Memo: Allows field to be long text field where text will wrap to next line.
Multi Git: Set the field to enter multiple options selected from a dropdown list set in Settings. Similar to Git.
RichText: Allows formatted text.
Text: Text field (alpha/numeric) with special characters allowed.
Time: Allows a time field.
Required entry on the field if ticked, otherwise field is optional.
If the default value has been set, then if this option is ticked the field cannot be changed.
Default value for the field. If Read only is ticked, then this value cannot be changed.
Settings will only be valid if there is the  icon showing. Most of the time this will be for the Git or Multi Git options.
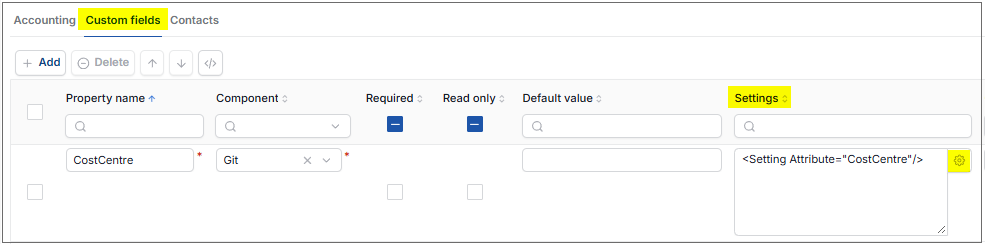
Selecting the icon opens up the following -
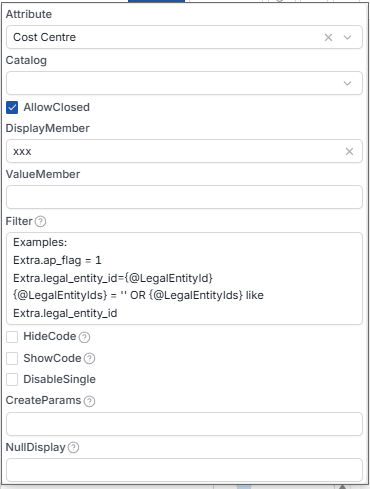
Attribute:
Select the attribute that this custom field will use. Attributes define the type of information that can be stored and may be linked to one or more catalogues containing selectable values. e.g. Funds
Catalog:
Select the Catalog that provides the list of values available for this custom field. A catalogue acts as a predefined list that Users can select from when entering data.
Allowed closed:
Determines whether values that have been marked as Closed* can still be selected within this custom field. Enable this option if users need access to historical or inactive values.
NullDisplay:
Specifies the text displayed when no value has been selected for the custom field. For example, you may wish to display Not specified or No selection.
Advanced Settings
Display Member:
Controls what users see when selecting a value from the catalogue.
Common options include:
This setting affects how values appear on screen but does not affect what is stored in the database.
Value Member:
Controls which value is stored behind the scenes when a selection is made.
Common options include:
This setting is typically only relevant for advanced reporting or enquiry requirements.
Filter:
Restricts the values that are available for selection within the custom field. This can be used to show only specific records from a catalogue, such as particular account types or values related to a specific legal entity.
This is an advanced setting intended for users with a detailed understanding of the underlying data structure.
HideCode:
Removes the value code from the dropdown list, displaying only the description to the user. This can make selection lists easier to read when codes are not required.
ShowCode:
Displays the code alongside the selected value within the field. This can be useful where users need visibility of both the code and description after a selection has been made.
This is the actual field name that will be displayed.
This field cannot be left blank.
Enter any help text required for the Custom field. This will show with the '?' icon next to the field name.
This will be relevant if something like Fund, Cost centre, Department etc has been set in the settings.
Enter a posting field, e.g. Fund.
This custom field value will automatically populate on transaction lines where -
If nothing is set in the posting field, the transaction will not be updated from the value set against the record linked to this group.
Ticking the Posting fixed option, will fix the Posting value. Leaving unticked will allow the value to be overwritten.
How to Duplicate Custom fields to another Group
Select the Group that has the Custom fields to copy.
Select Edit and then select the Custom fields tab.
Select the  icon.
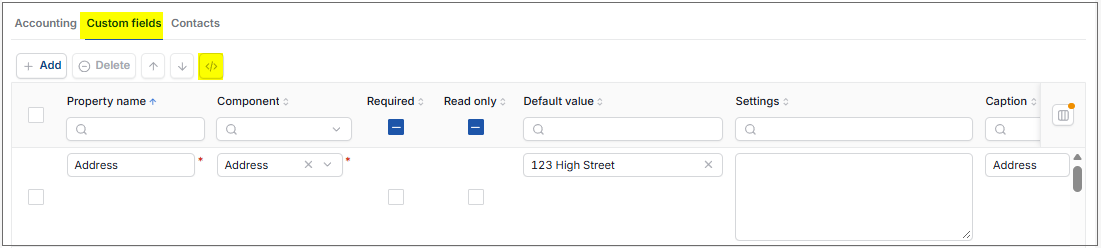
Select and copy all the resulting text.
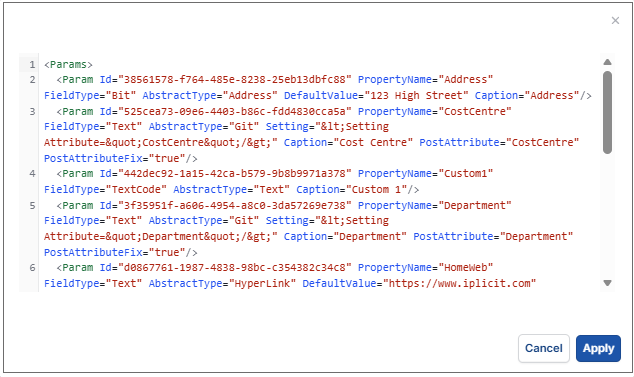
Cancel out of the text.
Select the Group where the Custom fields are to be copied to.
Select Edit and then select the Custom fields tab.
Select the icon.

Paste the copied text - overwriting the 3 lines already showing.
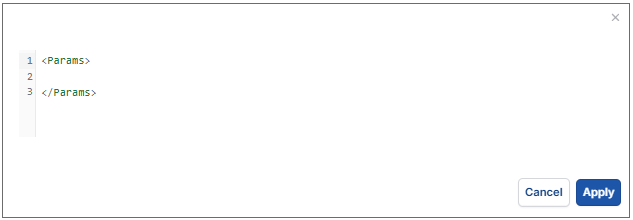
Select Apply.
Custom fields will now be populated with exactly the same as those copied.
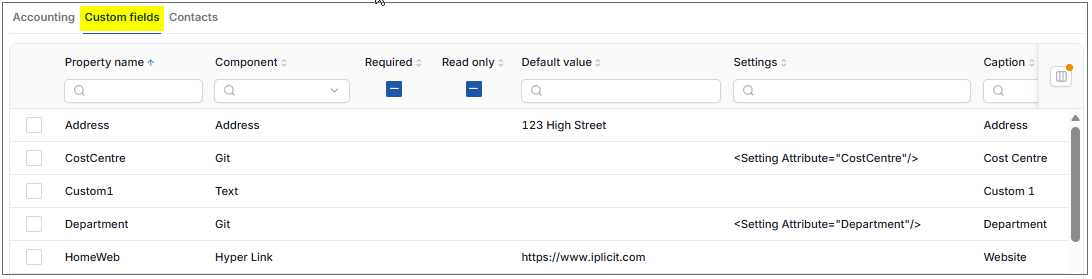
Select Save.
Updated October 2026