Archive Upload: Account Groups
The purpose of Archives is for users to be able to import their old data from previous systems, which then means they don't need to keep their previous systems turned on.
View Archive Account Groups menu
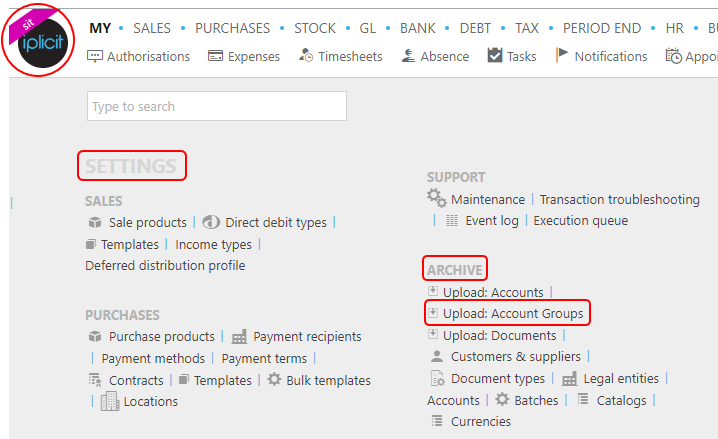
In iplicit, go to the Archive Upload: Account Groups menu by either selecting Upload: Account Groups from Archive in the Settings section from the pulse menu -
Note
This is an example screen shot of the pulse menu.
Position of the menu items within pulse will vary according to available options and dependant on personal screen resolution.
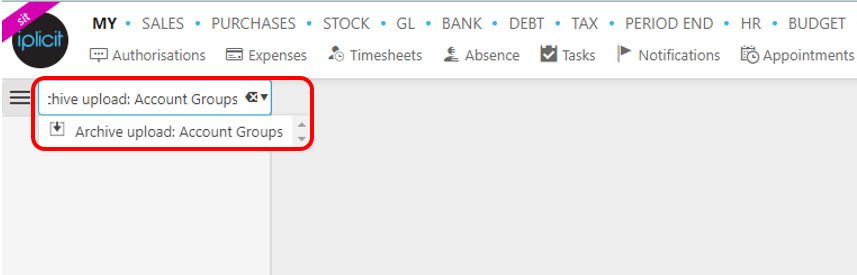
or enter Archive Upload: Account Groups in the Quick Launch Side Menu.
This will display Archive Account Groups.
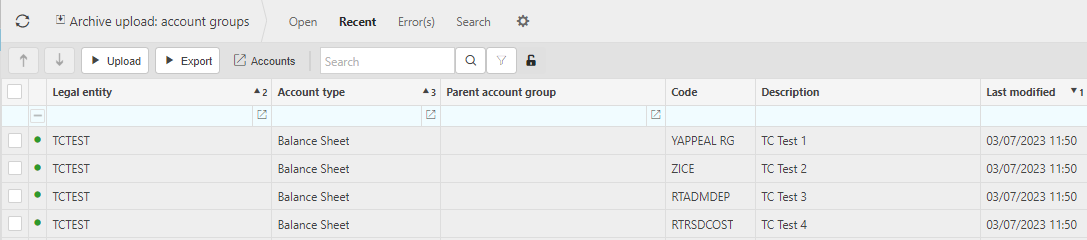
Information shown is self-explanatory.
Tip
To modify the columns displayed, select
 in the top right of the page, then untick the information you do not want to see.
Upload Archive Account Groups
Before running the iplicit process to upload your previous data, you have the responsibility to get your data in the correct format. At the moment, the Archive Upload: Account Groups process takes the archive data using a spreadsheet format.
The spreadsheet should have the following column headings (in row 1, in same order) -
account_type
account_type_description
code
description
legal_entity
legal_entity_description
order_index
parent_code
parent_code_description

Save the spreadsheet to an area that will be accessible to your iplicit system.
Tip
You can create a dummy spreadsheet with the correct column formats by running the Export Archive Account Groups below - this will even work if there is no data. Delete any data in the new spreadsheet, if there is any. Just leave row 1, which has the column names, and then you have a blank spreadsheet ready for you to add your data.
Select Upload Archive Account Groups menu from one of the options as shown in View Archive Account Groups menu above.
Select the Upload button.

In the pop-up box, select the spreadsheet that was created in step 1 from where it was saved on your system.
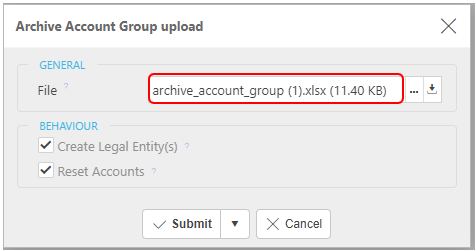
Behaviour Tab -
Create Legal Entity(s) - ticking this checkbox will automatically create Archive Legal Entities which exist in the upload but do not already exist in the Archive Legal Entities.
Reset Accounts - ticking this box with delete prior Archive Accounts and Archive Groups as part of the Archive Accounts re-population.
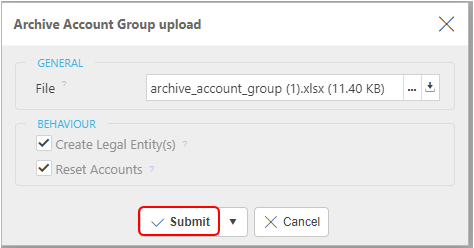
Select Submit.
Alternatively, by selecting the
 button, you can Queue the upload. This still Submits the upload but closes the overlay and there's no spinners, so you can carry on using the system whilst it uploads.
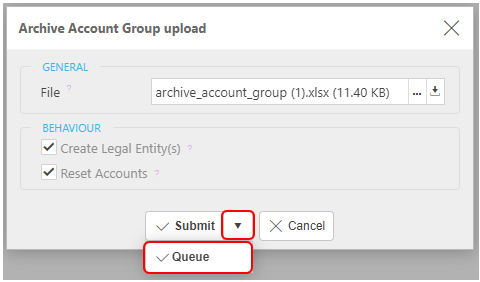
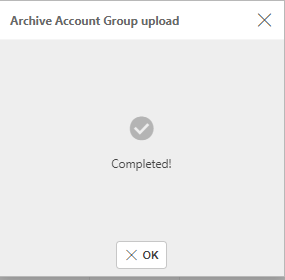
Once completed a message appears, select OK button.
Export Archive Account Groups
Select Archive Upload: Account Groups menu from one of the options as shown in View Archive Accounts menu above.
Select the Export button.

Select Legal Entity(s).
Include closed - ticking the checkbox will include locked/closed Accounts.
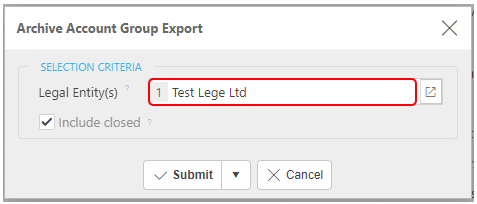
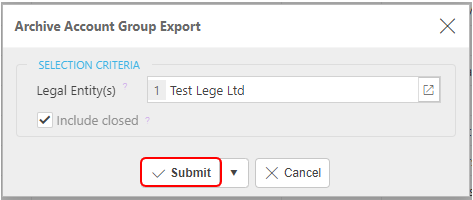
Select Submit.
Alternatively, by selecting the
button, you can Queue the export. This still Submits the export but closes the overlay and there's no spinners, so you can carry on using the system whilst it exports.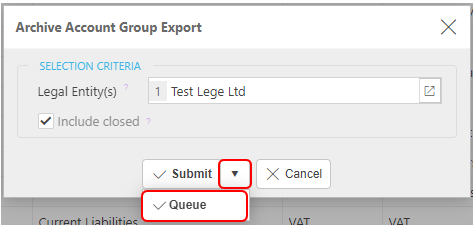
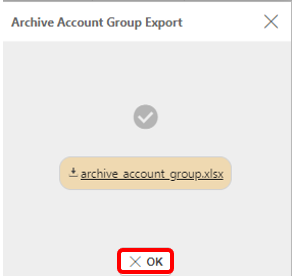
After the process has completed the following message appears.
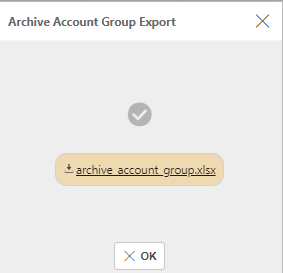
Select the archive account.xlsx to download the excel spreadsheet.
Select OK to continue.